What Equipment Do I Need for a Podcast?
In 2026, you can start a podcast with just three essentials: a decent mic, wired headphones, and a laptop with recording/editing software. Use AI tools to speed up cleanup and edits, then upgrade to multi-guest, video, and studio-level gear as the show grows.
Updated by Jack Freegard, Managing Director at TYX – 17 December 2025
At TYX Podaast Studios in London we design, record, and mix podcasts for brands, creators, and artists every week, so this guide distils the same practical equipment choices and workflows our engineers use in the studio every day.
What do we mean by podcast equipment?
In this guide podcast equipment means everything that helps you capture, shape, and publish a podcast episode: microphones, stands, headphones, interfaces, digital recorders, acoustic panels, recording software, editing software, and cameras if you plan to do video podcasting.
For most beginners, essential podcast gear includes:
- A beginner friendly USB microphone
- Closed back, wired headphones
- Free recording and editing software that acts as your digital audio workstation DAW
From there you can add XLR microphones, audio interfaces, acoustic treatments, and cameras as the show grows. Many successful podcasts started with a single mic in a bedroom and upgraded only when listeners arrived, so you don’t need perfect podcast equipment on day one.
A good recording environment matters as much as the hardware. A quiet recording space and consistent mic technique often improve audio quality more than one more expensive purchase.
TYX is a purpose-built London podcast studio where we record audio and video podcasts every week for brands, agencies, and independent creators. The recommendations below are based on what works in real productions, not just spec sheets' . Weekly audio ad video podcasts.
Essential beginner podcast setup
If you want to start your own podcast quickly and sensibly, you can build a lean recording setup that still produces high-quality audio.
Starter checklist: minimum viable kit
A simple beginner podcast setup can be:
The Samson Q2U is popular because it works as both a USB and an XLR mic, so you can plug straight into a laptop now and into an interface later, and it’s widely recommended as a flexible starter microphone. USB mics are ideal for beginners because most are plug and play and sound far better than built in laptop mics.
Closed back headphones stop playback bleeding into the mic and help you hear issues in real time. Affordable over ear headphones such as the Audio Technica ATH range are more than enough to get started.
Can you start a podcast with just a phone
You can start a podcast with only a smartphone and a decent recording environment. Your phone becomes the recording device and saves audio files you can edit later.
To lift the quality:
- Add a small lavalier mic or other external microphone so you’re not relying on the phone microphone
- Wear wired headphones while you record so you can hear background noise and clipping
- Choose a small room with soft furnishings and keep the phone close to your mouth
With a bit of care you can get clear audio and crisp sound from this kind of setup, then move to a more traditional rig when you’re ready.
How AI supports your podcast workflow
AI doesn’t replace podcast equipment, but it can remove a lot of friction from the process.
Before you record
Use AI tools to brainstorm episode ideas, refine titles, outline segments, and draft interview questions. That makes it easier to sit down and record consistently with a clear plan.
During podcast recording
Modern recording platforms and plugins use AI for echo cancellation, automatic gain control, and real time noise reduction. Many DAWs and call recorders now include “smart” processing that keeps levels steady and reduces distractions while you focus on the conversation.
After the session
AI powered apps can:
- Remove filler words and long pauses
- Auto level voices between speakers
- Apply gentle noise reduction and light sound effects
- Generate clips, captions, and social ready snippets from your podcast episode
Examples include tools like Descript for text based editing, Adobe Podcast Enhance or similar AI enhancers for cleaning dialogue, and AI features inside editors such as Adobe Audition or DaVinci Resolve for fast cleanup and repurposing.
Think of AI as a multiplier. It works best on clean recordings captured with good microphones, headphones, and a sensible recording space, not as a fix for rooms full of background noise or distorted tracks.
Microphones for podcasting
Your microphone’s still the heart of your signal chain.
Dynamic versus condenser
- A dynamic mic is less sensitive and rejects background noise and ambient noise more effectively. It’s usually the safest choice for spare rooms, offices, and other untreated spaces.
- A condenser mic captures more detail and a brighter tone, but it hears more of the room, so it works best in a treated recording environment.
If you’re unsure, a dynamic mic is almost always the right starting point.
For more insight, read our detailed guide to the difference between dynamic and condenser mics.
USB mics
A USB mic connects directly to your computer with a single cable. It’s ideal when you want to start a podcast without learning lots of hardware.
Benefits:
- No separate interface required
- Great for solo podcast recording and remote calls
- Easy to travel with
The Samson Q2U is widely recommended because it has both USB and XLR outputs and works as a flexible bridge between simple and more advanced setups. The Shure MV7 is another popular USB microphone that sounds close to classic broadcast dynamics while staying simple to use. Most usb mics now ship with software that lets you tweak tone and basic processing.
XLR microphones
XLR microphones use a three-pin connection and plug into an interface, mixer, or digital recorder.
Reasons to choose an XLR microphone:
- More consistent tone and depth with a good preamp
- Easy to run multiple microphones and guests
- Flexible if you change or expand your recording setup later
As soon as you add a co-host or start recording in a dedicated podcast studio, XLR mics become the natural choice.
Interfaces, recorders, and mixers
Once you move beyond a single USB mic, you need a way to accept XLR mics and send the signal into your computer.
Audio interfaces
An interface sits between your microphones and your computer. It provides:
- One or more mic inputs and other audio inputs
- Clean gain so you can capture high quality audio
- Headphone outputs for monitoring
- Conversion from analog sound waves into digital audio files
There are many compact audio interfaces aimed squarely at podcasters and home studios, and they’re now standard in podcast workflows. Once one’s on your desk you can switch microphones and other kit without changing the rest of your recording setup.
Digital recorders
A digital recorder is a small box that captures multiple audio sources directly to an SD card and often doubles as an interface.
They’re useful when you:
- Record on location or at events
- Want a hardware backup in case the computer fails
- Need a simple way to capture more than one voice without a full mixer
A good digital recorder plus XLR mics and wired headphones is still one of the most robust recording setups available.
Audio mixers
For more complex podcasts, a small mixer adds physical control.
With a mixer you can:
- Balance several XLR microphones in real time
- Add live sound effects or music stings
- Route different feeds to guests and recording devices
You don’t need a mixer to make a high quality podcast, but it’s useful for live style formats and multi guest shows.
Monitoring and essential accessories
Accessories often make the difference between something that’s technically recorded and something listeners describe as studio quality sound.
Headphones and monitoring
Closed back headphones are ideal for podcast recording because they keep sound inside the cups instead of leaking back into the mic. Wired headphones avoid latency and connection issues that sometimes come with wireless options.
Popular models include long standing studio favourites such as Sony MDR 7506 and Sennheiser HD 280 Pro, along with more affordable options like Audio Technica’s ATH series.
Monitoring live lets you hear background noise, mic bumps, and subtle popping sounds so you can correct them before you move on.
Mic support and positioning
A stable mic stand or microphone stand keeps the mic where you need it. Many podcasters upgrade to a desk mounted boom arm that lets them move the mic easily while keeping hands free.
Basic placement rules:
- Position the capsule roughly a hand’s width from your mouth
- Angle it slightly off axis to reduce plosives
- Make sure a boom arm doesn’t block your face if you do a video podcast
These small choices dramatically improve audio quality and make editing easier.
Pop filters and cables
A pop filter sits between your mouth and the mic. It softens bursts of air from consonants like P and B so they don’t produce loud popping sounds. Pop filters and foam windshields are inexpensive and should be on every mic in your recording setup.
Good cables matter too. A decent USB cable or XLR lead reduces interference and dropouts. When you expand, a small stash of reliable cables is just as important as any single microphone.
Your recording space and acoustic treatment
Even the best podcast equipment struggles in a bad room. A good recording environment focuses the mic on your voice, not the reflections around you.
Choosing a recording space
A small, quiet room with carpets, curtains, and furniture usually beats a large open space.
Quick guidelines:
- Avoid bare walls and big windows where possible
- Turn off fans, noisy computers, and other constant sound sources
- Sit close to the mic so you don’t have to run high gain
This alone can seriously improve sound quality and make you sound more like a high quality podcast than a voice memo.
Acoustic panels and other treatments

Simple acoustic treatment helps stop sound bouncing around your recording space.
You can use:
- A few acoustic panels on the walls behind and beside you
- Heavy curtains, duvets, or blankets over reflective surfaces
- Rugs on hard floors under the table
These acoustic treatments reduce unwanted background noise and room echo, which means you rely less on aggressive noise reduction plugins later.
Testing before each recording session
Before a real recording session, always capture a short test and listen on headphones.
You’re listening for:
- Hums or hiss in the background
- Obvious echo or ringing
- Imbalance between speakers
Make small adjustments and test again. A few minutes here often improves the end result more than new hardware.
Recording software, editing tools, and hosting
Once your hardware’s sorted, you need tools for recording audio, editing, and publishing.
DAWs and recording software options
Your main recording software is usually a DAW. It handles podcast recording and editing in one place.
Popular options:
- Audacity: free, open source, and capable of basic recording and editing on Windows and Mac
- GarageBand: pre installed on Apple devices and very friendly for beginners
- Adobe Audition: more advanced, with multitrack tools and strong noise reduction for detailed work
- Hindenburg PRO: a spoken word focused editor with automatic leveling and publishing tools that evolved from the earlier Hindenburg Journalist product and remains widely used in podcast production
Inside your DAW you can cut mistakes, move sections, add subtle sound effects, and polish audio quality before export.
All in one and remote tools
Browser-based platforms such as Riverside are popular for remote recordings.
They offer:
- Local high quality audio recording for each guest
- Parallel video recording for video podcasts
- Straightforward tools for basic podcast recording and editing
Riverside in particular focuses on recording separate local tracks in high quality for each participant, then uploading them for you to download as separate files. These tools work well alongside a DAW: you record through the browser, then refine and finish in your workstation.
Hosting and RSS feeds
When your episode’s ready, you upload the final audio files to a podcast host.
Hosts:
- -in-Store your audio files--
- Generate an RSS feed so apps can subscribe
- Provide analytics and sometimes monetisation tools
Buzzsprout’s known for a clean interface, analytics, and simple submission to major platforms. Libsyn’s a long running, reliable option. Podbean offers an all in one package with hosting, distribution, and monetisation. Roundups from 2025 hosting reviews consistently place Buzzsprout, Podbean, Libsyn, Captivate, and Transistor among the most recommended platforms.
.png)
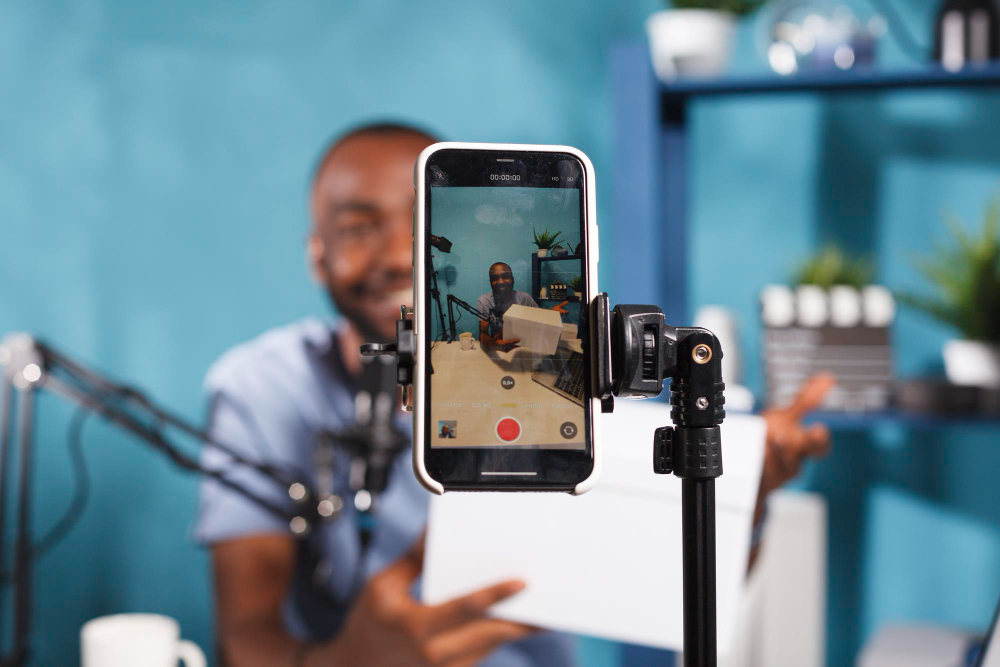
Video podcasts and cameras
Video podcasts are now a standard format for many shows.
Starter video podcast kit
You don’t need cinema gear to appear on screen.
A simple starter kit might be:
- One phone or compact video camera on a tripod
- Your existing microphones and interface
- Two soft lights pointed at faces
- A tidy background that fits your brand
Focus on sound first. Listeners will tolerate slightly lower video quality far more happily than thin, echo heavy audio.
Growing into multi camera setups
As you grow, you can add:
- Extra video cameras for alternative angles
- Better lighting and a styled set
- A crew member or audio engineer to watch levels and framing
This is the stage where a professional podcast studio with built in video podcast infrastructure can save a lot of time and risk. AI tools can then create short clips from each video podcast ready for social feeds.
Podcast equipment by budget
Starter kit: under £200
Ideal for a first solo podcast:
Serious hobbyist kit: roughly £400 to £800
For creators who know they’ll stick with it:
Studio level kit: £1,000 plus or use a studio
For brands, agencies, or networks:
At this level many teams either build a dedicated podcast studio or simply book a space like TYX rather than owning everything.
Example podcast setups by scenario
Here’s how those ingredients come together in practice.
Each of these podcast setups uses different podcasting gear, but all of them rely on the same principles: sensible mic choice, thoughtful acoustic treatment, and reliable tools for recording and editing.
How to set up your podcast gear
Before each real recording session:
- Position the mic about a hand’s width from your mouth and slightly off axis
- Set levels so your loudest phrases don’t clip but sit well above the noise floor
- Wear wired headphones and check for room echo or unwanted background noise
- Record a short test and listen back inside your DAW
- Save your project and back up important audio files after every session
These habits quietly improve every podcast episode you produce.
That's a wrap
The best podcast equipment for 2026 is the gear that lets you record consistently, capture high quality audio, and grow your format over time. Start with a simple USB mic, headphones, and a DAW, then add interfaces, XLR mics, acoustic panels, and cameras only when they solve concrete problems.
AI tools, all in one platforms, and modern editing software can streamline podcast recording and editing workflows. They work best when you give them clean, well recorded tracks from a good room and a sensible recording setup.
TYX Podcasting Studio London
Don't want to invest in all that gear yourself? TYX Studios at Tileyard London runs three fully equipped podcast studios with isolated recording spaces, control rooms, 4K cameras, and professional microphones as standard. From Netflix-approved Sony FX2 rigs in Studio 1 to the flexibility of our new Studio 1 with its ceiling-rigged lighting and multiple backdrop options, the equipment is already there.
We also offer end-to-end podcast production covering recording, editing, mastering, and finished assets. You bring the idea, we bring everything else.
Frequently Asked Questions
To create a podcast you need a core set of podcast equipment: a microphone, wired headphones, and recording software that can capture and edit your voice. Most beginners start with a USB mic, closed back headphones, and a free DAW, then add an interface, acoustic treatment, and extra accessories as the show grows.
A beginner should start a podcast by choosing a simple format, planning a small batch of episodes, and setting up a basic recording environment at home.
Use a USB microphone, wired headphones, and a quiet room, record a short test and listen for room echo and background noise, then adjust your space.
Once you’re happy with the sound, record your first full podcast episode, edit it in your DAW, and upload it through a hosting platform.
It’s free to put a podcast on Spotify. You can either use a third party host such as Buzzsprout, Libsyn, or Podbean and submit your RSS feed, or you can host directly on Spotify for Creators, which offers free hosting and distribution to Spotify and other apps.
The basic equipment needed to start a podcast is simple: one mic, one pair of wired headphones, and a computer that can run recording and editing software. A typical starter kit would be a Samson Q2U or similar USB mic, closed back headphones, a light boom arm with a pop filter, free software such as Audacity or GarageBand, and a quiet recording space.
Yes, you can podcast with just your phone, especially if you add a small lavalier mic and record in a quiet room. Mount the phone so it doesn’t move, monitor with wired headphones, and keep it close to your mouth. Many creators record their first few episodes this way before investing in more specialised podcast equipment.
Yes, like most recording studios, we allow you to bring your own equipment if you prefer.
However, it is important to inform our bookings team in advance about the specific equipment you plan to bring to ensure compatibility with our setup and to avoid any technical issues during recording.
TYX can handle the heavy lifting so you can focus on the content. We help you plan your show, record in pro studios, then take care of editing, mixing, and sound design. On top of that, we can film video podcasts, create social clips, and support distribution so each episode looks and sounds on-brand and is ready to promote across all your channels.
We offer multiple packages:
Studio 1: £1250 for session (half day minimum)
£250 per extra hour
Studio 2: £500 for session (3 hr minimum)
£170 per extra hour
Studio 3: £300 for session (3 hr minimum)
£100 per extra hour
Studio engineer included, minimum rental periods apply, +£200 for custom set.
TYX Members get up to 20% off all bookings. Reach out to learn more or to book your session.
How to Start a Podcast in 2026: Full Step-by-Step Guide
Learn how to create a podcast in 2026 with a practical, step-by-step system for planning, recording, hosting, editing, and launching across audio and video.