Best Podcast Mics by Budget
This guide ranks the best podcast mics by budget, with no-nonsense pros and cons. Discover when to choose USB or XLR, dynamic or condenser, and the few accessories that actually help.

Reviewed by Jack Freegard, Managing Director at TYX – Updated 16 December 2025
A podcast lives or dies on clarity, consistency, and ease. The best podcast microphone for you delivers focus, keeps background noise low, and fits your workflow so you publish on time.
At TYX Podcasting Studios, we test podcasting microphones every week for a variety of use cases. This guide reorients the topic into a true buyer’s map. Discover tiered lists by price, quick pros and cons, and precise setup advice that gives better audio quality without guesswork.
We cover USB microphones, XLR microphones, dynamic and condenser options, and accessories that matter more than most upgrades.
How we tested and ranked these podcast mics
We compared each mic on real recordings, looking at clarity, background noise rejection, consistency across different voices and rooms, and how easy it is to set up and get reliable results. We do not use affiliate links, paid placements, or brand partnerships.
Price tiers at a glance
Street prices shift, so think in bands, not pennies. The tiers below help you shortlist the best podcast microphone for your budget without drowning in specs. Verify current street prices for your date and region before you buy.
Under 100 dollars: Basic USB microphones and a few rugged XLR mics.
100 to 199 dollars: Popular USB mics and first broadcast-leaning dynamics.
200 to 499 dollars: Hybrid XLR and USB, refined dynamics, and quiet condensers.
500 to 999 dollars: Pro broadcast mainstays that define tone.
1000 dollars and above: Flagship studio capsules for premium rooms and brands.
Under 100 dollars
Affordable, reliable, and fast to set up. These picks give a clean start if you learn placement and control the space.
FIFINE K669B
A compact USB mic that gets you live quickly. Keep gain low, sit close, and use a pop filter to avoid blasts. It is bright, so angle slightly off-axis for a smoother mic sound.
- Pros: Simple USB connection, quick to power up and record straight. Small body fits tight desks and travel kits with a light desktop stand.
- Cons: Sensitive to ambient noise and keyboards. Handling noise without a shock mount. Fewer controls than mid-tier USB mics.
Behringer XM8500
An XLR mic that punches above its price. It prefers close speech and a firm hand on technique. Pair with an audio interface for control and monitoring.
- Pros: Dynamic capsule rejects background noise in busy flats. Takes EQ well for better audio quality with minimal effort.
- Cons: Needs an interface and a decent XLR cable. Lower output than condensers, so watch gain staging. Basic clip. Upgrade to a heavier desktop stand for stability.
Samson Q2U
A flexible starter with both XLR and USB on the body. That means one mic for laptop days and studio sessions. Keep a pop shield ready.
- Pros: Dual outputs cover both XLR and laptop workflows. The headphone jack gives zero-latency monitoring.
- Cons: The stock arm and own stand are light. Replace with a solid desktop stand. Plosives at close range without a pop filter. Tone shifts with distance. Coach guests to hold position.
Tonor TC30

An ultra-budget USB mic that can work for voice if you keep it close and quiet. Best for entry-level intros and remote calls.
- Pros: Plug in, select input, and record straight with minimal friction. Small footprint makes it easy to place between keyboard and screen.
- Cons: Picks up more background noise than dynamic mics. Needs a pop shield for clean consonants. Limited headroom and control compared to mid-tier USB mics.
100 to 199 dollars
This tier contains the most common starter gear, including an icon that many creators begin with.
Blue Yeti
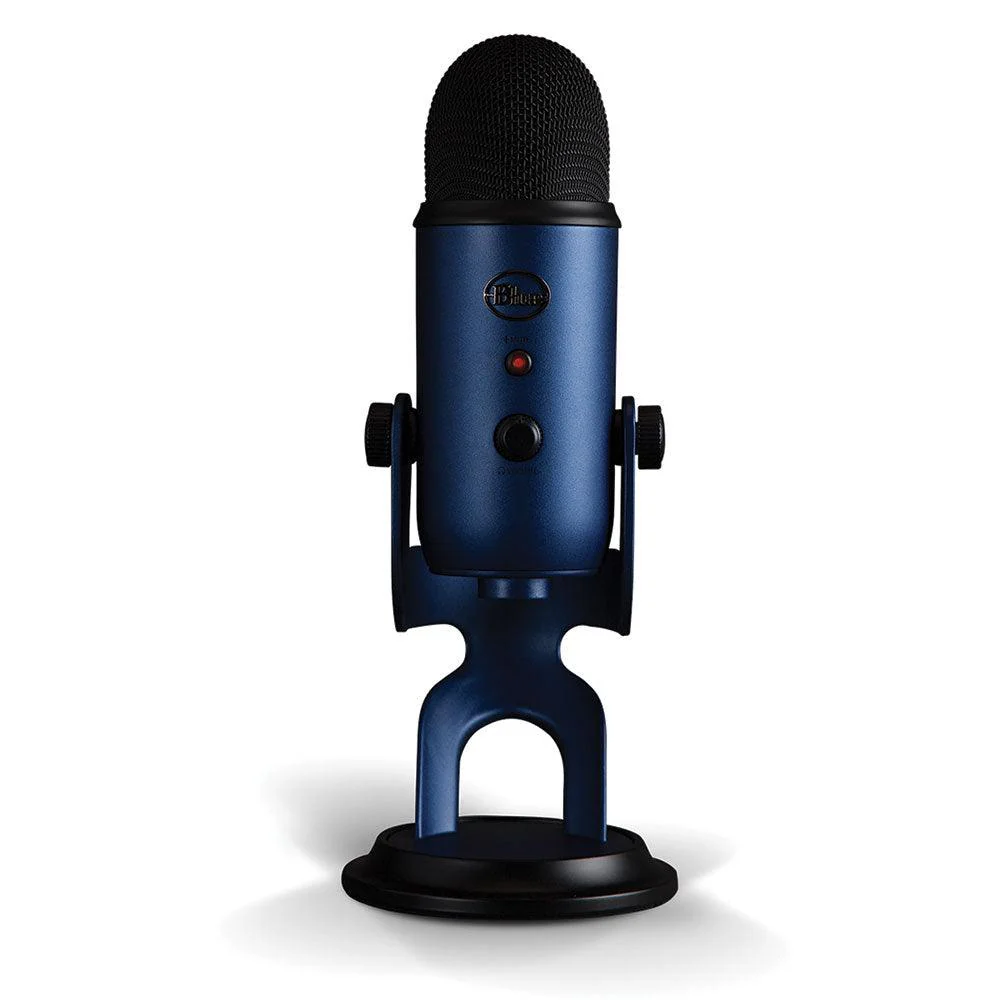
Blue Yeti is visible everywhere for a reason. It offers multiple patterns for solo and side-by-side chats. For most podcasts, set cardioid, keep gain low, and talk across the grille. Used close, Blue Yeti sounds great and can carry a show for years.
- Pros: Multiple patterns for varied setups, including interviews. Ships with a desktop stand, so you can start fast at any desk.
- Cons: Hears more ambient noise the further you sit back. Needs a pop filter and pop shield for plosives. Rumbles without isolation, so consider a shock mount or heavier desktop stand.
Blue Yeti placement tip: Put the Blue Yeti at mouth height, point the logo toward you, drop the gain, and keep a palm’s width distance. Blue Yeti benefits from soft furnishings and small room tweaks for improved room acoustics.
Shure SM58
A stage workhorse that doubles as a podcast mic in lively rooms. Close placement gives a rich sound that survives rough environments.
- Pros: The dynamic capsule effectively reduces background noise and spill. Rugged build that shrugs off daily use.
- Cons: Some interfaces require a stronger preamp. Requires an XLR cable, a stand, and time to dial the distance. Less air than a condenser mic on whispery reads.
Rode Pod Mic

A broadcast-voiced dynamic microphone that likes close talk. Aim slightly off-axis and add a pop filter for hard plosives.
Pros: Tight pickup means less ambient noise around keyboards and screens. Heavy body reduces handling noise on a boom.
Cons: Needs a clean gain from your audio interface. Darker for some voices until you add a small EQ lift. A fixed mount can transfer knocks without a shock mount.
Audio Technica AT2020
A clean condenser microphone that shines in quieter rooms. If your space is treated, this is a solid step into detail.
- Pros: Crisp top end that flatters vocal recordings and ads. Affordable path to condenser detail without fuss.
- Cons: Sensitive to room tone and reflections. Needs phantom power and careful placement. Demands a pop shield and pop filter for confident close work.
200 to 499 dollars
Here you meet hybrid designs, refined dynamics, and quiet condensers suited to narrative or ad-heavy shows.
Shure MV7

Shure MV7 is the flexible hybrid that many podcasters choose. It offers XLR and USB on the same body, so you can travel light or plug into a rig. The voicing leans broadcast, which helps in normal rooms. Shure MV7 is a flexible one-mic solution for creators who move between spaces.
- Pros: Hybrid path covers XLR and USB without adapters. Confident presence that sounds great on a wide range of voices.
- Cons: Pricier than basic USB mics. Needs consistent distance to avoid low mid build-up. Touch controls can be nudged if you fidget.
Shure MV7 workflow: At home, run USB with a usb c connection and a short usb c cable. In the studio, use the XLR connection into a USB audio interface for better metering. Keep a pop filter on the front and angle off-axis.
Audio Technica ATR2100x-USB
Audio Technica gets flexibility right with this travel-friendly unit. You get a USB on one end and a proper XLR on the other. The tone is honest and easy to shape in the mix.
- Pros: Hybrid outputs make it ideal for switching rigs. Headphone port for direct monitoring and setup speed.
- Cons: Light build needs a sturdy desktop stand. Plosive control requires a pop shield. Output is modest on soft voices, so check the interface gain.
Rode NT1
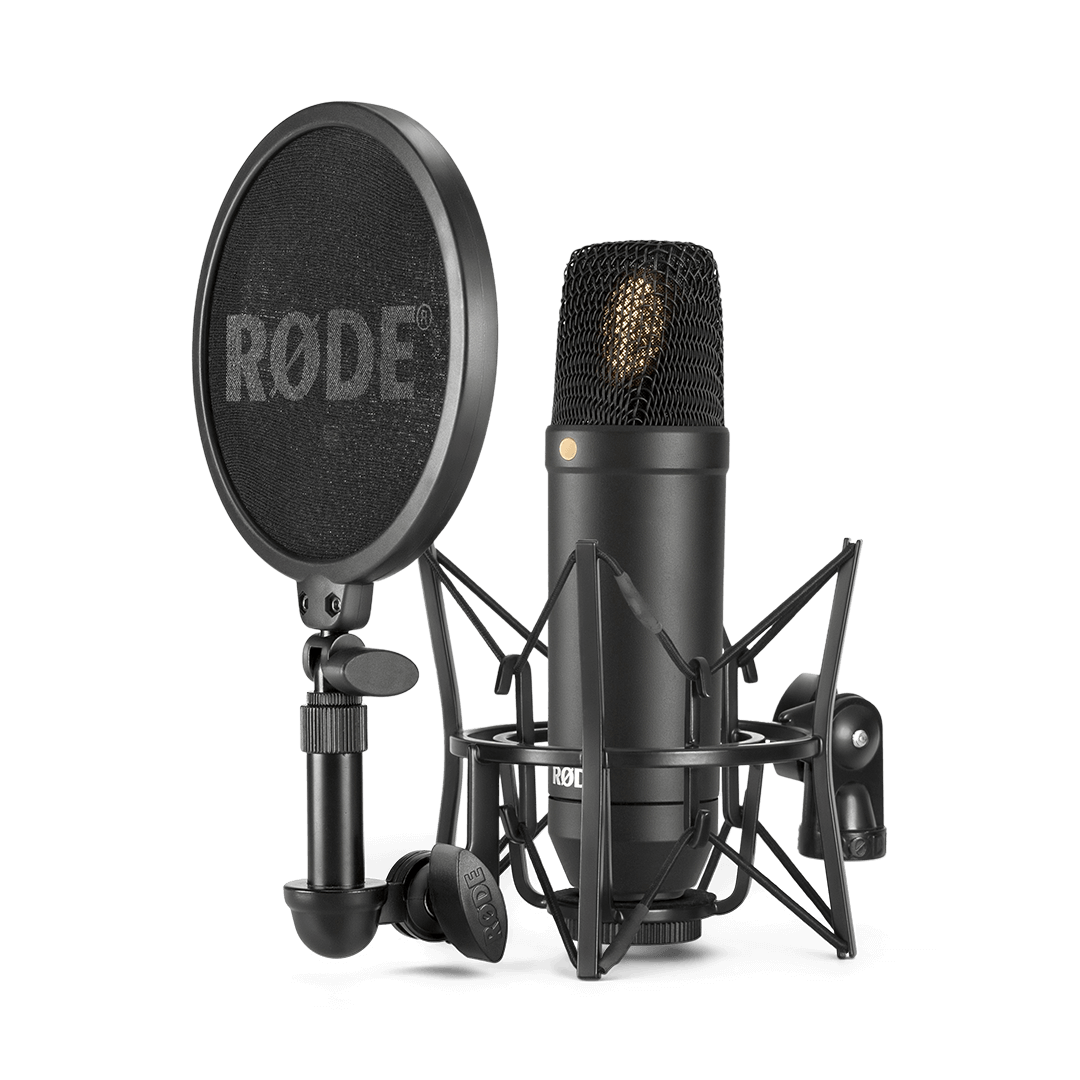
A quiet condenser mic that captures detailed sound in treated spaces. Ideal for narration, documentary, and in-booth ads.
- Pros: Very low noise floor that supports high quality audio. Smooth top adds polish without harshness.
- Cons: Sensitive to ambient noise in shared homes. Requires phantom power in XLR mode; the 5th Gen can also run bus-powered over USB. Works best with a shock mount and a reliable pop filter.
Audio Technica AT2040
A dynamic speech mic voiced for focus. It gives weight and control in home offices.
- Pros: Tight hypercardioid polar pattern that resists spill. Easy to EQ for better audio quality in a busy mix.
- Cons: Needs more gain than a condenser microphone. Plosives without angle and a pop shield. Fixed mount can pass bumps without a shock mount.
Rode Podcaster
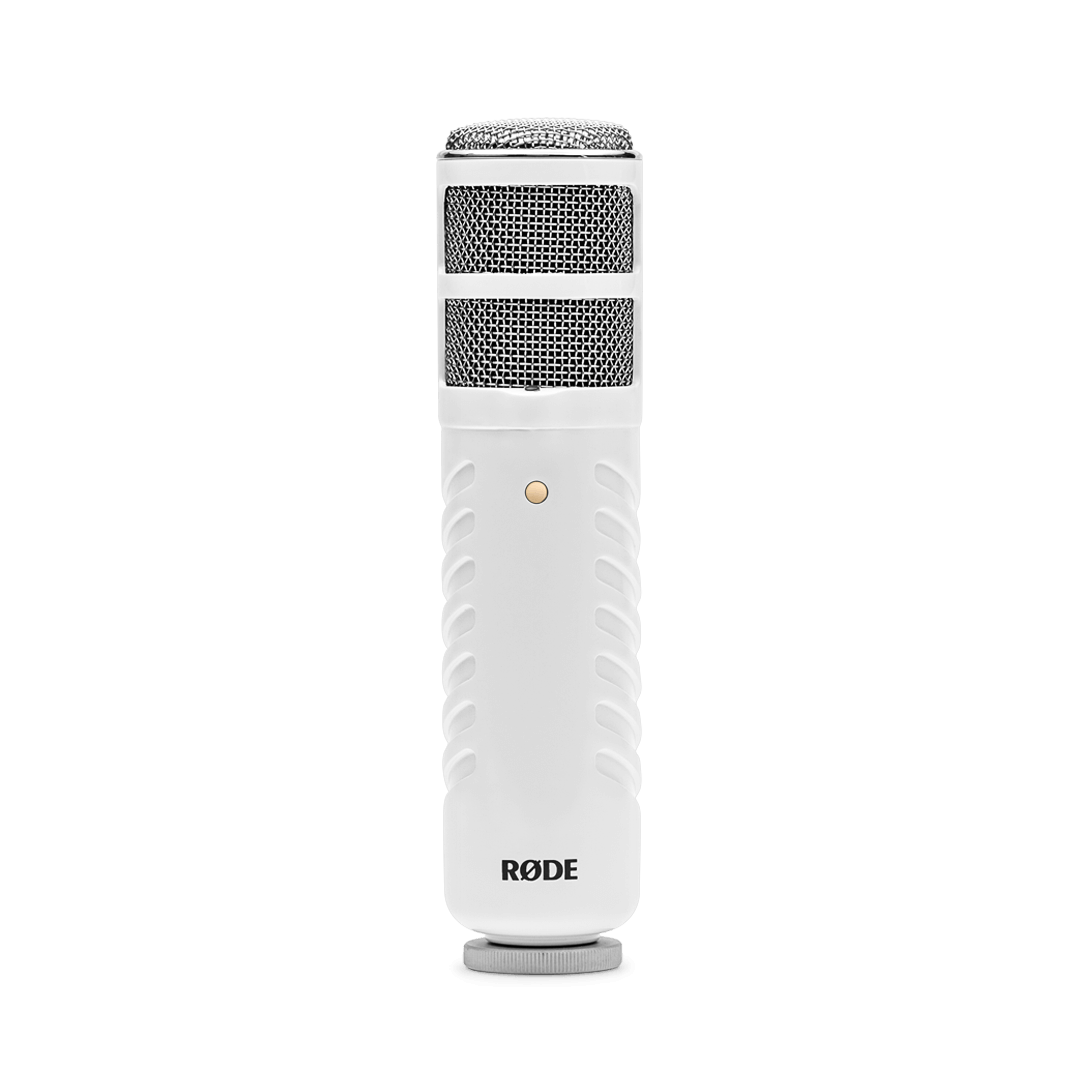
A USB dynamic that skips the interface. It aims at creators who want a broadcast tone with a simple path.
- Pros: USB direct path for fast set-up and the ability to record straight into your app. The dynamic capsule offers less ambient noise than many condensers.
- Cons: Heavier body. Use a solid desktop stand or boom. Onboard level control is limited versus an interface. Still benefits from a pop filter for close reads.
500 to 999 dollars
These are the repeat performers across pro studios. They define tone and tolerate tough spaces.
Shure SM7B

A legendary mic that delivers the classic radio sound. It is a dynamic microphone with a cardioid polar pattern and superb off-axis behaviour. Pair it with a strong, quiet preamp.
- Pros: Smooth tonality that takes EQ and compression well. Stable rejection around screens and desks.
- Cons: Needs a healthy gain or an inline booster. A bulky body needs a strong boom or a weighted desktop stand. Costs more than starter options.
Electro-Voice RE20

A broadcast microphone with a Variable D design. Less proximity shift when you move. A favourite for lively hosts.
- Pros: Consistent tone for presenters who turn their heads. Handles plosives better than many peers.
- Cons: Sits at the upper end of the price band. Needs an audio interface with proper headroom. Heavy. Balance your boom correctly.
Rode Procaster
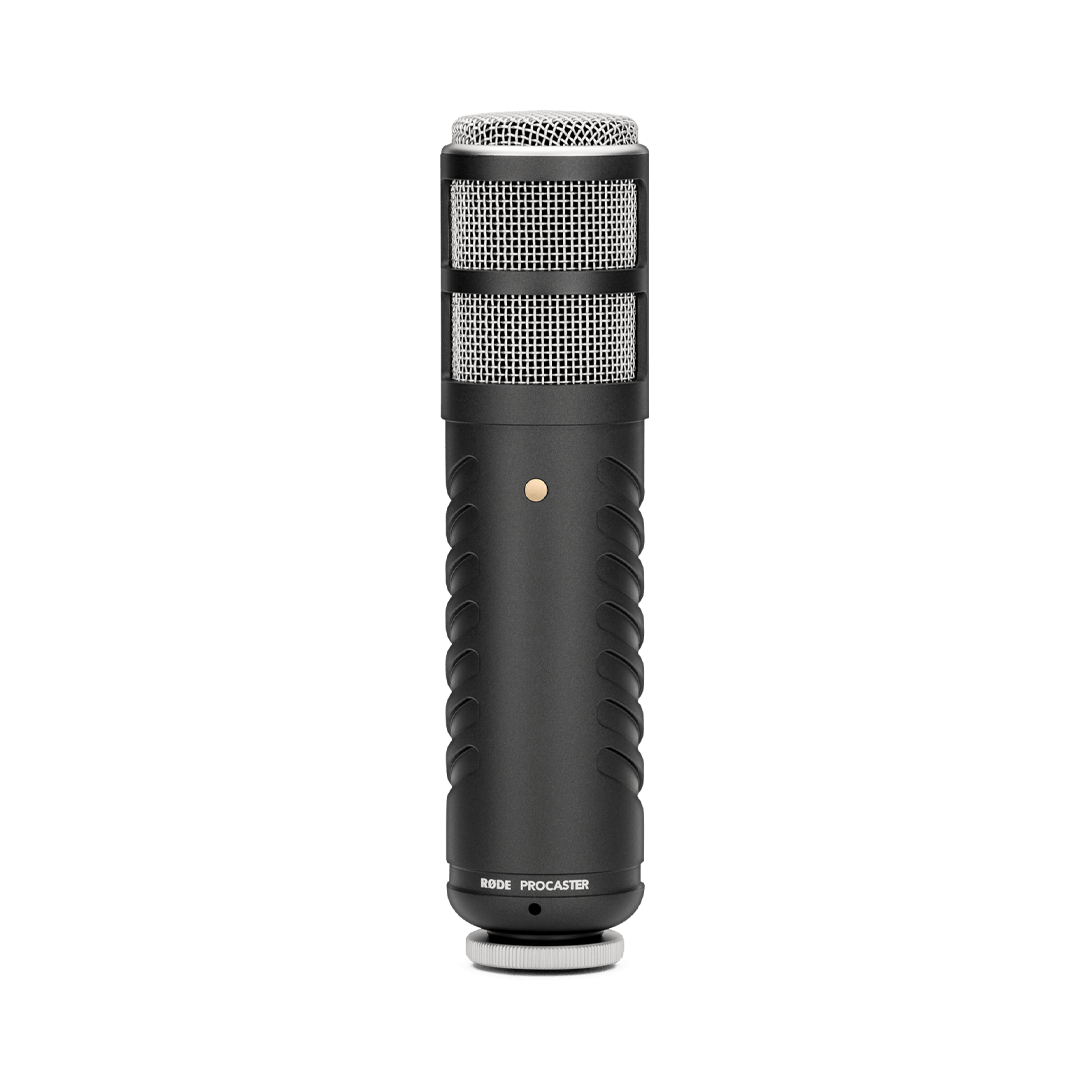
A focused dynamic for energetic delivery and noisy rooms.
- Pros: Rejects fan whirr and keyboard taps. Strong midrange that sits well under music beds.
- Cons: Needs more gain. Close use still wants a pop filter. Less airy top than a condenser mic.
Heil PR 40
A tight, forward dynamic that adds bite without grit.
- Pros: Great cut for dense mixes. Solid rejection that helps in untreated spaces.
- Cons: Bigger body. Choose a boom with good reach. Can emphasise sibilance on some voices. Needs careful distance and a pop shield.
1000 dollars and above
Premium capsules for brands that want a signature voice and have quiet rooms to match.
Neumann BCM 705
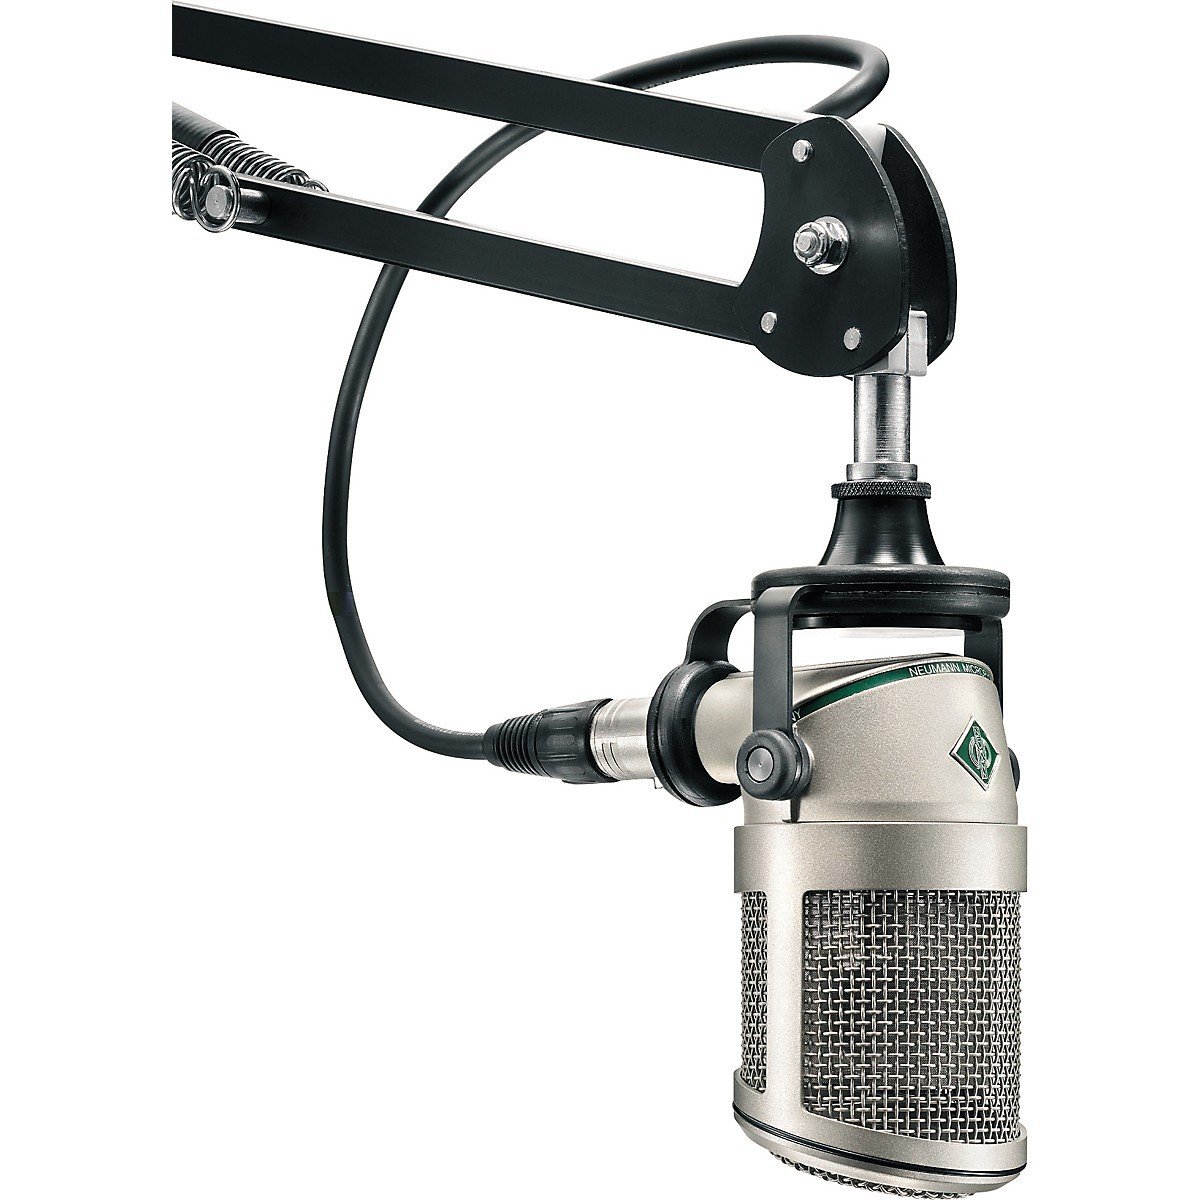
A dynamic broadcast model voiced for the booth. Refined midrange with controlled proximity effect.
- Pros: Commanding tone that helps build a brand. Robust build for years of daily work.
- Cons: Demands a steady chain and quiet space. Needs a quality shock mount, not a light clip. Price places it in flagship territory.
Neumann TLM 103
A modern condenser aimed at narration and voiceover in treated studios.
- Pros: Low self-noise and excellent sound quality that readers notice. High output, which keeps interface gain modest.
- Cons: Hears every detail of the room. Plosives and sibilance need precise technique. Not ideal for shared homes or open-plan offices.
What to expect from each capsule type
Dynamic microphone
Best for busy homes and office corners. You get less ambient noise and steadier tone if you move. Dynamic mics also tolerate laugh spikes and excited guests.
Condenser mic
Best for treated booths and late-night sessions in quiet spaces. You get detailed sound that flatters breathy reads and fine textures. A condenser microphone needs phantom power if used over XLR and rewards quiet environments. USB condensers draw power over USB.
Check out our article on the key differences between the two main mic types.
Hybrid podcasting microphones
Shure MV7 and Audio Technica ATR2100x-USB cover both XLR and digital. They fit hosts who want one body across travel and studio days.
A quick note on a legend: The Shure SM7B is called a legendary mic for a reason. It takes processing well, keeps spill down, and encourages confident mic technique with a rewardingly rich sound.
Placement and pattern you can repeat every time
For most podcast setups, use a cardioid polar pattern. Keep the mic about a hand span from your mouth and angle it slightly off-axis so plosives don’t hit the diaphragm. Add a pop filter or pop shield, and use a shock mount if your desk transfers bumps. A solid desktop stand will usually beat a wobbly arm, even with a pricier mic.
Do a quick test before you record properly. Read a 30-second script, then take one step closer and do it again. Listen back on headphones and small speakers and keep the take that needs the least EQ.
Noise control that works in normal UK homes
Start with the easy wins. Close doors, switch off fans, and put a rug under your chair. With a cardioid polar pattern, aim the back of the mic towards the noisiest part of the room. Small moves like that cut background noise and ambient noise before you touch any settings.
Then calm the desk. A soft mat under your stand reduces rumbles, and shorter cable runs help keep things clean. If room noise is still there, move closer and lower the gain. Dynamic mics are often the safer bet in small flats, and they help you capture a drier recording you can tidy in post-production.
How to choose quickly and win the next 100 episodes
Choose based on your space and how you record. Dynamic mics reduce spill and suit shared homes. A condenser microphone can sound more detailed, but it rewards a quiet room. Most creators stick with a cardioid polar pattern because it keeps the focus on your voice.
For connection, USB is the quickest start. XLR into a USB audio interface gives you better metering, gain control, and an easier upgrade path. Don’t overthink specs early. A pop filter, pop shield, and stable mount improve audio quality more than most feature lists.
Connection and workflow decisions that reduce friction
USB microphones are great for mobile setups and fast recording. Pack a spare USB-C cable, keep a short one in your bag, and choose a USB-C connection where possible. If you’re recording two people, use a two-channel USB audio interface. If you’re planning panels, go four channels.
Hybrid mics keep you flexible. Shure MV7 and Audio-Technica ATR2100x-USB can run on USB or XLR, so you can switch setups without starting over. If you’re unsure, a mic with both connection options is a sensible long-term choice.
Accessories that unlock immediate gains
- Pop filter: First purchase. It prevents blasts that clip and distract.
- Pop shield: A second layer that allows closer placement for a strong tone.
- Shock mount: Isolation from desk thumps and keyboard taps.
- Desktop stand. Keep the capsule steady at mouth height. Choose weighted bases.
- Cabling: One quality XLR cable and one spare. One spare USB and USB-C cable. Short runs reduce hum and snagging.
- Windscreens: Keep a few. Swap when they smell or wear. These small items are why even a good microphone can fail without support. Fit them once, and your podcast mic becomes easier to use every week.
Explore our more in-depth guide to podcast equipment.
Hands-on comparisons by use case
Solo in a noisy home
- Choose a dynamic microphone with a cardioid polar pattern.
- Sit close, add a pop filter and shock mount, and keep the gain modest.
- Run an XLR mic into an audio interface for repeatable knobs and meters.
Interview at one desk
- Use two matching podcasting microphones.
- A four-input USB audio interface helps if you add guests later.
- Keep short XLR cables and label channels so edits are easy.
Travel light
- Use USB mics with a usb c connection.
- Choose the Shure MV7 or Audio Technica ATR2100x-USB for flexibility.
- Carry a spare USB-C cable, a small USB-C cable, and a small desktop stand.
Video plus audio
- Wireless microphones can help if you need to move around.
- Monitor closely because dropouts happen.
- Wired wins if you can stay seated.
- Record a safety take if your recorder allows it.
Preamps, power, and gain made simple
Your interface preamp raises mthe ic level. Speak at show level and set gain so peaks sit well below clipping. For condensers, turn on phantom power at 48 volts for XLR models. For USB condensers, power comes from USB.
For quiet dynamics, consider an interface with more clean gain rather than pushing noise. Keep cable runs short and tidy. Use quality connectors on every xlr cable. Put the interface where you can see the meters.
If you want to avoid software surprises, choose a usb audio interface with stable drivers and clear front-panel controls. This small choice lowers stress during live reads and saves time later.
Practical testing workflow used by TYX engineers
Never guess with your voice. Capture sound samples before you buy. Borrow two or three podcasting microphones and read the same script for 30 seconds. Keep the distance fixed.
Label files with mic name, distance, and gain. Drop them into your digital audio workstation and listen on neutral headphones and phone speakers.
Focus on sibilance, low-mid build-up, and breath noise. The best podcasting microphone is the one that needs the least EQ and makes you speak confidently.
Real-world placement recipes that tame plosives and hiss
Recipe one. Close the dynamic on a boom
- Dynamic microphone set to cardioid polar pattern.
- Pop filter two fingers from the grille.
- Pop shield eight centimetres out. Speak across the capsule.
- Angle slightly so breath does not hit directly.
Result: Less ambient noise and a controlled low end.
Recipe two. Quiet-room condenser for narrative
- Condenser mic with phantom power on for XLR models or USB bus power, where supported.
- Shock mount and heavy desktop stand.
- Cardioid polar pattern, mouth just off axis.
Result: Detailed sound that suits ads and gentle reads.
Recipe three. Two hosts at one desk
- Two matching XLR microphones into a USB audio interface.
- Short XLR cables.
- Stands labelled left and right.
Result: Cleaner edits than one mic and fewer cross-talk issues.
Cables, ports, and practical tips you will thank yourself for later
Use quality cables. A tidy XLR cable reduces hum. A snug USB cable reduces dropouts. Carry a spare for both. Prefer usb c. A usb c connection is robust and fits either way. Keep cable runs short, especially around power strips.
If you must use a hub, test before a session. Place the interface where you can see the meters and reach the gain knob. For travel, a compact case with foam protects connectors and keeps your usb c cable from bending.
If you are forced to record on a cell phone, choose a mic that is class-compliant over USB. On Android 5.0 or later in host mode, class-compliant mics use a subset of USB Audio Class 1.0. On iPhone 15 or later with USB‑C, class-compliant USB audio devices are supported.
Power budgets vary, so use a powered hub or interface if needed. Test your app. For mobile recording, pack a tiny desktop stand and the shortest cables you can find.
When to choose hybrid bodies and when to go all in on XLR
Hybrid mics with both XLRs are ideal if you move between home, office, and studio. You keep one tone. You carry less gear. If your show grows, you can plug straight into an interface and add channels. Pure XLR wins when you lock in a space and want the most control.
You can upgrade the USB audio interface without changing the capsule. It is easier to add outboard gear later. If you run group recording often, pure XLR with an interface is the cleanest long-term path.
Common issues and fast fixes
Plosives and blasts: Fit a pop filter. Angle off-axis. Slow breath on P and B.
Hiss at high gain: Move closer. Lower gain. Use an interface with more clean headroom.
No signal on a condenser: Turn on phantom power. Reseat the XLR cable. Confirm input selection.
Buzz and hum: Shorten cables. Separate audio and power runs. Try a different port for the USB cable.
Muddy tone: Reduce distance slightly for presence, then cut a little low mid in the mix.
Techniques that make any podcast mic easier to mix
Sit up, relax your shoulders, and keep the pop filter at your distance guide. Smile when you say hello. Back off slightly when you laugh. Save two sound samples at the top of each session so you can match tone in the edit. This simple routine creates a consistent best podcast experience for listeners on small speakers and headphones.
Post-processing that respects capture
Start with a high-pass filter to remove rumble. Add gentle compression. Tame sibilance with a light de-esser. Avoid heavy EQ. You want a natural tone that translates everywhere. Clean capture with minimal processing produces excellent audio and faster edits.
Price-tiered quick picks by scenario
Under 100 dollars
- Best for absolute starters who want USB mics and a fast path.
- Pick Samson Q2U if you want both XLR. Pick XM8500 if you prefer a rugged XLR mic.
100 to 199 dollars
- Best for single host shows in spare rooms. P
- ick Blue Yeti if you want patterns. Pick PodMic or SM58 if you want less ambient noise.
200 to 499 dollars
- Best for growing shows that need flexibility.
- Pick Shure MV7 for hybrid. Pick AT2040 for focused speech. Pick NT1 for narratives.
500 to 999 dollars
- Best for long-running brands.
- Pick SM7B or RE20 for classic control. Pick Procaster for energy.
1000 dollars and above
- Best for premium booths and signature voices.
- Pick BCM 705 or TLM 103 if your room is quiet and your workflow is stable.
Avoiding dead ends with purchase choices
Do not buy mics without thinking about stands and space. A good microphone cannot save a wobbly arm or a hollow desk. Do not overbuy processing to fix capture. Better capture beats rescue. Do not ignore monitoring. Hearing yourself in real time through the mic or interface improves takes and reduces mistakes.
Care and maintenance that saves you money
Store mics in a dry case. Brush grilles lightly. Swap windscreens when they tire. Coil every xlr cable neatly. Do not force connectors. Carry a spare usb cable and a spare usb c cable. Label everything so resets are fast. These habits keep your podcasting microphones ready and reliable.
Extra depth for advanced buyers who want to future-proof
Building a path from solo host to panel
Start solo with a hybrid body so you can shift rigs smoothly. Shure MV7 and Audio Technica ATR2100x-USB handle both XLR and USB. When you add a second host, move to an interface with at least two mic inputs. Later, a four-input USB audio interface lets you run four XLR microphones with clear routing. Keep identical capsules for all seats so edits match.
Managing guests and remote links
For remote guests, send a short guide that teaches mic distance, pop filter use, and how to face the cardioid polar pattern away from noise sources. Ask for short sound samples before the slot. If a guest arrives with a USB unit, give them a clean USB cable, seat them close, and angle the mic to reduce ambient noise. Record a safety take if time allows.
Building a brand voice deliberately
Capture three styles of greeting at matched level. One with a smile, one neutral, one with a softer, breathy tone. Compare in context. Choose the one that sounds great against your theme and beds. Lock that voice in and stop tweaking. Consistency is the shortcut to the best podcast experience.
Proofing your chain end to end
Run a five-minute rehearsal. Print to your editor and to a backup if you can. Listen on headphones, cheap earbuds, and laptop speakers. If the track translates well, publish confidently. If not, adjust the distance, check the XLR connection, and try again. Small changes beat large corrections.
Model-specific pro tips and accessory notes
Blue Yeti
- Use cardioid. Keep it close. Blue Yeti can have a built-in pop filter, but an extra screen helps at close range.
- Add a boom. The desktop stand is fine to begin, but a boom isolates better.
Shure MV7
- Keep both XLR and USB ready. Label cables so swaps are quick.
- Mount on a boom to reduce desk bumps and to maintain a consistent angle.
Audio Technica ATR2100x-USB
- Carry it for travel. It is small, light, and sounds great with minimal EQ.
- Use a pop shield and a firm desktop stand for confidence.
AT2020 and Rode NT1
- Treat the space and use phantom power for the AT2020. The NT1 5th Gen uses phantom power in XLR mode or bus power over USB.
- Fit a shock mount and pop filter, then set levels calmly.
SM58, XM8500, PodMic
- Lean into close placement. These models deliver a rich sound when you work the proximity effect carefully.
- A steady stand matters more than shopping for tiny EQ differences.
SM7B and RE20
- Use a serious boom and counterweight.
- Pair with an interface that has ample clean gain so breath noise stays below threshold.
TLM 103 and BCM 705
- Use in quiet rooms. These reward techniques and a controlled schedule.
- Keep the chain clean and minimal so the capsule voice leads.
Final checklist before you buy
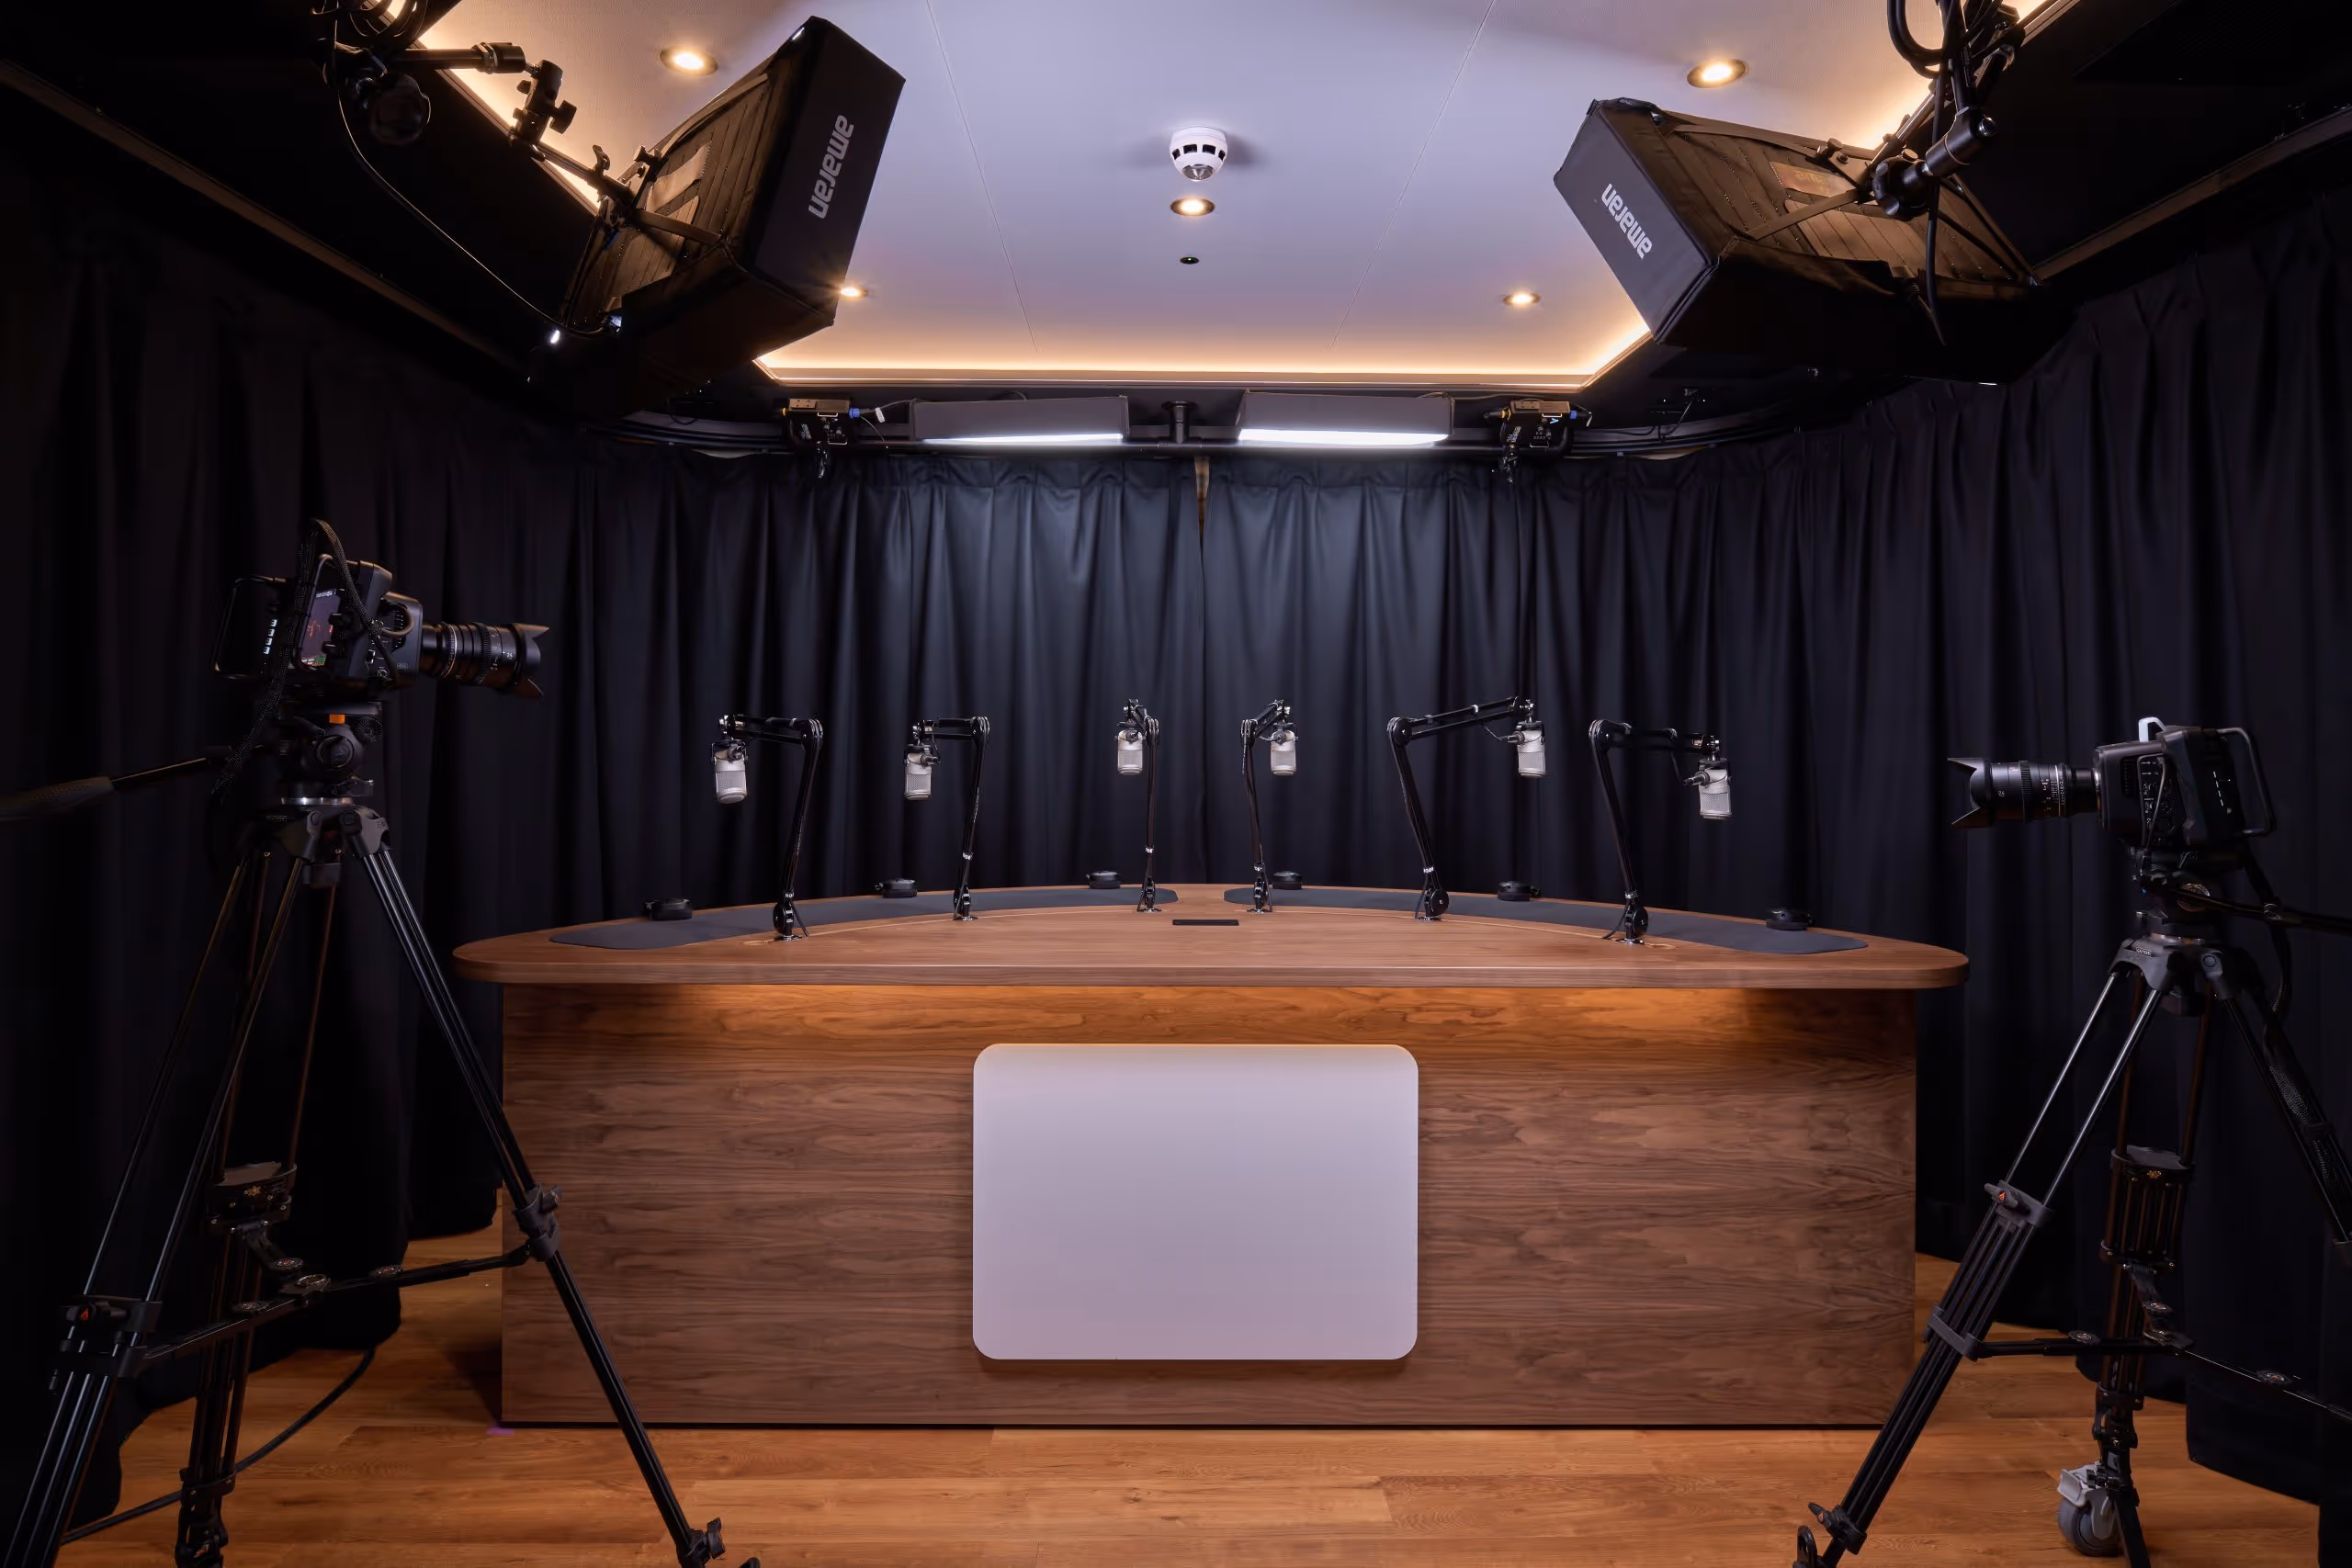
Capture studio-quality sound at TYX Podcasting Studios
.avif)
Your voice deserves more than a bedroom setup. TYX Studios offers three purpose-built podcast studios with world-class acoustics, high-end mics, and a technician who knows how to get you broadcast-ready fast. Our new Studio 1 adds a flexible, cost-effective option with ceiling-rigged lighting and multiple backdrops, starting from £300 per session.
We also handle podcast production end to end, from 4K video recording in acoustically treated rooms to editing, mastering, social clips, and distribution. Whether you're launching your first show or scaling a growing one, you get the sound quality and workflow to match.
Frequently Asked Questions
A dynamic microphone with a cardioid polar pattern. It reduces background noise and gives a steadier tone in lively rooms.
Not if you choose USB mics. An audio interface is required for XLR microphones and gives metering and better monitoring as you grow.
Yes, if you use it close in cardioid with a pop filter. Blue Yeti remains a simple, flexible starter and a solid spare.
Shure MV7 gives both XLR and USB, so you can run USB at home and move to a rig later without changing tone.
Yes, with a mic that supports USB and a supported app. On Android 5.0 or later in host mode, class-compliant mics use a subset of USB Audio Class 1.0. On iPhone 15 or later with USB‑C, class-compliant USB audio devices are supported. Check power and app support.
Good placement, consistent level, and light processing. Capture clean, then add small EQ and compression in the mix for high-quality audio.
Alternatiely, a professional studio environment like TYX can ensure broadcast level standards every time.
Yes, TYX Studios is fully equipped for video podcast production. The studio offers 4K video recording, professional lighting, and a multi-camera setup—perfect for creating high-quality visual content alongside your audio podcast.
The rental duration for a podcast recording studio typically depends on the studio’s availability and your specific needs. TYX studios offer hourly rates, as well as daily or weekly packages. It is advisable to discuss your requirements with the studio in advance to determine the most suitable booking option for your podcasting project.
How to Start a Podcast in 2026: Full Step-by-Step Guide
Learn how to create a podcast in 2026 with a practical, step-by-step system for planning, recording, hosting, editing, and launching across audio and video.