What is Exposure in Photography? An Ultimate Guide
Exposure is a fundamental concept in photography that determines how light or dark your images will be. In this article, we'll explore the key elements of exposure, including shutter speed, aperture, and ISO, and provide practical tips to help you achieve the perfect exposure for your photos.
Table of Contents
- What is exposure in photography?
- Understanding the exposure triangle
- Balancing the exposure triangle
- Exposure modes on your camera
- Common exposure challenges
- Practical tips for getting the right exposure
- Exposure and post-processing
- Practice, practice, practice
What is exposure in photography?
Exposure in photography refers to the amount of light that reaches your camera’s sensor, affecting how light or dark your images appear. Achieving proper exposure is essential for capturing photos with the right brightness and detail, ensuring that shadows and highlights are well-defined.When you press the shutter button, light enters through the camera's aperture and hits the sensor, creating a visual representation of the scene. A high amount of light results in an overexposed image, appearing washed out with loss of detail in bright areas. Too little light leads to an underexposed image, making it too dark and obscuring details in the shadows.If you want to get the correct exposure, you need to understand how to control your camera's exposure settings. Whether you're shooting in manual mode or relying on auto settings, knowing how to adjust your exposure can dramatically improve your photography.This allows you to capture images that are both visually striking and technically precise. same exposure adjust exposure multiple exposure film or camera sensor focal length light meter
Understanding the exposure triangle
To achieve proper exposure, you need to balance three fundamental camera settings: shutter speed, aperture, and ISO. These settings form the exposure triangle, a crucial concept for photographers.
Shutter speed

Shutter speed determines how long your camera’s shutter remains open, allowing light to reach the sensor. It is measured in fractions of a second (e.g., 1/1000 or 1/30). Faster shutter speeds capture quick movements without blur, making it ideal for action shots or sports photography.
Conversely, a slow shutter speed lets in more light and is useful in low-light conditions or for creating motion blur effects, such as in waterfall photography.
Aperture
Aperture is the adjustable opening in your camera lens that controls the amount of light entering the camera. It is measured in f-stops (e.g., f/2.8, f/16). A wide aperture (low f-stop number) allows more light and creates a shallow depth of field, making your subject stand out against a blurred background. This is perfect for portrait photography.

A smaller aperture (high f-stop number) lets in less light and increases depth of field, ensuring that both the foreground and background are in focus, which is ideal for landscape photography.
ISO
ISO measures the sensitivity of your camera’s sensor to light. A lower ISO value (e.g., 100 or 200) means less sensitivity, which is best for well-lit conditions and produces images with minimal digital noise.

A higher ISO value (e.g., 1600 or 3200) increases sensitivity, allowing you to shoot in darker environments but can introduce noise, affecting image quality.By understanding and adjusting these three elements of the exposure triangle, you can control the amount of light that reaches your camera’s sensor, achieving the desired exposure for your needs.
Balancing the exposure triangle
Achieving the correct exposure requires a delicate balance between shutter speed, aperture, and ISO. Understanding how these three settings interact will help you make informed decisions when adjusting your camera for different shooting conditions.
Shutter speed and ISO

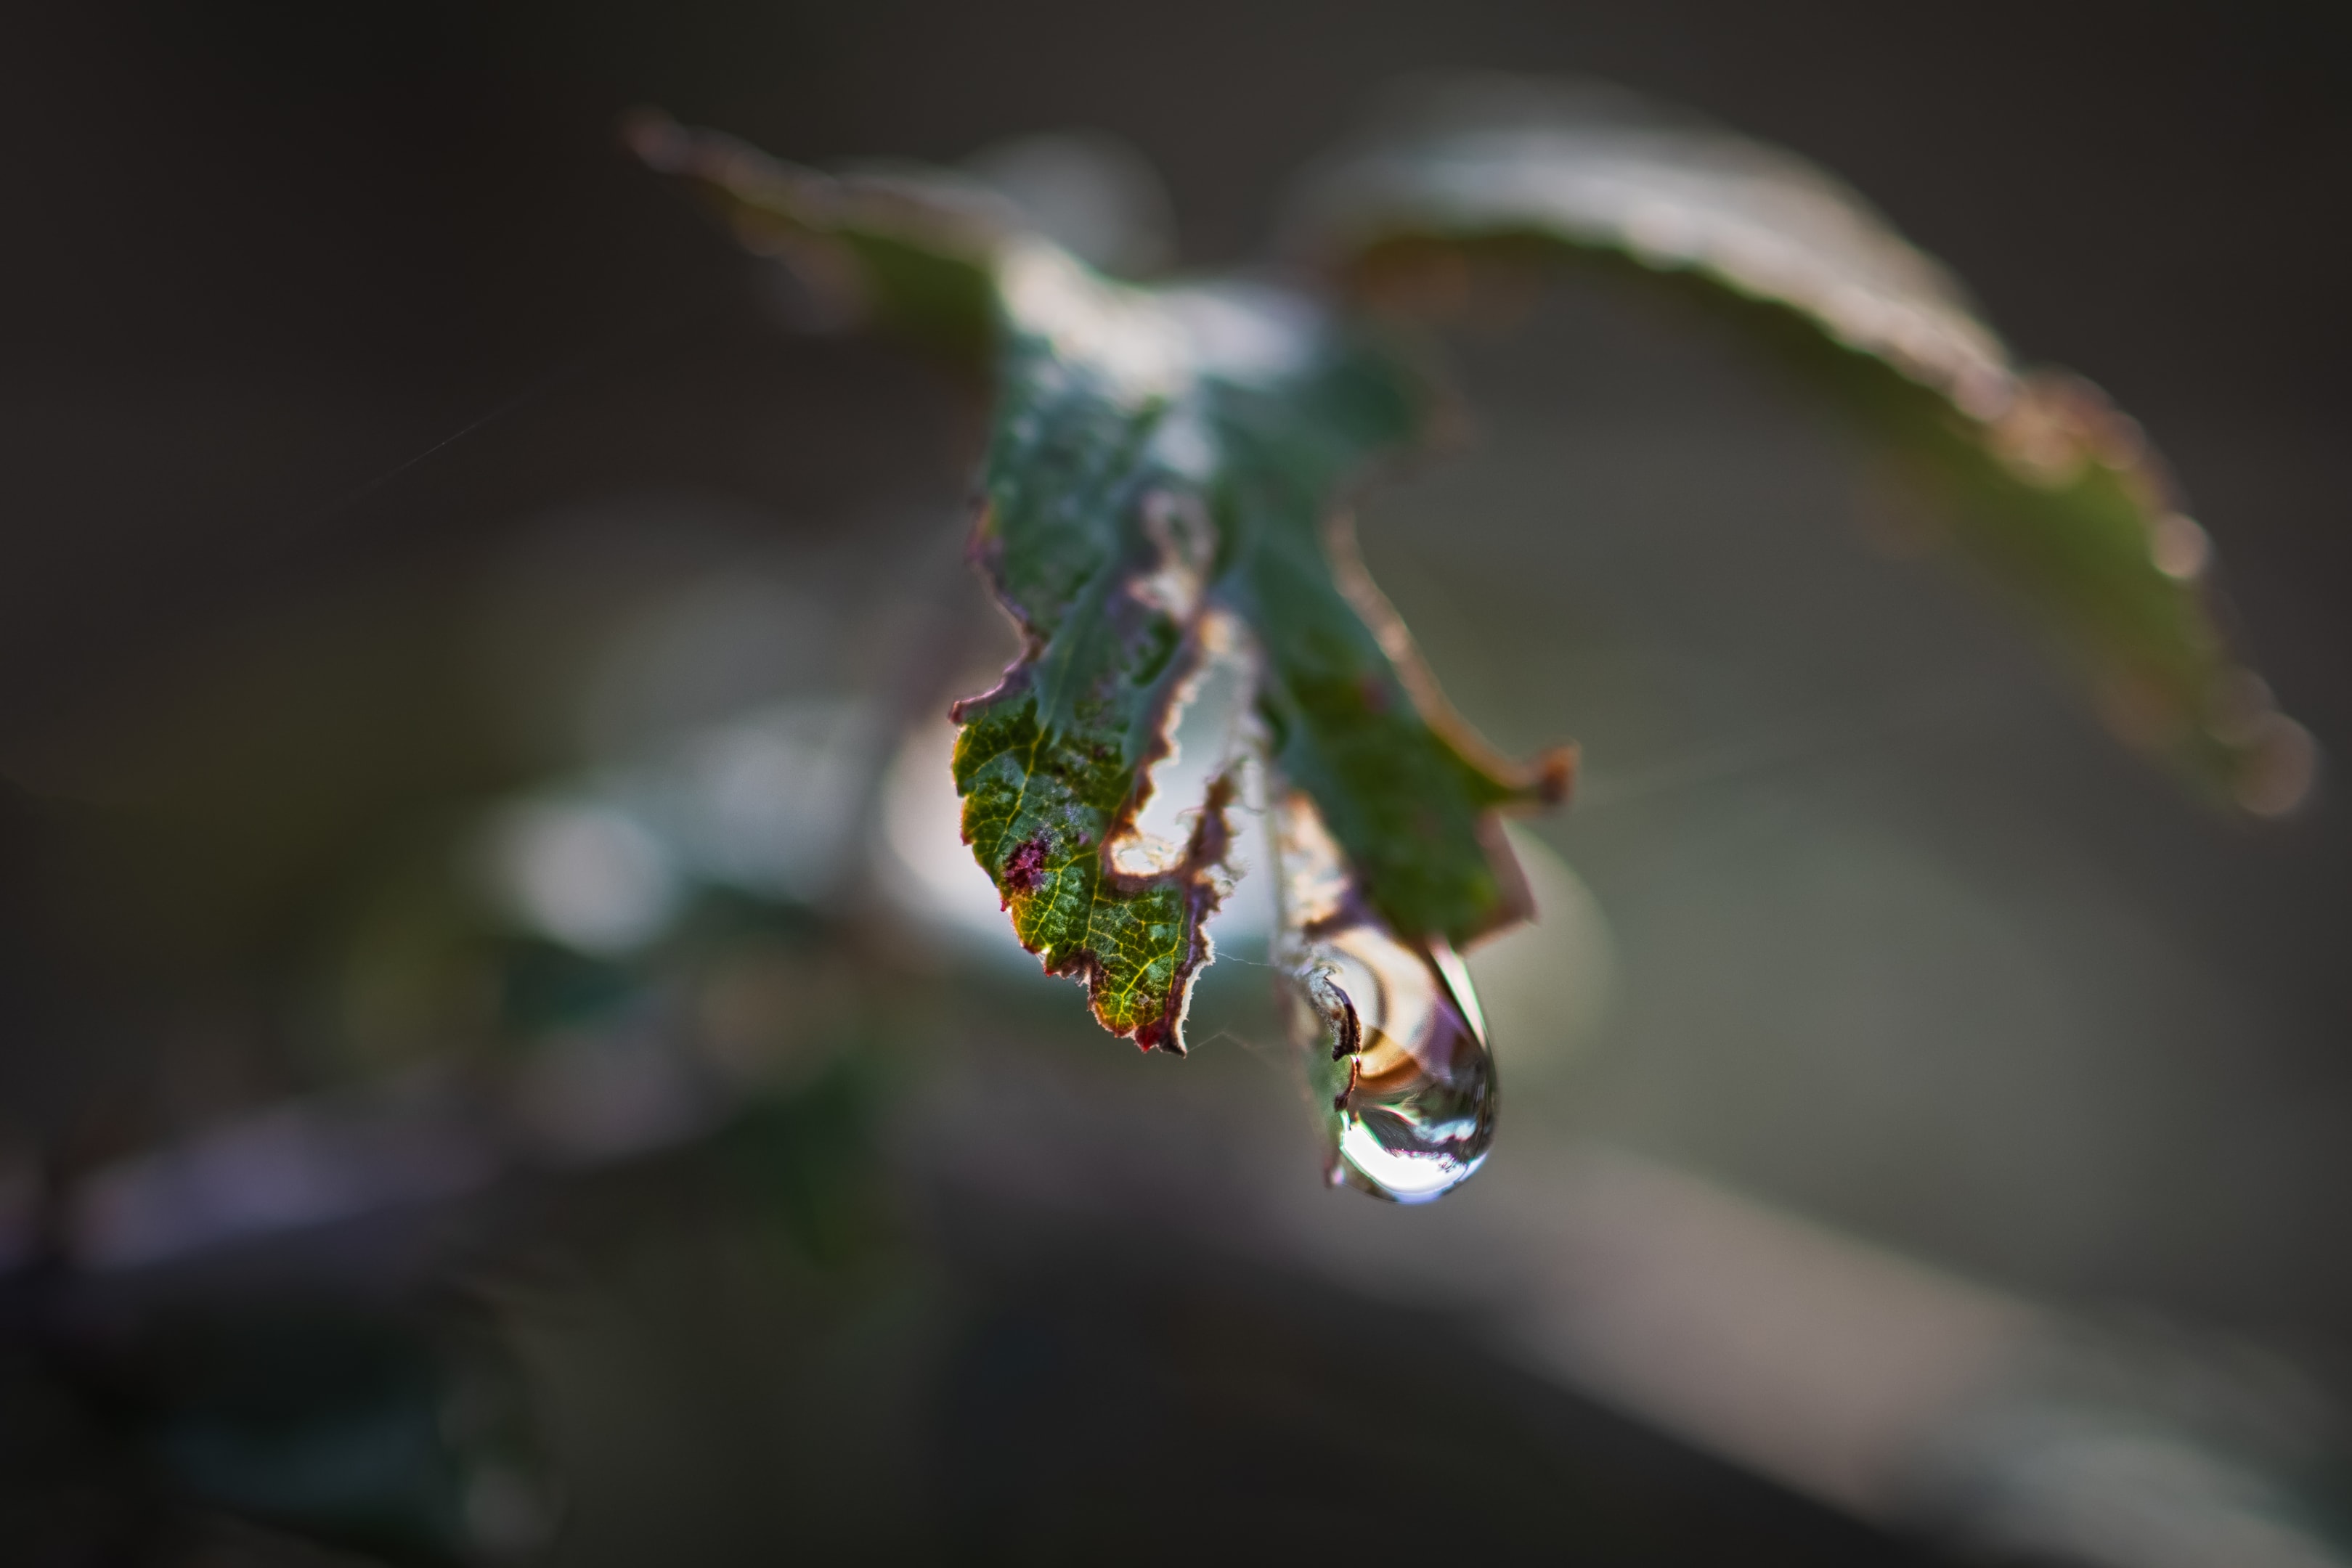
A 1/320 s exposure showing individual drops on fountainWhen adjusting your camera exposure, it's essential to consider how changes in one setting affect the others. For example, if you increase your shutter speed to freeze motion, you may need to widen the aperture or increase the ISO to compensate for the reduced light reaching the sensor.Conversely, if you slow down the shutter speed for a longer exposure, you might need to narrow the aperture or lower the ISO to avoid overexposure.
Aperture and shutter speed
Balancing aperture and shutter speed is crucial for controlling both exposure and depth of field. A wide aperture (e.g., f/2.8) lets in more light, allowing for a faster shutter speed, which is ideal for capturing sharp images in low light or freezing action.However, this also creates a shallow depth of field. To achieve a greater depth of field (e.g., in landscape photography), you can use a smaller aperture (e.g., f/16) but will need a slower shutter speed or higher ISO to maintain proper exposure.
ISO and image quality
While increasing ISO can help achieve the right exposure in low-light conditions, it’s important to be mindful of the impact on image quality. Higher ISO settings can introduce digital noise, resulting in grainy images. Therefore, it’s often best to keep the ISO as low as possible and rely on aperture and shutter speed adjustments to achieve the desired exposure.
Practical example

Imagine you’re photographing a fast-moving subject in dim light. You’ll need a fast shutter speed to freeze the motion, which means less light enters the camera. To compensate, you can open the aperture wider to allow more light and increase the ISO to boost the sensor’s sensitivity. Finding the right balance will ensure your image is correctly exposed, sharp, and with minimal noise.By mastering the interplay between shutter speed, aperture, and ISO, you can achieve the correct exposure in various shooting scenarios, resulting in high-quality, well-lit photographs.
Exposure modes on your camera

Modern cameras come equipped with various exposure modes that help you manage shutter speed, aperture, and ISO settings. Understanding these modes can enhance your ability to achieve proper exposure and create the desired photographic effects.
Manual mode
Manual mode (M) gives you complete control over all three elements of the exposure triangle: shutter speed, aperture, and ISO. This mode is ideal for photographers who want maximum creative control and are comfortable adjusting settings based on the scene. Manual mode allows you to experiment with different combinations to find the perfect balance for the correct exposure.
Shutter priority mode
Shutter priority mode (S or Tv) allows you to set the shutter speed while the camera automatically adjusts the aperture to achieve the correct exposure. This mode is useful for capturing fast-moving subjects or creating motion blur.
For example, if you're photographing sports, you can select a fast shutter speed to freeze the action, and the camera will adjust the aperture accordingly.
Aperture priority mode
Aperture priority mode (A or Av) lets you choose the aperture setting while the camera automatically sets the shutter speed. This mode is perfect for controlling depth of field.For instance, if you want to take a portrait with a blurred background, you can set a wide aperture (e.g., f/2.8), and the camera will adjust the shutter speed to ensure proper exposure.
Auto mode
Auto mode (A or green square) is designed for beginners or quick snapshots, where the camera automatically selects the best settings for the scene. While convenient, it doesn’t offer the creative control that manual, shutter priority, or aperture priority modes provide.Auto mode is useful when you need to capture a moment quickly without worrying about adjusting settings.
Program mode
Program mode (P) offers a balance between auto and manual control. In this mode, the camera automatically sets both shutter speed and aperture, but you can still adjust the ISO and use exposure compensation to tweak the exposure.Program mode is great for general photography when you want some control but prefer the camera to handle the primary settings.
Common exposure challenges

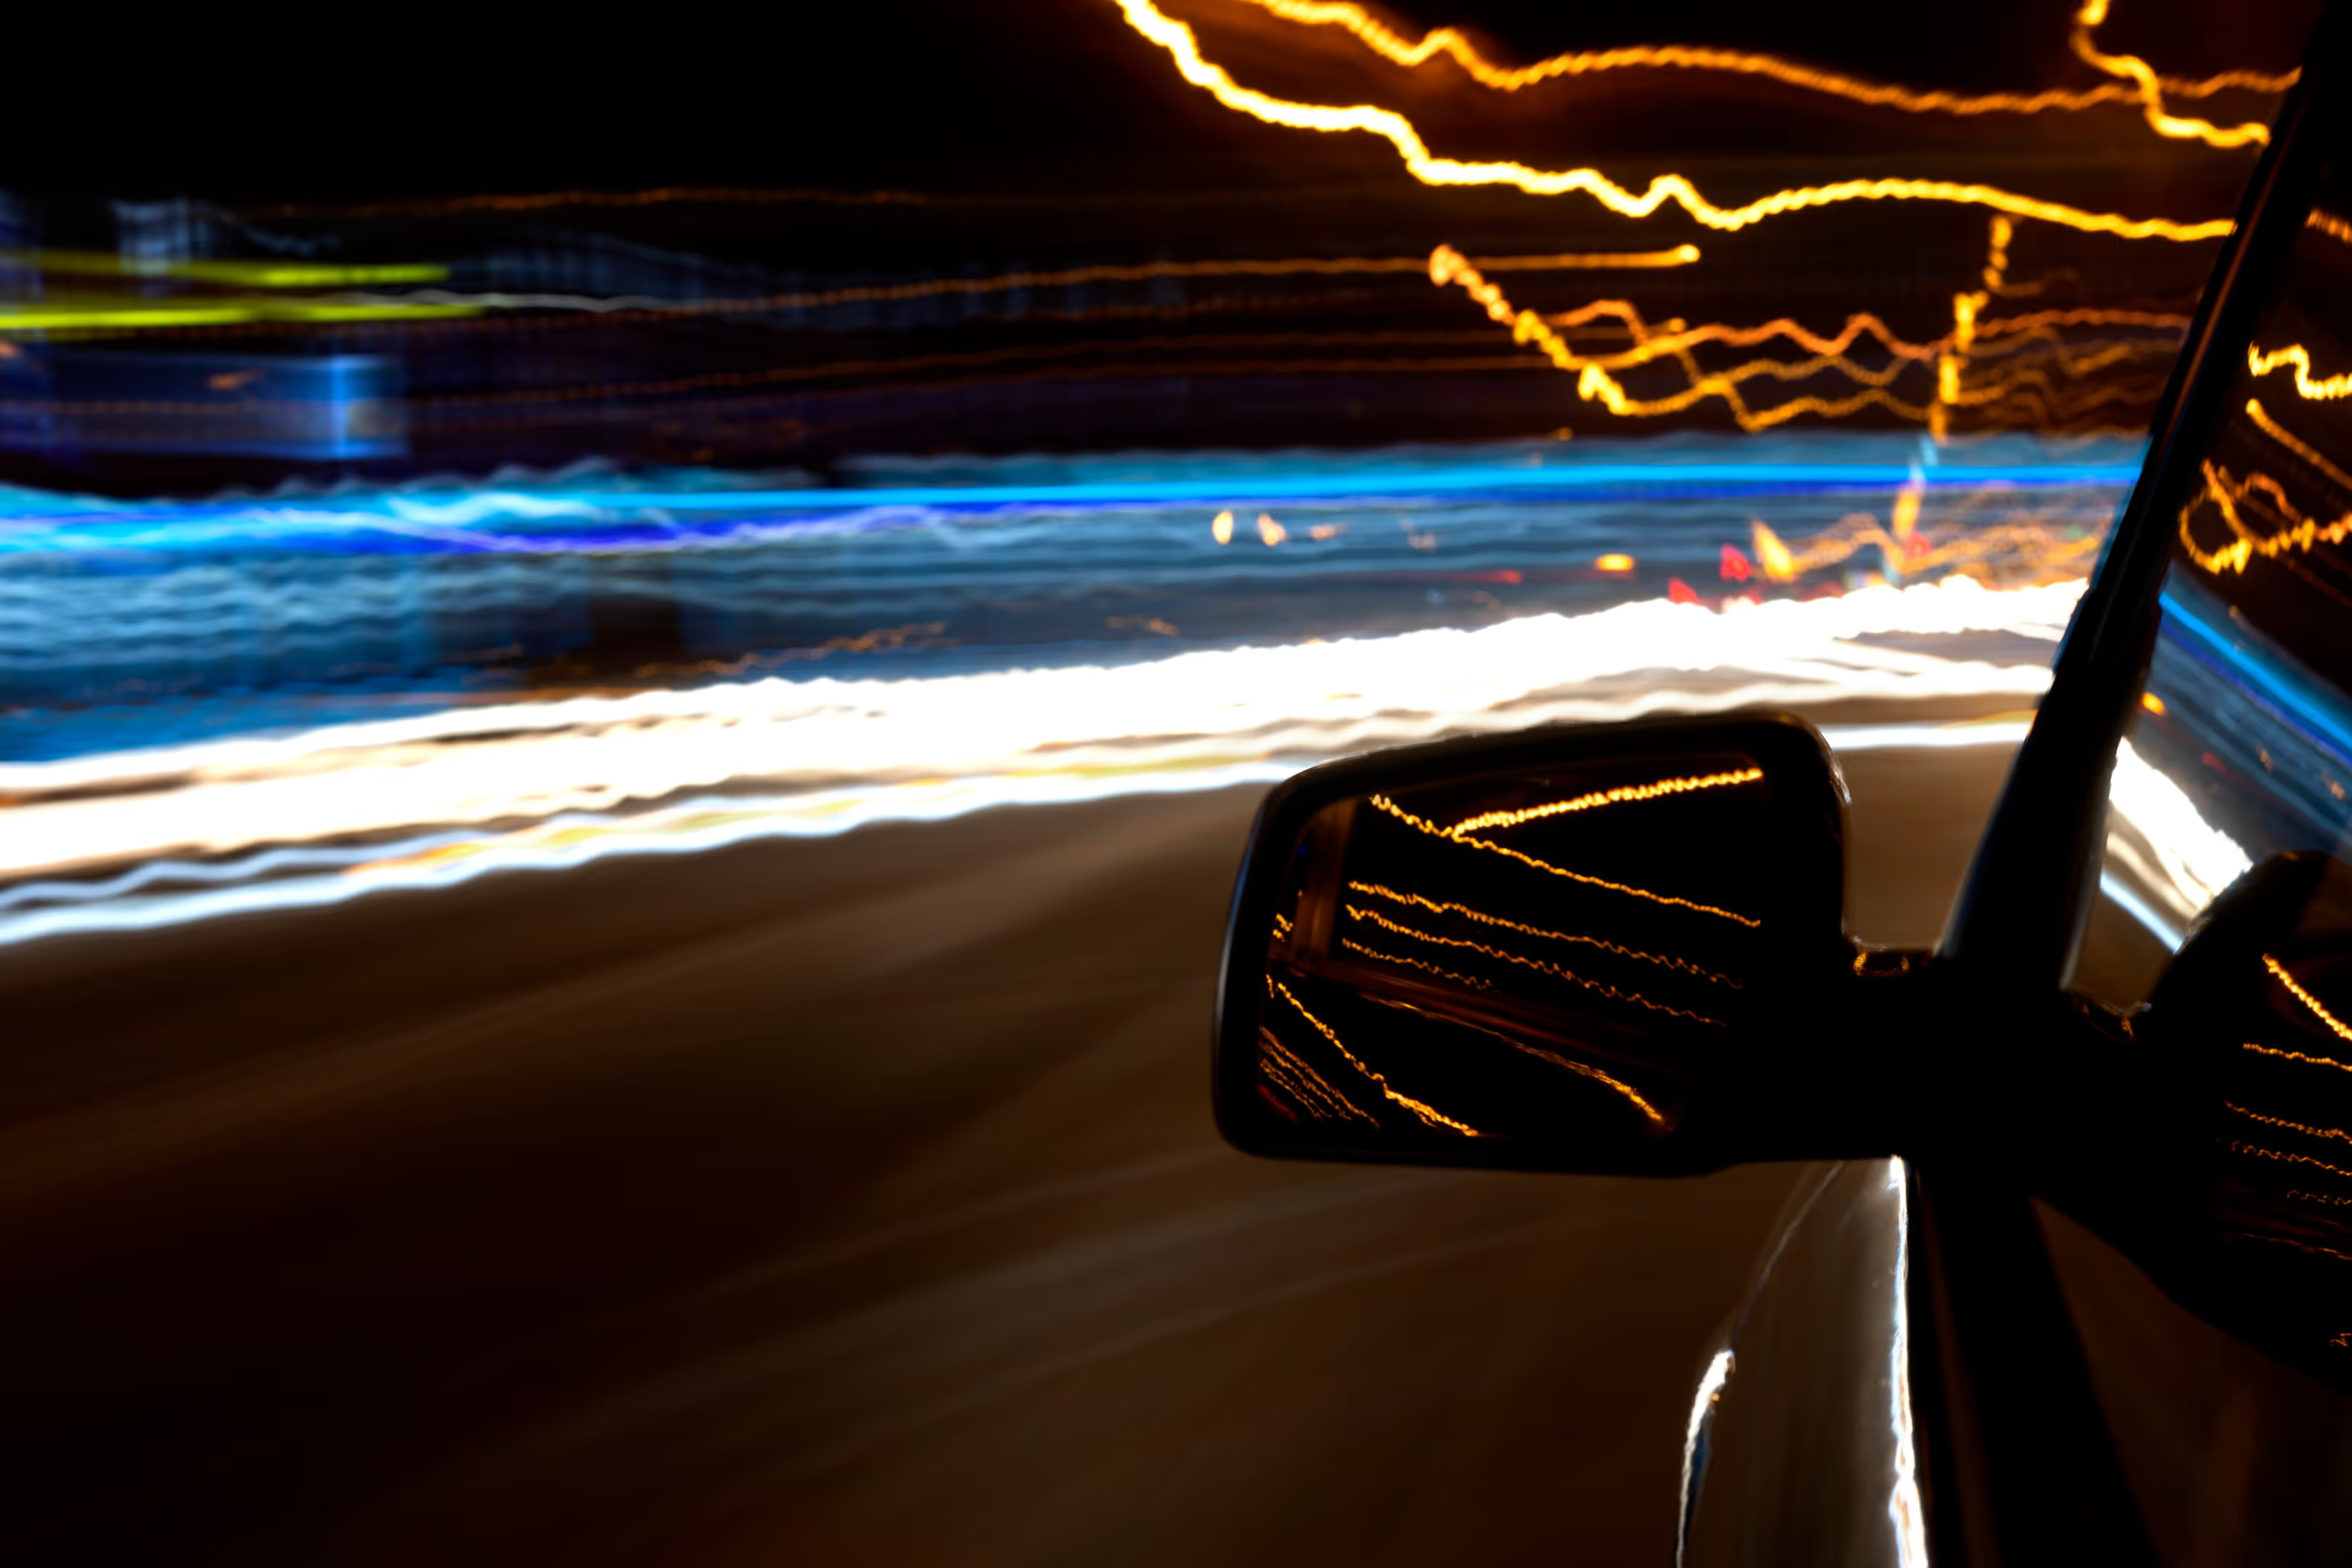
Example of overexposure used for artistic effectEven with a solid understanding of the exposure triangle and camera modes, photographers often encounter various challenges when trying to achieve the correct exposure. Here are some common issues and tips on how to overcome them.
Overexposure and underexposure
Overexposure occurs when too much light hits the camera sensor, resulting in images that are too bright and washed out. Underexposure happens when insufficient light reaches the sensor, making images too dark. Both can obscure details and degrade image quality.Use exposure compensation: Most cameras have an exposure compensation feature (+/- EV) that allows you to adjust the exposure value. Use positive compensation (+EV) to brighten an underexposed image and negative compensation (-EV) to darken an overexposed image.Review histograms: After taking a photo, check the histogram on your camera’s LCD screen. A well-balanced histogram should have a good distribution of tones without clipping on either end. Adjust your settings based on the histogram to avoid overexposure or underexposure.
Dealing with tricky lighting conditions
Photography often involves challenging lighting situations, such as backlighting, low light, or high-contrast scenes. These conditions can make it difficult to achieve proper exposure.Backlighting: When your subject is lit from behind, use spot metering to ensure the subject is correctly exposed. You can also use fill flash or a reflector to add light to the front of the subject.Low light: Increase the ISO to make the sensor more sensitive to light, open the aperture wider, and use a slower shutter speed. Be mindful of potential digital noise and motion blur.High-contrast scenes: Use graduated neutral density filters to balance the exposure between bright and dark areas. HDR (High Dynamic Range) photography is another technique where you take multiple exposures and blend them in post-processing to capture detail in both highlights and shadows.
Practical tips for getting the right exposure
Understanding the exposure triangle and using your camera's settings effectively is crucial, but applying this knowledge in real-world situations can sometimes be challenging. Here are some practical tips to help you get the right exposure in various shooting scenarios.
Typical landscape photography
For landscape photography, achieving the correct exposure is vital to capture details in both the sky and the land.

Tips for landscape photography – Use a tripod to avoid camera shake, especially in dim light or when using a slow shutter speed. Switch to aperture priority mode to control depth of field, usually setting your aperture between f/8 and f/16 to keep everything in focus.Keep your ISO low to minimize digital noise, and let the shutter speed adjust automatically for the right exposure. If your image is too bright or too dark, use exposure compensation to make slight adjustments.
Portrait photography
In portrait photography, the goal is often to isolate the subject from the background using a shallow depth of field.Tips for portrait photography – Use a wide aperture (low f-stop number) to blur the background and make your subject stand out. Set your camera to aperture priority mode or manual mode to control the aperture and shutter speed. Ensure there is enough light on your subject by adjusting the ISO or using additional lighting if necessary. If shooting in auto mode, use exposure compensation to adjust the brightness of the image.
Sports and action photography
Capturing fast-moving subjects requires careful control of shutter speed to freeze motion and prevent blur.

Tips for sports and action photography – Use a fast shutter speed (e.g., 1/1000 or faster) to freeze the action. Set your camera to shutter priority mode to control the shutter speed while the camera automatically adjusts the aperture.Increase the ISO if needed to maintain proper exposure, but be mindful of digital noise. Using a telephoto lens can help you get closer to the action, but remember to adjust the shutter speed to account for any potential camera shake.
Low-light and night photography
Shooting in low light or at night poses unique challenges, requiring adjustments to all three elements of the exposure triangle.

Tips for low-light photography – Use a slow shutter speed to allow more light to reach the camera sensor. A tripod is essential to prevent camera shake during long exposures. Open the aperture wide to let in as much light as possible, and increase the ISO to enhance the sensor's sensitivity to light.Be cautious of digital noise at high ISO settings and use noise reduction techniques in post-processing. Experiment with different exposure times to achieve the desired effect, whether it's capturing the stars in the night sky or creating light trails from moving vehicles.
Using the light meter
Most digital cameras come with a built-in light meter that helps you gauge the exposure before taking a shot.Tips for using the light meter – Pay attention to the exposure meter in your camera's viewfinder. It typically shows a scale with a zero in the middle, indicating a balanced exposure.Adjust your shutter speed, aperture, or ISO to keep the indicator near the center for a properly exposed image. Use spot metering for more precise control over exposure, especially when dealing with tricky lighting conditions.
Exposure and post-processing

Even with careful attention to camera settings, sometimes the images captured may not be perfectly exposed. Post-processing can help adjust and refine exposure to achieve the desired results.
Adjusting exposure in post-processing
Post-processing software like Photoshop provides powerful tools to adjust exposure. You can brighten an underexposed image or darken an overexposed image, ensuring your photos have the appropriate exposure.Tips for adjusting exposure – Use the exposure slider to adjust the overall brightness of your image. Fine-tune highlights, shadows, and midtones to achieve a balanced look. Pay attention to the histogram to avoid clipping highlights or shadows. Additionally, use tools like the exposure adjustment brush for targeted corrections.
Correcting exposure values
When you adjust exposure in post-processing, you are essentially modifying the exposure values of your image. This can help recover details in both the highlights and shadows, creating a more balanced and visually appealing photo.Tips for correcting exposure values – Utilize the histogram to guide your adjustments. Move the sliders for exposure, contrast, highlights, and shadows until the histogram shows a well-distributed range of tones. Avoid making extreme adjustments that can introduce digital noise or artifacts.
Using exposure meters and histograms

hHstogram of sunflower imageAn exposure meter helps you measure the light in your scene, providing a reference point for making adjustments. Histograms, on the other hand, visually represent the tonal distribution of your image, showing how much light is captured in different parts of the photo.Tips for using exposure meters and histograms – Before taking a shot, use your camera’s built-in exposure meter to gauge the light levels and adjust your settings accordingly. After capturing the image, review the histogram to check for any exposure issues. Make necessary adjustments in post-processing to achieve a properly exposed photo.
Creative uses of multiple exposure and double exposure

Multiple exposure and double exposure techniques can be used creatively to produce unique and artistic images. They involve combining two or more exposures into a single frame, either in-camera or during post-processing.Check out our in-depth guide to double exposure.Tips for creative exposures – Plan your shots carefully, considering how the different exposures will interact. Use post-processing software to layer images and adjust opacity for a seamless blend. Experiment with different subjects and settings to create visually compelling compositions.
Practice, practice, practice
Mastering exposure in photography requires continuous practice and experimentation. Through regular practice, you can develop a deeper understanding of how to achieve the desired exposure in various conditions.
Understanding your camera's settings
Spend time familiarising yourself with your camera's settings, including aperture, shutter speed, and ISO. Practice shooting in different lighting conditions and using various modes such as manual exposure and auto exposure.Tips for understanding settings – Start by exploring your camera's manual mode to see how adjusting aperture and shutter speed affects the exposure. Pay attention to the light meter and exposure meter to guide your adjustments and achieve the desired exposure.
Experimenting with different exposure techniques
Try out various exposure techniques to enhance your creative skills. This includes using slow shutter speeds for long exposure photography, experimenting with multiple exposure settings, and adjusting the exposure value.

Example of a multiple exposure photoTips for experimenting – Use slow shutter photography to capture motion blur, such as flowing water or light trails. Experiment with multiple exposure and double exposure to create unique compositions. Adjust the exposure value to fine-tune the brightness and achieve a balanced exposure.
Evaluating and refining your work
After each shooting session, review your images to evaluate the exposure. Look for overexposed or underexposed areas and make notes on how you can improve. Post-processing tools can help adjust exposure and correct any issues.Tips for evaluation – Use software like Adobe Lightroom to adjust exposure settings and correct any imbalances. Check the histogram to ensure a well-distributed range of tones. Use the exposure adjustment tools to refine the brightness and contrast of your images.
Incorporating advanced techniques
Advanced techniques like using a telephoto lens and understanding focal length can help you achieve more creative and dynamic shots. Experiment with these methods to expand your photographic repertoire.

A telephoto lensTips for advanced techniques – Use a telephoto lens to capture distant subjects with a shallow depth of field. Experiment with different focal lengths to see how they affect the composition and exposure. Practice using smaller apertures to achieve a greater depth of field in landscape photography.By consistently practicing and experimenting with different settings and techniques, you'll gain a better understanding of how to achieve the desired exposure.
Conclusion
Mastering exposure in photography can seem daunting at first, but with practice and a solid understanding of the fundamentals, you'll soon be capturing images with perfect brightness and stunning detail. Remember to experiment with different settings, embrace the learning process, and don't be afraid to make mistakes. Each photo you take is a step closer to mastering your craft.Happy shooting, and may your journey to capturing the perfect exposure be filled with creativity and joy! If you have any questions or need further guidance, feel free to reach out – we're here to help you every step of the way.
TYX Photography Studios

Our top-tier London photography studio offers everything you need to elevate your projects. Equipped with state-of-the-art gear, including 4 Profoto D2 1000 flash heads and a full set of modifiers, we ensure optimal brightness and clarity.Our expert team is here to help you achieve your vision. The studio features a professional 4x5m infinity cove and a 7m runway leading to the Colorama holder, providing ample space for your creative ideas.More than just a studio, TYX is a vibrant hub for creatives. Enjoy cosy lounges and a contemporary café, perfect for networking, brainstorming, and connecting with fellow creatives.Book today and take your photography the next level!
Frequently Asked Questions
Yes, TYX Studios provides a selection of professional photography equipment for rent. Please contact us for a detailed list of available gear and rental terms.
Our photo studios cater to a variety of photography needs, including fashion shoots, product photography, portrait photography, and more. Whatever photo shoot you have in mind, our facilities are equipped to support diverse creative projects.
Yes, we encourage you to visit our studio spaces to see if they fit your shooting style. Please contact us to schedule a visit and see the facilities firsthand.
The rule of exposure, often referred to as the exposure triangle, involves balancing shutter speed, aperture, and ISO to achieve the correct exposure. Properly adjusting these settings ensures your image has the right brightness, with details visible in both the highlights and shadows.
Exposure in photography is the amount of light that hits the camera's sensor, determining how light or dark an image appears. It's controlled by three settings: shutter speed (how long the sensor is exposed to light), aperture (how much light is let in), and ISO (the sensor's sensitivity to light).
Exposure mode refers to the camera settings that determine how shutter speed, aperture, and ISO are controlled. Common modes include manual (M), shutter priority (S or Tv), aperture priority (A or Av), and auto mode, each offering different levels of control over the exposure settings.