


How to Record Music—Essential Tips for Beginners
Learning how to navigate the world of music production can seem daunting, but with the right tools, setup, and techniques, anyone can start producing high-quality recordings from their home studio. In this detailed guide, we’ll walk through everything from to take your music production to the next level.
Table of Contents
- The importance of the right setup
- Essential equipment for a home recording studio
- The recording chain: Setting up for success
- Understanding the music production process
- Improving your music production skills
- Troubleshooting common challenges in the recording process
- The future of your music career
The importance of the right setup
Before you even start recording, having a well-equipped home recording studio is essential. Whether you're producing your own music or working with other artists, the quality of your recordings depends heavily on the gear you use and the space in which you work.
Creating an inspiring environment
One often overlooked aspect of setting up a production studio is the environment itself. An inspiring, well-organised space can greatly enhance your creativity and productivity. Consider the following when designing your recording environment:

Lighting – Natural light can boost your mood and creativity, so try to set up your studio in a space that has good lighting. You can also use ambient lights to create a more relaxed atmosphere.Comfort – Make sure your workspace is comfortable. A good chair and desk can make a big difference during long sessions. Consider ergonomic setups that promote good posture.Soundproofing – If you’re recording in a noisy environment, investing in some soundproofing materials can help eliminate external noise. Heavy curtains, acoustic panels, or even rugs can absorb sound and reduce echo.
Essential equipment for a home recording studio
Once you have a suitable environment, it’s time to focus on the equipment you’ll need for your home recording studio. The following items are essential for capturing high-quality audio and creating polished tracks.
Computer
At the heart of your studio is your computer. It will run your digital audio workstation (DAW), the software where you will record, edit, and mix your tracks. Make sure your computer is powerful enough to handle the software and any plugins you plan to use.
Digital Audio Workstation (DAW)
The DAW is your main hub for creating and arranging music. Whether you choose Logic Pro, Ableton Live, FL Studio, or Pro Tools, make sure your DAW is capable of handling multiple tracks and plugins without crashing. Familiarise yourself with its features to make the most of your recording sessions.
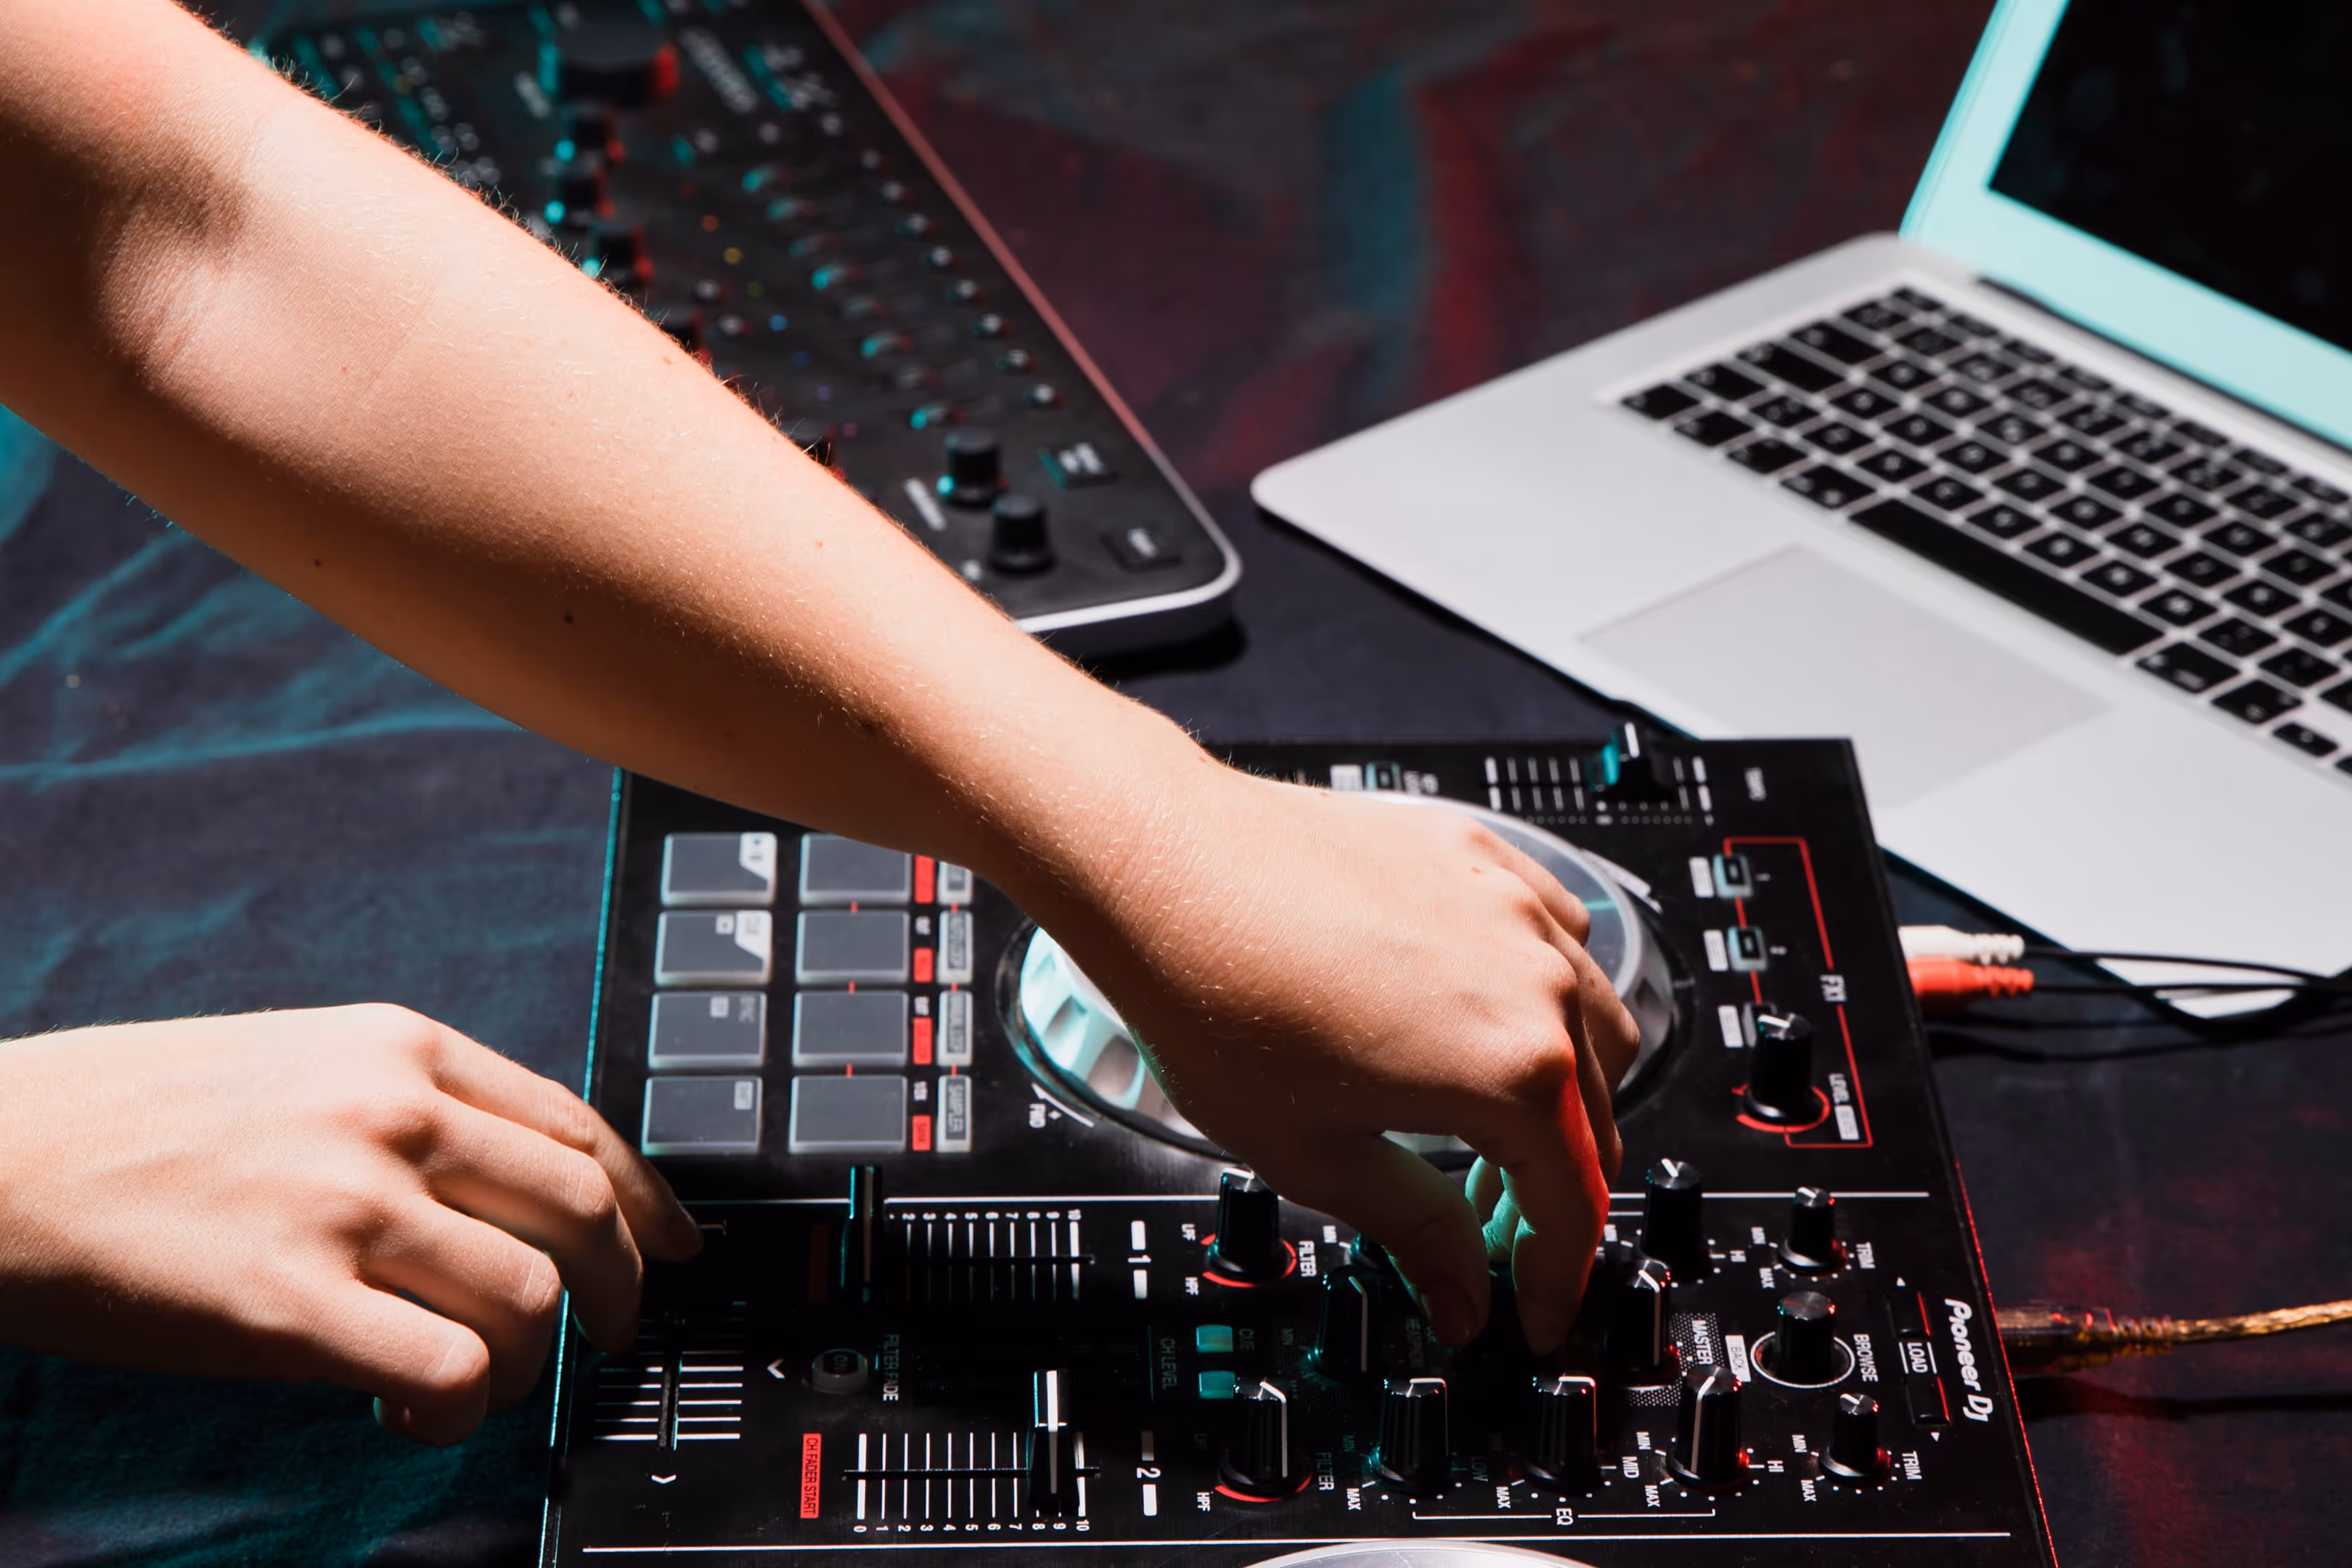
Audio interface
This device is critical for converting analogue sound (from microphones or instruments) into digital signals that your computer can process. The audio interface also allows you to record vocals and instruments with clarity and precision, ensuring excellent audio quality. Look for interfaces that offer:
- Multiple inputs for various instruments
- High-quality preamps to enhance your recordings
- Low-latency monitoring for real-time playback
Studio monitors
Unlike standard speakers, studio monitors provide a flat, uncoloured sound, allowing you to hear the recordings as they truly are. This is crucial during the mixing stage, where accurate monitoring can make or break a track. Consider investing in good studio monitors to ensure your mixes translate well to other listening environments.
Microphones

A good mic is essential for capturing vocals or acoustic instruments like acoustic guitar. For vocals, condenser mics are a popular choice because they pick up the subtleties in the voice, while dynamic mics are better suited for louder instruments such as electric bass and drums. Here’s a quick overview of the types of mics you might consider:
- Condenser mics – ideal for capturing detailed sounds, perfect for vocals and acoustic instruments.
- Dynamic mics – durable and great for high-volume sources like guitar amps and drums.
- Ribbon mics – offer a warm sound, often used for vintage-style recordings.
Pop filter
A pop filter is essential for recording vocals as it helps reduce the harsh “p” and “b” sounds, preventing them from distorting the recording. This simple tool can greatly improve the clarity of your vocals in the mix. Consider having multiple pop filters on hand for different microphones to ensure you can maintain high quality across various setups, even in a home studio.
MIDI keyboard

If you're incorporating virtual instruments or working with electronic music, a MIDI keyboard allows you to input notes and trigger samples more efficiently. Look for keyboards that are compatible with your DAW and have a good range of controls.
The recording chain—setting up for success
The recording chain refers to the order in which your audio signals flow, from the source to the final recording in your DAW. This chain is critical to achieving high audio quality and maintaining clarity throughout your project.
A typical recording chain
The standard production process for home studios often follows this path:
- Instrument or microphone → Audio input (via the audio interfaces) → Computer (via DAW)
This simple chain helps ensure your sounds are captured accurately. Let’s take a closer look at the elements involved:Microphones – As mentioned earlier, your microphone choice matters. If you’re recording vocals, a condenser mic is usually ideal. For acoustic instruments like acoustic guitars, experiment with mic placement to find the sweet spot that captures the instrument's natural tone. When using dynamic mics, consider their durability and ability to handle higher sound pressure levels.Audio interface – Your audio interface is where the sound enters your computer. It’s responsible for converting analogue sound to digital. Most interfaces come with audio inputs for microphones, instruments, and studio monitors, as well as MIDI keyboard integration for those working with virtual instruments.Studio monitors – Once your track is recorded, accurate studio monitors are essential for fine-tuning your mix, ensuring that your final product sounds great on all types of playback systems.
Understanding the music production process
The music production creative process can be broken down into three key stages: recording, mixing, and mastering. Each stage requires attention to detail and skills that develop over time as you gain more experience. Whether you're creating a simple demo or a full-length album, these stages are universal to any music producer.
Stage 1: Recording
The recording stage is where you capture your musical ideas. It’s the most creative part of the music production process, allowing you to bring your own music to life. Here are some essential tips for beginners when recording:

Set proper gain levels – The gain is the amount of amplification applied to your signal. Too much gain can cause distortion, while too little will result in a weak signal. Aim for a signal level between -12dB and -6dB for best results.Use pop filters for vocals – As mentioned earlier, a pop filter will prevent harsh consonant sounds from distorting the vocal recordings.Experiment with mic placement - If you're recording acoustic instruments, experiment with different mic positions. For example, when recording acoustic guitar, place the mic slightly off-centre from the soundhole for a fuller sound.Direct Input (DI) – If you're recording instruments like electric guitar or bass guitar, you can use a DI box to capture the sound directly into your audio interface. This method often yields a clean, polished sound that can be further enhanced with plugins in your digital audio workstation.Use high-quality cables – Poor-quality cables can introduce noise and reduce audio quality. Always invest in good-quality cables to ensure a clear signal.
Stage 2: Mix stage
After you’ve captured your tracks, it’s time to move to the mixing stage. This is where you blend all your recorded elements into a cohesive track. Mixing is as much an art as it is a technical skill, and it takes time to develop your ear for it. Here are some basic tips for the mixing session:
EQ and compression – Equalisation (EQ) allows you to adjust the frequency balance of each track, while compression controls the dynamics. Use EQ to carve out space for each instrument in the mix, ensuring that the vocals don’t clash with the guitar or drums.Panning – Panning allows you to spread instruments across the stereo field. For example, you might pan the electric bass slightly to the left and the rhythm guitar to the right, creating a more immersive listening experience.Layering tracks – To create depth, you can layer multiple takes of instruments or vocals. For example, layering two or three vocal recordings can give your mix a richer, fuller sound.Reverb and effects – Use reverb to add a sense of space to your track. For vocals, a small amount of reverb can create a professional sound without overwhelming the clarity of the audio recording.Automate levels and effects – Automation is a powerful tool in mixing that allows you to change levels or effects at specific points in the song. This can help create dynamic shifts and keep the listener engaged.Fine tune your mix– Pay close attention to each track and ensure that you’re achieving the right balance. This involves adjusting levels, EQ settings, and effects to ensure everything blends seamlessly.
Stage 3: Mastering
Mastering is the final step in the production process, where you polish the track for distribution. This stage focuses on refining the overall audio quality, ensuring that your song sounds balanced across different playback systems, from studio monitors to headphones and speakers.Volume level – Mastering ensures that the overall volume of your track is consistent with industry standards. If your track is too quiet, it may get lost on streaming platforms.Limiting and compression – These tools help control the loudness of the track, ensuring that it’s not too dynamic, which could cause distortion during playback.Final checks on different systems – After mastering, listen to your track on various playback systems (e.g., car stereo, earbuds, home speakers) to ensure it translates well across all formats.
Improving your music production skills
As with any craft, improving your music production skills requires practice and continuous learning. Even experienced music producers will tell you that the process of recording, mixing, and mastering is an evolving journey.
Learn the basics of music theory
While it’s not necessary to be an expert in music theory to create great music, having a basic understanding of chord progressions, scales, and harmonies will improve your ability to arrange songs. Understanding chord progressions in particular will allow you to craft more compelling and emotionally resonant tracks.
Chords and progressions – Familiarise yourself with common chord progressions such as the I-IV-V or ii-V-I sequences to create catchy hooks and verses.Scales – Learn about major and minor scales, as these are the foundation of most music. They will help you understand melodies and improvisation.Rhythm and timing – Pay attention to rhythm and timing, as they play a crucial role in music making. Experiment with different time signatures to add interest to your compositions.
Practice beat making
If you’re into hip hop or electronic music, beat making will likely be a core part of your music production process. Use your MIDI keyboard and virtual instruments to experiment with different sounds, rhythms, and effects.

Experiment with sample – Use samples and loops from libraries to get inspiration and create unique beats. Try chopping and manipulating them to add your flavour.Explore different genres – Don't limit yourself to one genre. Experimenting with various styles will expand your skill set and help you discover your unique sound.Use drum machines and MIDI – Incorporate drum machines and MIDI programming to create precise and intricate rhythms that suit your tracks.
Collaborate with other producers and artists
One of the most effective ways to improve your skills is by collaborating with other producers and other artists. Working with experienced producers can expose you to new production techniques and help you refine your mixing skills.

Networking – Attend local music events, join online communities, and connect with like-minded individuals. Building a network can lead to collaboration opportunities and valuable feedback on your work.Feedback sessions – Share your work with trusted friends or fellow producers and ask for constructive criticism. This can provide you with fresh perspectives on your tracks.Co-writing – Collaborating on songwriting or music production can lead to exciting new ideas and help you grow as a musician.
Our brand activation services, as part of the Tileyard Group, offer unparalleled opportunities for artists to connect with industry professionals and audiences, fostering growth and collaboration within the UK's largest creative community.Contact us to find out more.
Stay up to date with the latest tools and techniques
The music industry is constantly evolving, and new tools, plugins, and techniques are developed regularly. Stay updated with the latest trends in modern music production by attending webinars, watching tutorials, and participating in music forums.Follow industry leaders – Subscribe to YouTube channels, podcasts, and blogs run by industry professionals to gain insights into their techniques and processes.Experiment with new software – Don’t hesitate to try out new DAWs or plugins that can enhance your music production process. Many offer free trials, allowing you to test them before committing.Online courses – Consider enrolling in online courses that focus on specific aspects of music production, such as mixing, mastering, or specific genres.
Troubleshooting common challenges in the recording process
Even seasoned music producers encounter challenges in the music production process, but don’t be discouraged. The key is to be aware of common pitfalls and know how to troubleshoot them.
Ear fatigue

After hours of listening to the same track, your ears can become fatigued, making it harder to hear details. To combat this:Take frequent breaks – Step away from the mix session every hour or so to give your ears a rest. This will help maintain a keen ear for fine-tuning the details in your mix. Taking a longer break can also be beneficial if you feel particularly fatigued.Use reference tracks – Listening to professionally produced music in a similar genre can help guide your mixing decisions. This provides a benchmark for achieving the sound you want.Listen at lower volumes – High volume levels can cause ear fatigue faster. Try listening at a lower volume, especially during longer sessions.
Balancing high frequencies with low-end muddiness
Balancing the high frequencies with the bass and midrange is essential for creating a polished mix. Too much high-end can make your track sound harsh, while too much bass can muddy the mix.Use EQ to clean up the low-end – Especially in bass guitar and kick drums, cleaning up unnecessary frequencies will help your mix feel more spacious and clear.Adjust the high frequencies on instruments – Instruments like cymbals and vocals may require attention in the higher frequencies to avoid harshness while maintaining clarity.Check your mix in mono – Switching your mix to mono can help identify frequency clashes that may not be apparent in stereo. This ensures that your track sounds good on all playback systems.
The future of your music career
As you continue to refine your music production skills and build your catalogue of recordings, you’ll naturally begin to think about your future in the industry. Whether you're hoping to release your own music or work as a music producer for others, the skills you develop in your home recording studio will be invaluable in shaping your music career.
Building Your Portfolio
Having a strong portfolio of your work is essential for showcasing your abilities. As you improve, consider creating demo reels of your best tracks to share with potential collaborators or clients.Highlight your best work – When creating a portfolio, select your strongest tracks that showcase your range and skill set. Include various styles if you have them to demonstrate versatility.Create a website – Having a dedicated website can help you present your work professionally. Include samples of your recordings, a bio, and a way for potential collaborators to contact you.Utilise social media – Share snippets of your work on platforms like Instagram, TikTok, or SoundCloud. This can attract a wider audience and potential collaborators.

Networking in the music industry
Success in the industry isn’t just about technical talent—it’s also about relationships. Attend local music events, connect with other artists, and join online communities where you can share your work and get feedback from other producers.Attend workshops and events – Participate in local or online workshops where you can learn and meet other musicians. TYX writing camps are perfect for this, allowing you to connect with the UK's rising stars. his can lead to new opportunities and collaborations.Utilise music forums – Engage in music production forums to seek advice, share knowledge, and connect with like-minded individuals. Websites like Gearslutz and Reddit’s music production threads can be great resources.Be active on social media – Follow and interact with artists and producers on social media. This can open up opportunities for collaboration and feedback on your work.
Final thoughts
Learning how to record music as a beginner involves mastering a combination of technical skills, creative experimentation, and the right equipment. With patience and practice, your home recording studio can become a space where you craft professional-quality recordings. By following these tips and continuously improving your music production skills, you’re well on your way to creating outstanding music and potentially building a successful music career.

Whether you’re just starting or have been producing for a while, remember to enjoy the journey. Each track you create brings you one step closer to mastering the art of music production.Your path in the industry is uniquely yours. Embrace the challenges, learn from your mistakes, and keep pushing your creative boundaries. With dedication and passion, you’ll be well-equipped to produce music that resonates with you and your audience.
TYX Recording Studios
Experience the best of London's world-class recording studios at TYX. From our Red Studio, to our production facilities, we have the equipment and expertise to help you craft a sound that matches your vision.Whether you're preparing for a festival performance, releasing a chart-topping single, or aiming to capture the ideal sound, our dedicated team is here to guide and support your creative journey.

Get in touch today to book a session and make your next release unforgettable.
Frequently Asked Questions
Use the above tips to improve clarity and improve the overall quality of your audio. However, depending on the issues when you recorded it, it might be simpler to rerecord the audio. You can also change audio formats to see if that would have a change on your audio. Recording it in a high-quality format will help it retain more of the quality of the original recording.
Different mic placements and more mics can help you to record guitar and voice simultaneously. You can position a mic close to your voice and one close to your guitar. Make sure you use the same type of microphone. You could also use one mic, but make sure it's equidistant from your guitar and voice.
To improve your mixing skills, practice regularly, study professional mixes, and use reference tracks to guide your decisions. Learning EQ, compression, and panning techniques will also help you achieve a good mix.
To start recording music at home, you'll need a computer, a digital audio workstation (DAW), an audio interface, microphones, and studio monitors. Additional equipment like MIDI keyboards and pop filters can enhance your recordings.
A music producer oversees the entire recording process, guiding the creative direction and helping to shape the sound of the project. They collaborate with artists and engineers to ensure the final product aligns with the desired vision and quality standards.


How to Record Vocals Like a Pro
Discover how to record vocals like a pro. Build a reliable signal path, treat your room, position your mic stand, and coach confident performances. With the right setup and workflow, you’ll capture clear, high-quality vocals ready for mixing.

How to Record Bass Guitar Like a Pro
Learn how to record bass guitar that locks with drums, translates on small speakers, and needs less fixing later. Use this checklist-driven guide and work faster. This bass recording guide preserves the original flow and adds precise updates where needed.