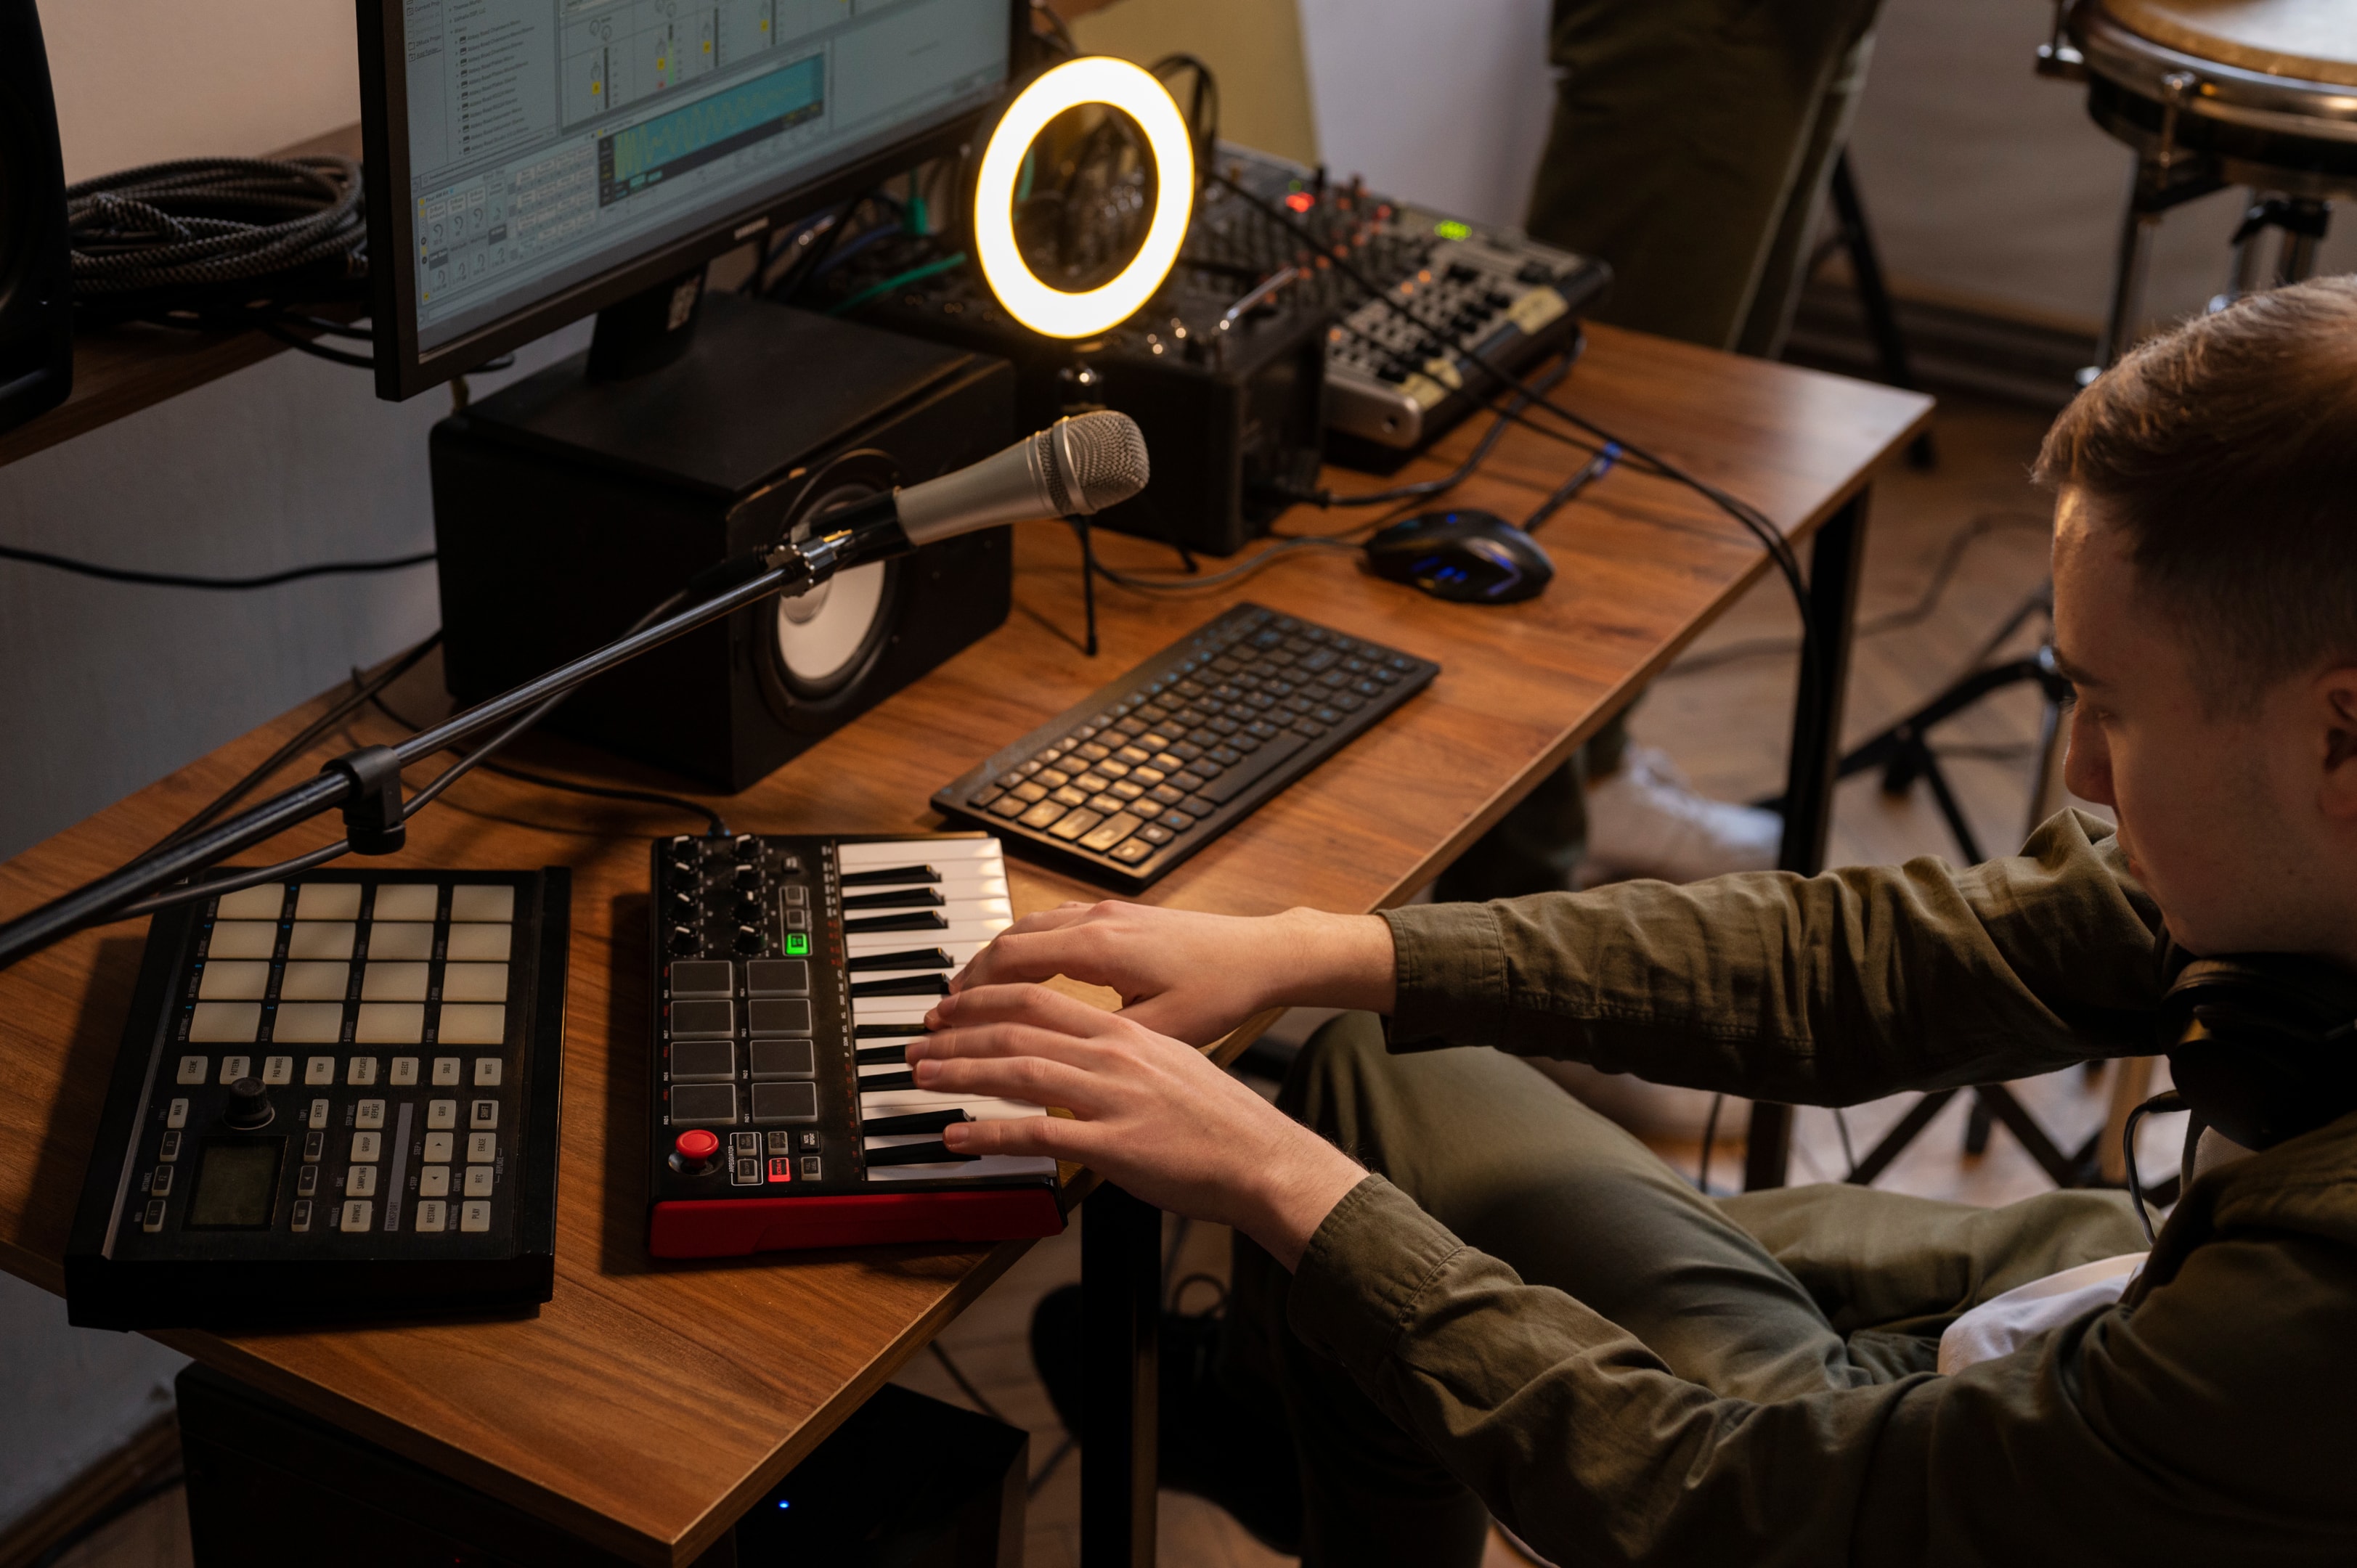
Building Your First Home Studio? This Guide Covers All Bases
Everything you need to create high-quality recordings and professional mixes from the comfort of your home. This in-depth guide covers essential gear, room setup, workflow tips, and expert advice to help you build a studio that fits your goals and budget.
The home studio has become a cornerstone of the modern music industry. From hobbyists to professional recording artists, having a space to create music on your own terms is more accessible than ever.
Thanks to advancements in recording equipment and software, you can now achieve studio-quality results from a small room with a few hundred dollars’ worth of carefully selected gear. Still, getting the setup right requires smart decisions about space, acoustics, and the tools you choose to invest in.
Building a great home studio doesn’t mean filling a room with expensive gear. Instead, it’s about smart studio design, focusing on your creative goals, and choosing the right equipment for your space and budget.
At TYX recording studios, we know that world-class studios don’t appear overnight. Every producer starts somewhere. This guide is here to help you build the best possible version of yours.
We've covered every base imaginable, from gear to layout to workflow tips. Whether you're recording vocals in a spare room or planning your first EP, you'll find practical, professional advice right here.
First, make a water-tight plan
Define Your Purpose
Before buying gear, define the purpose of your home studio. Are you primarily recording vocals, producing electronic music, podcasting, working with different genres, creating content for YouTube, or aiming to record bands? Clarifying your creative goals will ensure you only invest in what's essential – and avoid wasting money on gear you'll rarely use.
If your focus is on music production, for instance, prioritize your digital audio workstation, audio interface, and studio monitors. A content creator who also records video will need to factor in cameras, lighting, and soundproofing for better audio quality.
Budget accordingly
The budget is often the most critical factor in your home studio setup, but you can still achieve high quality recordings with a few hundred dollars if you’re strategic. A basic starting ratio for budgeting is:
70% – Hardware – This includes your audio interface, microphones, headphones, studio monitors, cables, and microphone stands. Invest most here to get a strong core setup.
20% – Software – This covers your DAW (e.g. Logic Pro, FL Studio, or Ableton Live) and any virtual instruments or plug-ins. While there are excellent free tools, a good DAW is well worth the price.
10% – Acoustic treatment – Even modest room treatment can make a huge difference. Budget for acoustic panels, foam panels, and bass traps, or use DIY methods to save money.
On a budget? Watch Karra's guide to building a wallet-friendly bedroom studio.
Rememeber, you can scale up or down
If you have more to spend, consider upgrading to higher-end gear like the Universal Audio Apollo Twin, or adding items like a vocal booth, external electric guitar amps, or a better camera lens.
If you’re working with a tight budget, start with essentials like a good microphone, interface, and free DAW software such as Cakewalk or Tracktion.
Make a list of everything you need based on your goals. Then, research and prioritise. For example:
- Want to record electronic music? A DAW, MIDI controller, and studio monitors should top your list.
- Planning to record bands or use a drum kit? Make sure you understand how many inputs your interface needs and what microphones suit each instrument.
You don't need expensive gear in the first instance, but you do need to plan carefully. Future-proof your setup by choosing gear that allows for expansion.
For example, a 2-in/2-out interface is fine for solo recording, but might feel limiting if you decide to add more instruments or record in other rooms.
Choose a suitable room
Choosing the right room is a crucial first step in building a home studio that delivers professional results. The space you select will affect everything from your sound quality to how comfortable and efficient your workflow is.
Start by identifying a room that’s as quiet and isolated as possible. Avoid areas near AC units, the next room with heavy foot traffic, or shared walls where external background noise can bleed into your recordings. Rooms with minimal outdoor exposure (like those facing busy streets) are typically better choices.
Ideal room characteristics
While a small room can work, make sure there’s enough space for your equipment and movement. Compact spaces often introduce challenges with bass frequencies, so room treatment becomes even more important.
Shape – Rectangular rooms are generally better than square ones, as they reduce the risk of problematic frequency build-up. Avoid oddly shaped spaces with lots of nooks unless you have experience with studio design.
Surfaces – Hard, reflective surfaces (wood floors, bare walls, glass windows) cause unwanted reflections and standing waves. You’ll need to address this with acoustic foam, foam panels, or even rugs and curtains.
Ceiling height – Higher ceilings are better for recording vocals and instruments as they reduce reflections. Lower ceilings can cause flutter echoes and should be treated with ceiling panels or absorbers.
Ensure there's natural light and ventilation
Natural light helps create an inviting and productive space – especially if you’ll be spending long hours mixing or working on audio production. However, too much direct sunlight can affect your gear or cause video lighting inconsistencies. Consider blackout curtains or blinds that give you full control over the lighting.
Ventilation is important too. Make sure the room isn’t too hot or stuffy, but avoid using noisy fans or air conditioners during takes. Portable AC units or silent ventilation systems are best if temperature control is needed during sessions.
Multi-purpose considerations
If your own home doesn’t have a spare room, you can still build a functioning home studio in a shared or other room. Just be aware of compromises in acoustics and noise control.
In such cases, opt for portable solutions like reflection filters, mobile microphone stands, and foldable acoustic panels that can be set up and stored easily.
Also, think about future plans. Will you be recording vocals, filming video content, or tracking live instruments? Planning ahead ensures the room layout suits your evolving needs, and that you’re not stuck rebuilding the space later.
Choose the right input & recording equipment
Audio interface
The audio interface is the bridge between your instruments, microphones, and computer. It converts analogue signals into digital audio that your digital audio workstation (DAW) can process – and then back into sound for playback through your studio monitors or headphones.
Without one, your home studio setup won't be able to capture or monitor high-quality recordings effectively.
Whether you're recording vocals, an electric guitar amp, a drum kit, or working with virtual instruments, a reliable interface is a must for accurate, low-latency recording.
Key features to consider
When choosing an audio interface, keep the following in mind:
- How many inputs – Solo artists may only need 2 inputs, while those who record bands or acoustic drums will need 4, 8, or more to accommodate multiple microphones and instruments at once.
- Line input vs mic input – Microphones need preamps and XLR inputs, while synths, keyboards, and drum machines can often use standard line inputs. Check your gear and plan accordingly.
- Phantom power – Needed for condenser microphones, phantom power (usually labelled +48V) is essential for capturing detailed sound
- Outputs – Ensure your interface has at least two balanced outputs for connecting to studio monitors. More outputs allow for advanced routing and external gear.
- Headphone output with volume control – Vital for accurate monitoring during recording and mixing.
Latency performance is also crucial. Look for interfaces with reliable drivers and low round-trip latency, especially when recording vocals or tracking instruments in real time.
Recommended models
There are many great interfaces available across different price points. Here are a few well-regarded options:
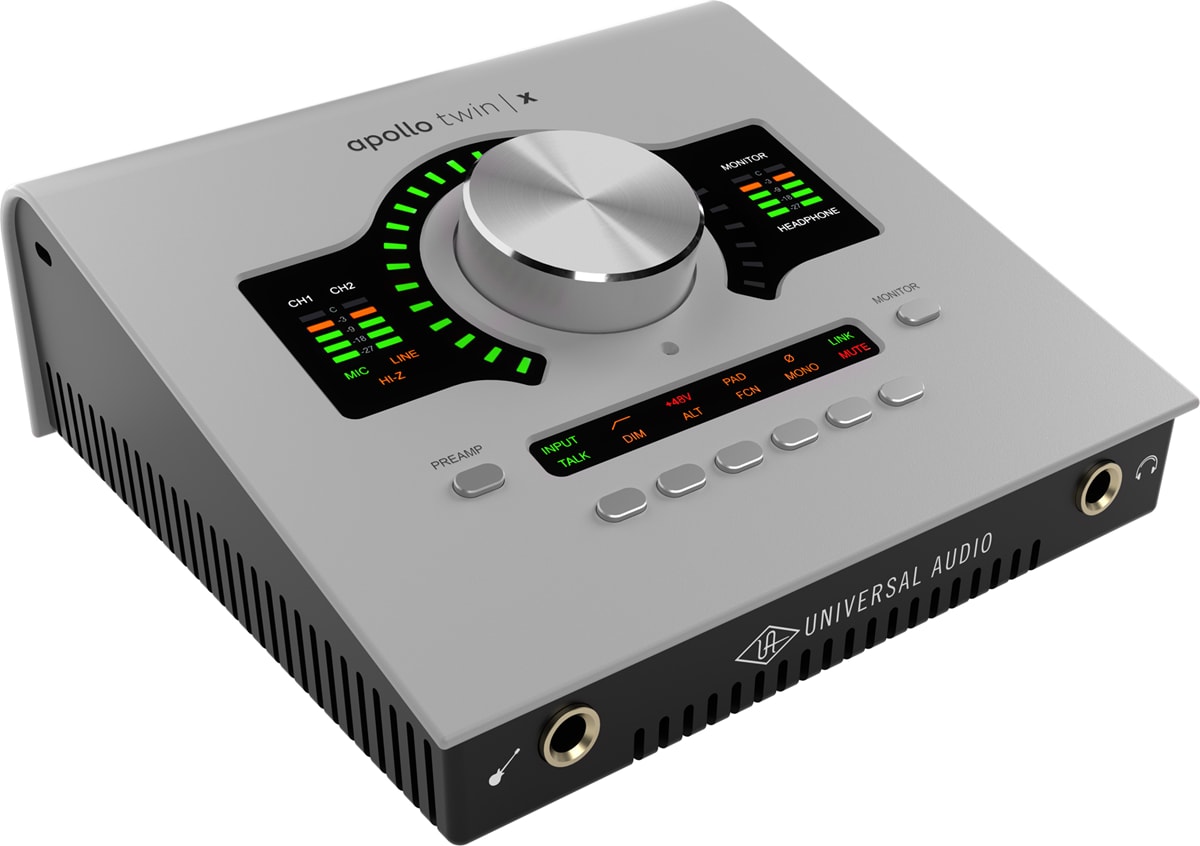
Universal Audio Apollo Twin – A popular choice in professional studios and high-end home studios alike. It offers pristine conversion, powerful onboard DSP for real-time effects, and seamless integration with UAD plug-ins.
Focusrite Scarlett series – Affordable, reliable, and ideal for beginners. Offers clean preamps and solid build quality.
Audient iD series – Known for their excellent preamps and desktop-friendly design. Great for singer-songwriters and solo creators.
MOTU M2/M4 – Excellent value with great metering, high-quality audio, and ultra-low latency.
PreSonus Studio series – Integrates well with Studio One and includes software bundles to get started quickly.
Connection types
Your computer will determine which connection types you can use:
- USB – The most common and widely compatible. Nearly all modern interfaces support USB-C or USB 2.0.
- Thunderbolt – Offers faster speeds and lower latency. Common on Macs and higher-end setups, including the Apollo Twin.
- PCIe – Found in desktop-only systems and used in some professional recording environments, though less common for home use.
Make sure your interface is compatible with your operating system and DAW. Some interfaces also include loopback features, which are helpful for podcasting or streaming.
Long-term considerations
Start with the inputs you need now, but think ahead: Will you add a drum kit, hardware synths, or outboard gear later? Interfaces with ADAT expansion allow you to scale your system without replacing it entirely.
Also, make sure the interface integrates easily with the rest of your setup – your microphone stands, studio monitors, and other gear should all connect smoothly. Well-matched equipment makes for faster sessions and better results.
Microphones
Check out Edward Smith's reviews of top mics for home recording
Microphones are one of the most essential pieces of equipment in any home studio setup. They’re responsible for capturing sound at the source – be it vocals, an electric guitar amp, a drum kit, or acoustic instruments – and feeding it cleanly into your audio interface for processing in your digital audio workstation (DAW).
Selecting the right microphone is key to achieving high quality recordings, and it’s important to match the mic to your intended use. You don’t need a massive collection – just a solid, versatile mic (or two) suited to your creative needs.
Microphone types
There are three main microphone types to be aware of:
Condenser microphones – Ideal for studio use, particularly for recording vocals and acoustic instruments. They’re highly sensitive, offer great frequency response, and capture detail with clarity.
These mics require phantom power, which is usually supplied by your audio interface.
Dynamic microphones – Less sensitive than condensers and better for louder sources like electric guitar amps or snare drums. They're robust, don’t require phantom power, and are commonly used in both live and studio settings.
Ribbon microphones – These are more specialised and deliver a warm, vintage tone. While less common in starter studios, they’re excellent for smooth vocals or taming bright instruments in more advanced setups.
Understanding polar patterns
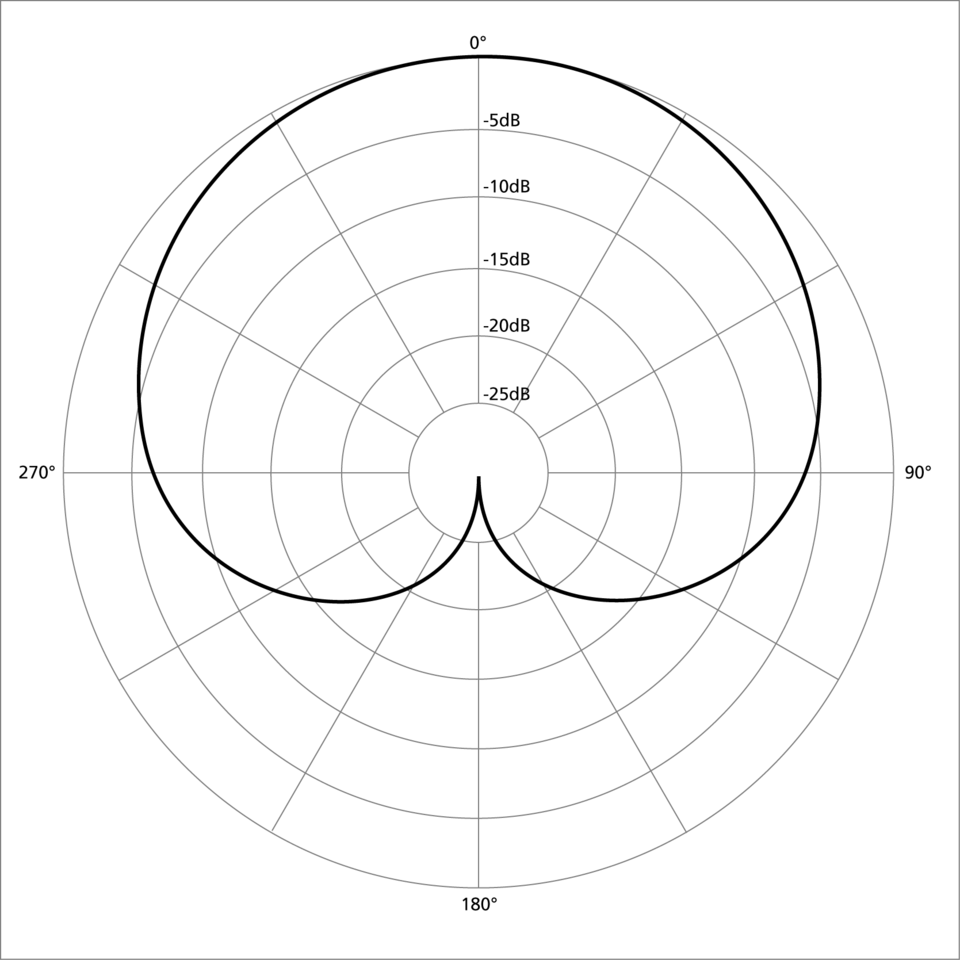
Example of cardio polar pattern
Most home studios benefit from cardioid microphones, which focus on capturing sound from the front and reject room reflections and background noise.
Other polar patterns, such as omnidirectional or figure-8, are used for specific applications like stereo or ambient recordings, but they require well-treated rooms for optimal results.
Recommended microphones by category
Vocals
- Rode NT1-A – A quiet, large-diaphragm condenser microphone known for clarity and warmth. Great for singers, voiceover artists, and YouTubers.
- Neumann TLM 103 – Premium large-diaphragm condenser offering crystal-clear vocal capture and excellent off-axis rejection. Ideal for professional studio quality vocal work.
Electric guitar amps
- Shure SM57 – A studio staple, this dynamic mic handles high SPLs and delivers punchy, focused recordings from amps and cabinets.
- Sennheiser e609 – Designed for guitar cabs, this flat-front mic makes amp miking easy and produces a tight, true-to-source sound.
Acoustic instruments
- AKG C414 – A highly versatile condenser mic with multiple polar patterns. Excellent detail for guitar, strings, piano, and more.
- Audio-Technica AT4050 – Great frequency response and clarity, ideal for nuanced acoustic recordings and different genres.
Drum kits
- Shure Beta 52A – Built for kick drums, offering punch and clarity with great low-end presence.
- Sennheiser MD 421 II – A dynamic mic perfect for toms and percussion, delivering full-bodied sound with minimal distortion.
Podcasts and voiceovers
- Blue Yeti – A plug-and-play USB condenser mic with selectable polar patterns. Great for content creators starting out.
- Audio-Technica AT2020USB+ – A USB version of the popular studio mic, offering clarity and ease of use for podcasting and vocal work.
Essential accessories
To get the best out of your microphone setup, make sure you have:
Pop filters – Reduce plosive sounds (‘P’ and ‘B’) for cleaner vocals.
Microphone stands – Boom stands offer the most flexibility for positioning.
Shock mounts – Isolate the mic from vibrations and handling noise.
Quality XLR cables – Provides clean signal paths with minimal interference.
Budget and upgrade path
You can start with a reliable condenser mic and interface for a few hundred dollars, and still achieve results that rival more expensive gear – provided your room is treated properly. Over time, you may want to expand your mic collection to suit a broader range of sources or refine your sound across different genres.
When paired with the right room treatment and placement techniques, even a small room can produce studio-quality recordings. Focus first on getting the right mic for your primary use case – it’s better to have one well-matched mic than “all the gear” that doesn’t suit your workflow.
Guide to MIDI controllers
Watch Sweetwater's video for tips on choosing MIDI controllers for beginners
A MIDI controlleris a vital tool in any home studio setup, especially if you’re into music production, composing, or creating beats. It doesn’t generate sound by itself but sends MIDI data to your digital audio workstation (DAW), allowing you to trigger virtual instruments, drums, samples, and effects with precision.
Think of it as an extension of your DAW – offering full control over performance, expression, and workflow, from synth lines to drum programming. Even if you're not a trained pianist, a controller can dramatically speed up your creative process.
Types of MIDI controllers
There are several types of MIDI controllers, each suited to different workflows and genres:
Keyboard controllers
These are the most common form of MIDI controller. They mimic a piano-style layout and are ideal for creating music with virtual instruments like pianos, synths, strings, and pads.
Best compact option – Arturia MiniLab 3 – A 25-key MIDI controller that’s ideal for small desks and mobile setups. It includes assignable knobs, pads, and software integration with Ableton Live and Analog Lab. Perfect for electronic producers or beginners with limited space.
Best mid-size option – Novation Launchkey 49 Mk3 – A 49-key controller with deep Ableton Live integration, velocity-sensitive keys, pads, and knobs. Great for those producing full tracks or playing more expressive parts.

Best full-size option – Native Instruments Komplete Kontrol S88 Mk2 – A premium, fully-weighted 88-key controller with smart integration for Komplete instruments, DAWs, and plugins. Ideal for piano players or composers looking for a high-end feel and intuitive control.
Pad controllers
Pad controllers are designed for beat-making, triggering samples, and live performance. They’re particularly popular in hip-hop, electronic, and DJ-style setups.
- Best all-rounder – Akai Professional MPD218 – Features 16 responsive MPC-style pads and assignable knobs. Portable, simple, and perfect for tapping out drums or loops.
- Best advanced option – Ableton Push 2 – Designed specifically for Ableton Live users, Push 2 offers deep DAW integration, a grid of velocity-sensitive pads, and real-time control over clip launching, mixing, and effects. Ideal for performance and production in one.
Hybrid controllers (keyboard + pads + knobs)
These combine piano keys with drum pads, sliders, and encoders – giving you full control over both performance and mixing elements.
Best all-in-one – Akai MPK249 – A versatile controller with 49 semi-weighted keys, 16 pads, 8 knobs, and 8 faders. It’s well-suited for hybrid producers working across different genres, offering flexible control for synths, drums, and DAW parameters.
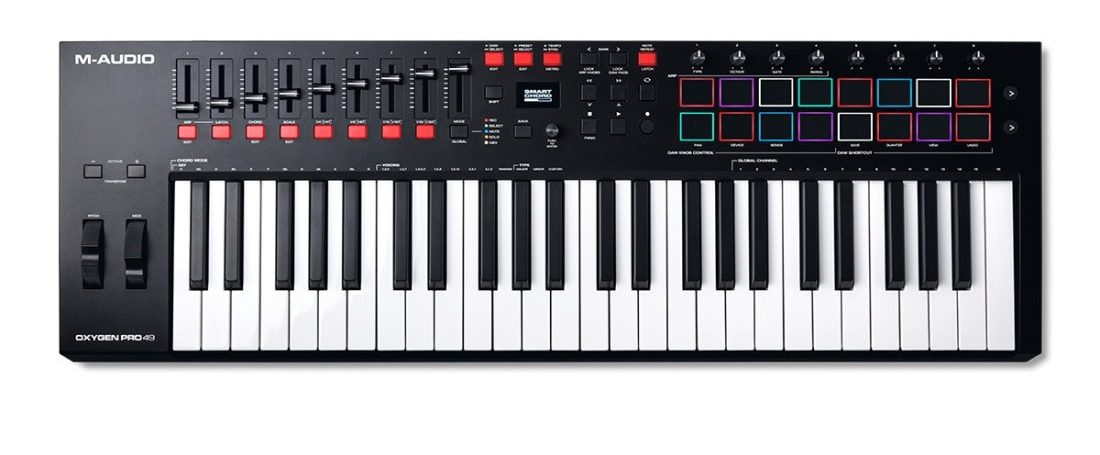
Best for beginners – M-Audio Oxygen Pro 49 – Offers great features for the price, including auto-mapping, built-in arpeggiators, and smart chord modes. It integrates easily with all major DAWs like FL Studio, Logic Pro, and Ableton Live.
Alternative performance controllers
If you're into experimental or non-traditional workflows, alternative MIDI controllers open up new ways to create music using gestures or unconventional layouts.
Best expressive controller – ROLI Seaboard Rise 2 – A soft, pressure-sensitive surface that lets you control pitch, timbre, and modulation with gestures. Brilliant for sound design and expressive synth work.
Best for modular setups – Arturia BeatStep Pro – Combines sequencing, control, and performance in a single unit – great for hardware synth lovers or hybrid digital/analogue setups.
What to consider when buying
When choosing a MIDI controller, ask yourself:
- How much space do you have in your home studio?
- Do you need keys, pads, or both?
- What DAW are you using – and is the controller natively compatible?
- Will you be performing live, or using it strictly for studio production?
If you're working in a small room or sharing space with other rooms, a compact 25-key controller might be ideal. If you’re aiming to record bands or work across different genres, a 49- or 61-key controller with assignable faders gives you more flexibility.
Now for production & processing
Computer specs and storage
Your computer is the central hub of your home recording studio – everything from tracking to mixing and mastering runs through it. That makes choosing the right machine absolutely essential, especially if you're working with demanding sessions in a digital audio workstation like FL Studio, Ableton Live, or Logic Pro X.
What specs do I need for smooth performance?
To achieve smooth performance, your computer should meet these baseline specifications:
Processor – A quad-core CPU (Intel i5/i7 or Apple M1/M2) is recommended for handling multiple plug-ins, virtual instruments, and high-track-count sessions.
RAM – At least 8GB of RAM is the minimum. For more complex audio production or running sample-heavy libraries (like orchestral instruments or detailed synths), consider upgrading to 16GB or more.
Storage – Fast storage is crucial. An SSD (solid-state drive) significantly reduces loading times for your DAW and sample libraries compared to traditional HDDs.
If you’re serious about making music regularly, avoid entry-level laptops with limited processing power. Instead, choose a system designed for media production, or consider building a desktop that you can upgrade over time.
Internal vs external storage
Large recording sessions, multi-track projects, and sample libraries take up substantial space. An internal SSD (500GB–1TB) is good for your OS, DAW, and frequently used plug-ins. For everything else, invest in external storage.
- External SSDs are ideal for fast file access during sessions.
- External HDDs offer more space for archived projects at a lower cost.
- Use one drive for session storage and another for backup – this protects against data loss.
It’s a good idea to structure your storage into folders for projects, stems, plug-ins, and samples, keeping your workflow organised and fast.
Mac or Windows?

Both platforms are fully capable of high-quality recordings, so the choice depends on your preferred DAW and budget:
- Mac systems are optimised for software like Logic Pro X and tend to offer excellent stability and long-term reliability.
- Windows PCs provide more flexibility and customisation, often at a lower cost, and are compatible with a wider range of third-party hardware.
Optimisation tips
Once your computer is set up, keep it optimised for audio work:
- Disable background processes and auto-updates during sessions.
- Use a dedicated user profile for your studio to minimise distractions.
- Keep system drivers and DAW software updated to ensure compatibility with your recording equipment.
If you work on large collaborative projects or in different genres, a fast and efficient computer setup allows you to switch between tasks with ease – from recording an acoustic set to mixing an electronic music track.
Digital audio workstation (DAW)
Watch AP Mastering's opinion of where available DAWs rank
The digital audio workstation, or DAW, is the core software of your home studio. It allows you to record bands, produce beats, record vocals, edit tracks, layer virtual instruments, and handle the entire audio production workflow.
Without a reliable DAW, even the best recording equipment can fall short.Think of the DAW as your virtual tape machine, mixing desk, and effects rack all in one. It's where ideas are shaped into full productions, whether you’re working in electronic music, pop, rock, or different genres.
How to choose the right DAW
There’s no one-size-fits-all DAW. The best choice depends on your musical style, workflow, and budget. Here are some of the most popular options:
Logic Pro X – A favourite for Mac users, Logic offers a powerful suite of virtual instruments, professional-grade plug-ins, and an intuitive layout. Ideal for songwriting, film scoring, and full album production.
Ableton Live – Known for its loop-based workflow and versatility in live performance and electronic production. Great for beatmakers and DJs.
FL Studio – Popular with electronic and hip-hop producers for its fast, pattern-based sequencing and user-friendly interface.
Pro Tools – An industry standard in professional studios, used for everything from mixing music to editing film sound, Pro Tools is best for those looking to work in the music industry or collaborate with engineers.
Studio One, Cubase, and Reaper – These DAWs also offer excellent flexibility, with varying price points and workflows to suit different needs.
What features should I look for in a DAW?
We recommend carefully checking for key features that match your goals:
Multitrack recording – For layering vocals, instruments, and virtual instruments.
MIDI sequencing – Essential for working with synths, samplers, and your MIDI controller.
Audio editing tools – Look for easy drag-and-drop editing, fades, pitch correction, and time stretching.
Plug-in support – Ensure the DAW supports third-party VST, AU, or AAX plug-ins, depending on your system.
Mixing and mastering tools – Built-in EQs, compressors, and effects are useful, especially for beginners without extra plug-ins.
Check DAW compatibility and licensing
Make sure to double-check system compatibility before buying. Some DAWs are Mac-only (e.g. Logic Pro X), while others are cross-platform. Also, pay attention to licensing:
- Most paid DAWs offer a one-time purchase or subscription model.
- Some, like Ableton Live, offer tiered versions (Intro, Standard, Suite) based on the number of features you need.
- Free DAWs like Cakewalk (Windows) or GarageBand (Mac) are great starting points for those on tight budgets.
If you plan to record in other rooms, work with collaborators, or switch between devices, look for a DAW that supports session sharing, cloud sync, or stem exports for easy transfer.
How to get the most out of your DAW
Take time to learn your DAW thoroughly. Many producers get better results from a mid-tier DAW they know inside out than from expensive software they barely understand. Mastering your DAW’s features helps you work faster and achieve more polished, high quality recordings.
There are tons of online tutorials, communities, and official resources to support you – and many DAWs include demo sessions to help you get started.
Ensure quality monitoring & mixing
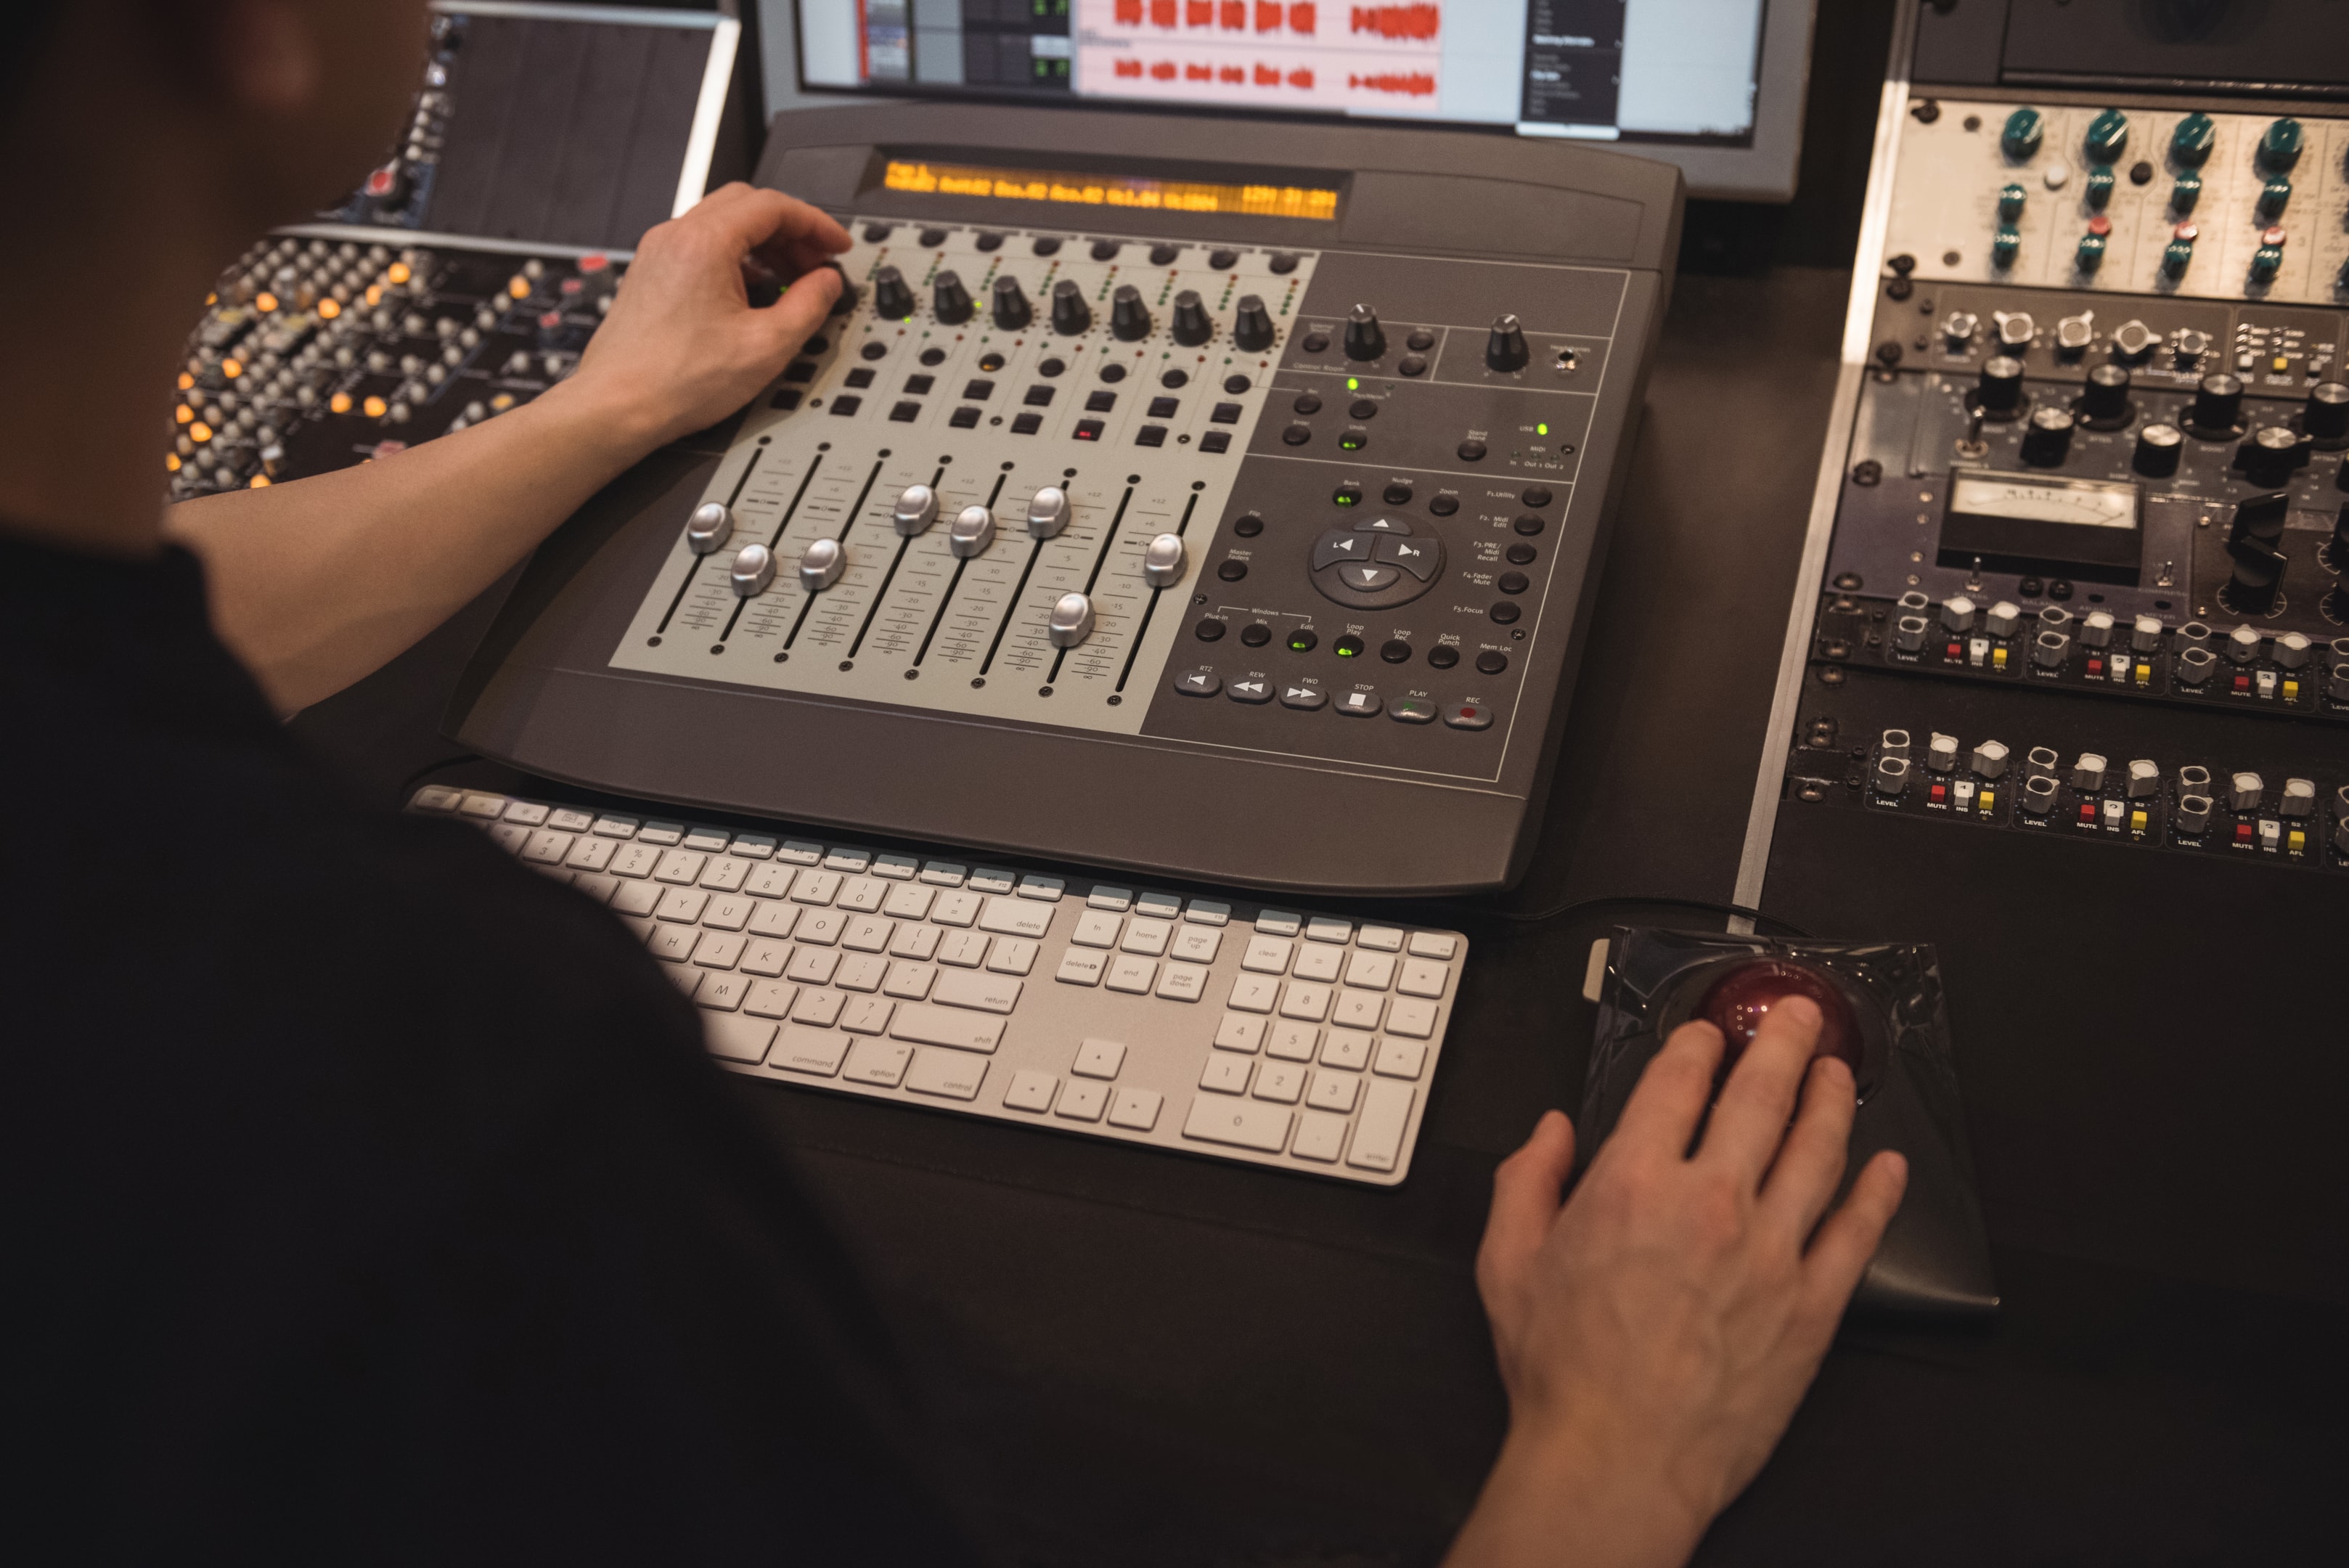
Studio monitors and headphones
Accurate monitoring is essential in any home studio setup. Without it, you're mixing and editing with a distorted picture of your sound, which leads to poor decisions that won’t translate well to other playback systems (like cars, phones, or professional recording studios).
That’s where studio monitors and headphones come in – giving you the accurate sound reproduction you need to make confident creative and technical choices.
While consumer-grade speakers or headphones boost certain frequencies to sound “better,” studio-grade gear is designed to provide a flat frequency response – meaning what you hear is what you’ve actually recorded.
What monitors should I choose?
Studio monitors (also known as reference monitors) are nearfield speakers designed for close-up listening in an acoustically controlled space. They’re essential for mixing and mastering, where precise tonal balance and imaging are key.
Key things to consider:
Size and wattage – Monitors typically range from 3" to 8" in woofer size. Smaller monitors are great for small rooms, while larger monitors deliver more accurate bass frequencies but need better room treatment.
Nearfield design – Most home studios use nearfield monitors, which are designed to be placed close to the listener to reduce the impact of room acoustics.
Active vs passive – Most modern monitors are active (self-powered), meaning they don’t require a separate amplifier.
Frequency response – Look for monitors with a flat and wide frequency range (e.g. 50Hz–20kHz or wider) for a more detailed sound picture.
How to place your monitors
Proper positioning is essential. Your monitors should form an equilateral triangle with your head at the centre, and the tweeters should be at ear height. Keep them away from walls and corners, and place acoustic panels behind them to control early reflections. Even a pair of bookshelves or foam can help if you’re starting on a budget.
Popular studio monitors:
Yamaha HS5 / HS8 – Industry standard monitors known for clinical accuracy and a flat response. Excellent for critical listening.
KRK Rokit 5 G4 – More forgiving and slightly bass-enhanced, making them popular among electronic producers and beatmakers. The G4s feature onboard room correction via an LCD screen.
Adam Audio T5V / T7V – Known for their ribbon tweeters and wide stereo image. Excellent detail in high frequencies for their price.
PreSonus Eris E5 – Affordable monitors with solid performance and room-tuning controls, great for beginners.
What headphone should I choose?
Studio headphones are indispensable in a home studio, particularly when recording in other rooms, working late at night, or monitoring in untreated spaces. They offer isolation and detail, and are especially useful during recording vocals or for referencing your mix.
There are two main types:
Closed-back headphones
Best for recording, these prevent sound from leaking into your mic and provide good isolation from background noise. However, they can exaggerate bass and may feel slightly “closed-in” for mixing purposes.
- Best options:
- Audio-Technica ATH-M50x – Balanced sound with strong isolation; widely used in studios and by touring artists.
- Beyerdynamic DT 770 Pro – Highly comfortable, with tight low-end and detailed highs. Available in multiple impedance levels.
Open-back headphones
Ideal for mixing and mastering, these offer a more natural and spacious sound. They allow air and sound to pass through the earcups, which reduces pressure build-up and creates a more realistic listening environment. Not suitable for recording vocals due to bleed.
- Best options:
- Sennheiser HD600 / HD650 – Renowned for natural sound and clarity; favourites among audio professionals for mixing.
- Beyerdynamic DT 990 Pro – Airy, detailed highs and wide stereo field. Great value for open-back headphones.
Headphone amps and impedance
If your headphones have high impedance (e.g. 250 ohms), they may require a headphone amplifier or a great interface with a powerful headphone output. This ensures you get enough volume and clarity. Check your audio interface specs before buying high-impedance headphones.
Should you use monitors or headphones?
Both have their place. Use studio monitors for a natural sense of space, panning, and depth, especially after treating your room. Use open-back headphones for critical listening, detail work, or when room treatment is not ideal. Closed-back headphones are a must when tracking or recording.
For best results, check your mixes on multiple systems – monitors, headphones, phone speakers, even your car stereo – to ensure your track sounds good everywhere.
Monitoring accessories
- Monitor isolation pads – Reduce vibrations and resonance from your desk, improving bass clarity.
- Monitor stands – Help position your monitors at ear level and improve stereo imaging.
- Headphone hangers or holders – Keep your workspace tidy and your gear safe.
Investing in studio monitors and headphones tailored to your space and workflow can massively elevate your home studio. Don't get swayed by marketing – the best gear is the one you can trust and learn inside out.
With proper placement, room treatment, and an ear trained over time, your monitoring setup becomes your most valuable creative tool – more so than expensive gear you barely use.
Acoustic treatment
Acoustic treatment is one of the most overlooked – yet most crucial – parts of building a home studio. Even with expensive gear, your recordings and mixes will suffer if your room isn’t acoustically controlled. Unwanted reflections, bass build-up, and flutter echoes can distort your perception of sound, making it harder to mix accurately and produce high-quality recordings.
The goal of acoustic treatment isn’t to make your room sound completely dead, but to achieve a balanced and controlled listening environment – one that allows for clear, honest sound reproduction.
What causes bad room acoustics?
Most home studios are set up in small rooms with hard surfaces like drywall, windows, and wooden floors. These surfaces cause sound to reflect back and forth, creating problems such as:
Early reflections – Sounds that bounce off walls and reach your ears slightly after the direct signal, smearing the stereo image.
Standing waves – Low frequencies (bass) build up in certain spots, causing an uneven frequency response.
Flutter echo – Rapid, repetitive echoes between parallel walls.
Reverberation – Long decay times that muddy recordings and reduce clarity.
Without proper treatment, what you're hearing through your studio monitors or headphones may be vastly different from what your recordings actually sound like.
Key elements of acoustic treatment
- Absorption – Used to reduce reflections and control mid-to-high frequencies.
- Acoustic foam and acoustic panels absorb sound energy.
- Position these at first reflection points – to the sides, above, and behind your listening position.
- For recording vocals, use portable vocal booths, reflection filters, or place foam behind the mic.
- Bass traps – Low frequencies are harder to tame and tend to build up in corners.
- Use thick, dense material in the corners of the room (floor-to-ceiling is ideal).
- DIY options using rockwool or Owens Corning 703 insulation can save money while being very effective.
- Diffusion – Diffusers scatter sound energy rather than absorbing it, helping maintain a sense of space without harsh reflections.
- Use behind your listening position or on the rear wall to improve stereo imaging.
- Bookshelves and angled wooden panels can work as low-cost alternatives.
Budget-friendly treatment ideas
You don’t need a professional carpenter to get started. Some affordable and creative treatment methods include:
DIY acoustic panels – Build your own using mineral wool, wood frames, and fabric.
Household items – Thick curtains, rugs, duvets, and even sofas can act as basic absorbers.
Pillows and blankets – For temporary vocal booths or to cover reflective surfaces during recording.
Bookshelves – An effective diffuser when filled with books of varying sizes and depths.
According to Audient’s home studio guide, many musicians create effective room treatment for under £100 using DIY methods and a few household items.
How to treat different studio areas
Mixing position – The most critical area to treat. Focus on early reflection points, bass trapping in corners, and symmetry in monitor placement.
Vocal booth or vocal corner – Treat the walls behind and beside the vocalist. If a booth isn’t possible, use a portable shield or heavy blanket behind the mic.
Ceiling (“cloud” panels) – Don’t neglect vertical reflections. Ceiling-mounted panels help reduce flutter echo and vertical bounce.
Other rooms – If you're recording in different rooms, treat those spaces too – especially if you’re using them for tracking acoustic instruments or recording vocals.
Common mistakes to avoid
Confusing soundproofing with acoustic treatment – Soundproofing keeps noise out; acoustic treatment controls sound within the room.
Using only foam panels – Foam handles high frequencies but does little for bass frequencies. Always include bass traps.
Over-deadening – Too much absorption can make a room feel unnatural and fatiguing to work in. Balance with diffusion.
Ignoring room symmetry – Uneven placement can skew stereo imaging and frequency balance.
Room size and layout
The size and shape of your room will affect how much and what type of treatment you need. Rectangular rooms are easier to treat than square ones. Avoid placing your desk against a wall or in a corner. Ideally, your listening position should be about 38% of the way into the room from the front wall, facing the short side.
If you’re working in a small room, it’s especially important to treat bass build-up, as low-end problems are more pronounced in tight spaces.
Acoustic treatment doesn’t have to be expensive, but it does require planning. You can achieve significant improvements with DIY panels, some basic tools, and smart placement. It’s one of the best investments you can make – even more important than buying more gear – because it lets you hear your mix clearly and produce tracks that sound good everywhere.
Jump to our 7 bonus tips for improving room acoustics
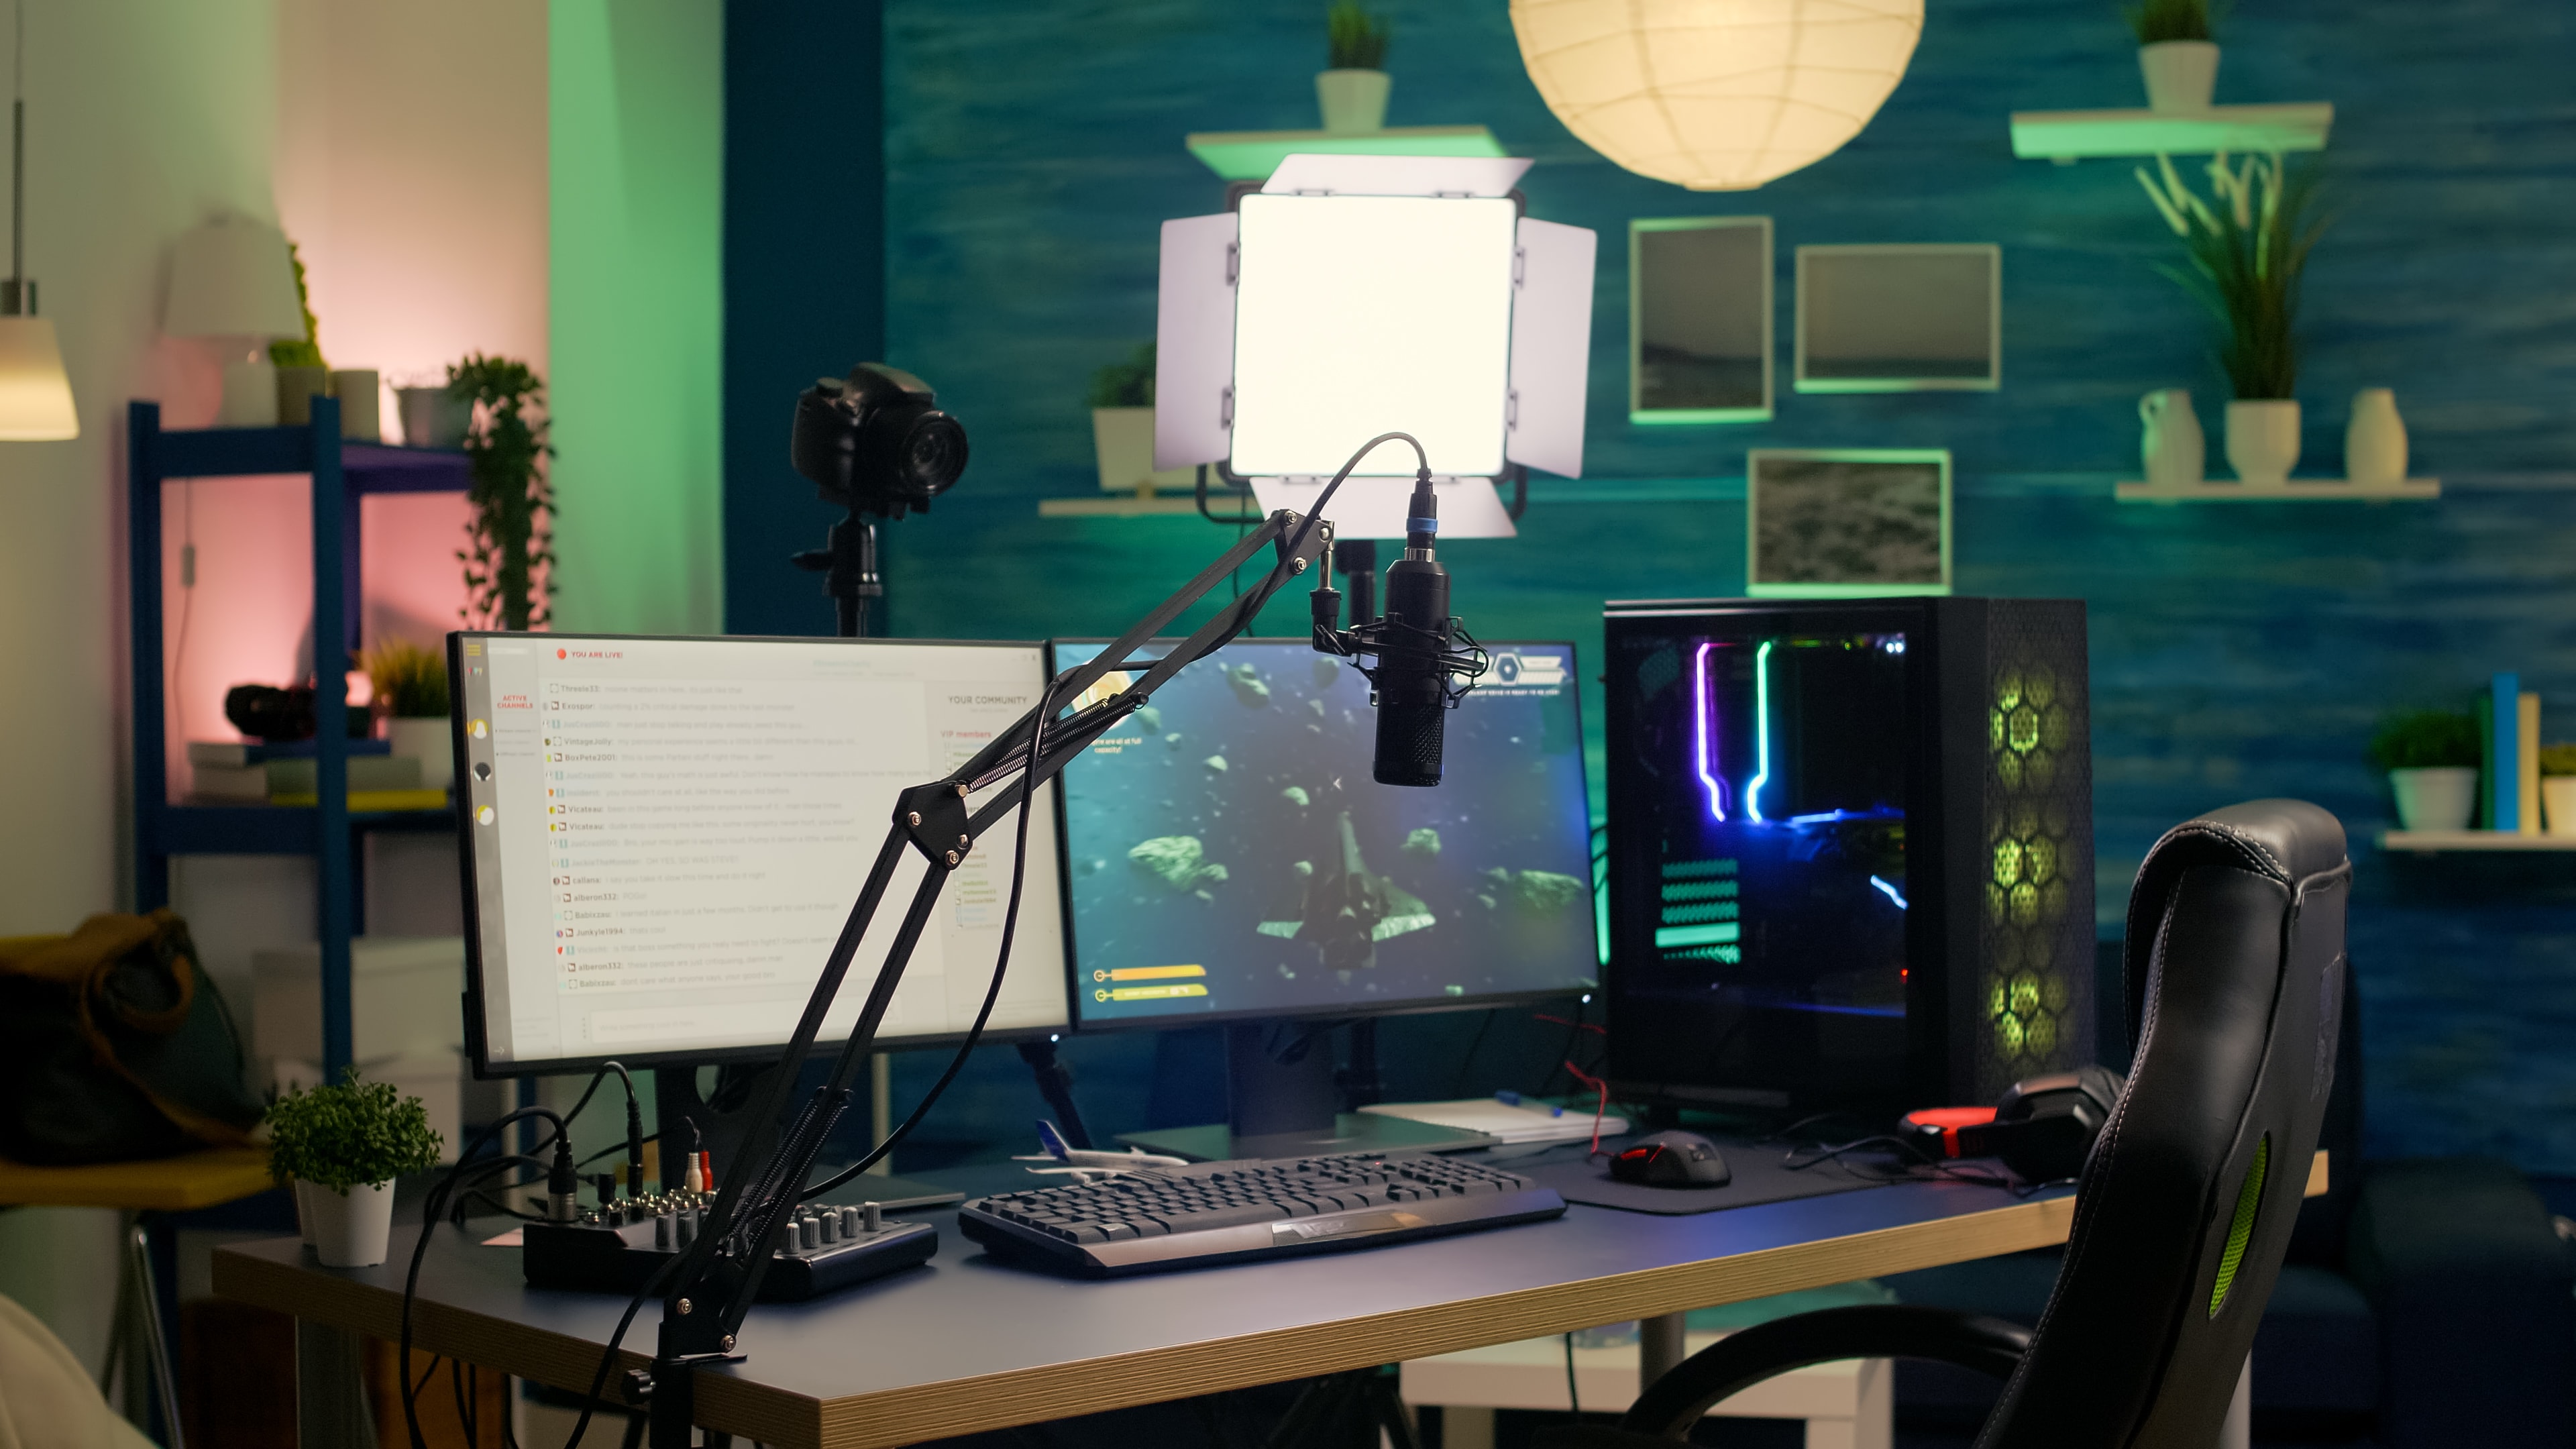
Making content? You'll need visual production equipment
If your home studio will be used for content creation, YouTube, livestreaming, online tutorials, or music videos, investing in the right video and camera gear is just as important as your recording equipment. High-quality visuals help establish your brand, engage your audience, and give your work a professional edge.Fortunately, with the right setup, you can capture studio-grade video from your own home without the need for a full-scale production crew – and you don’t need to spend a fortune to do it.
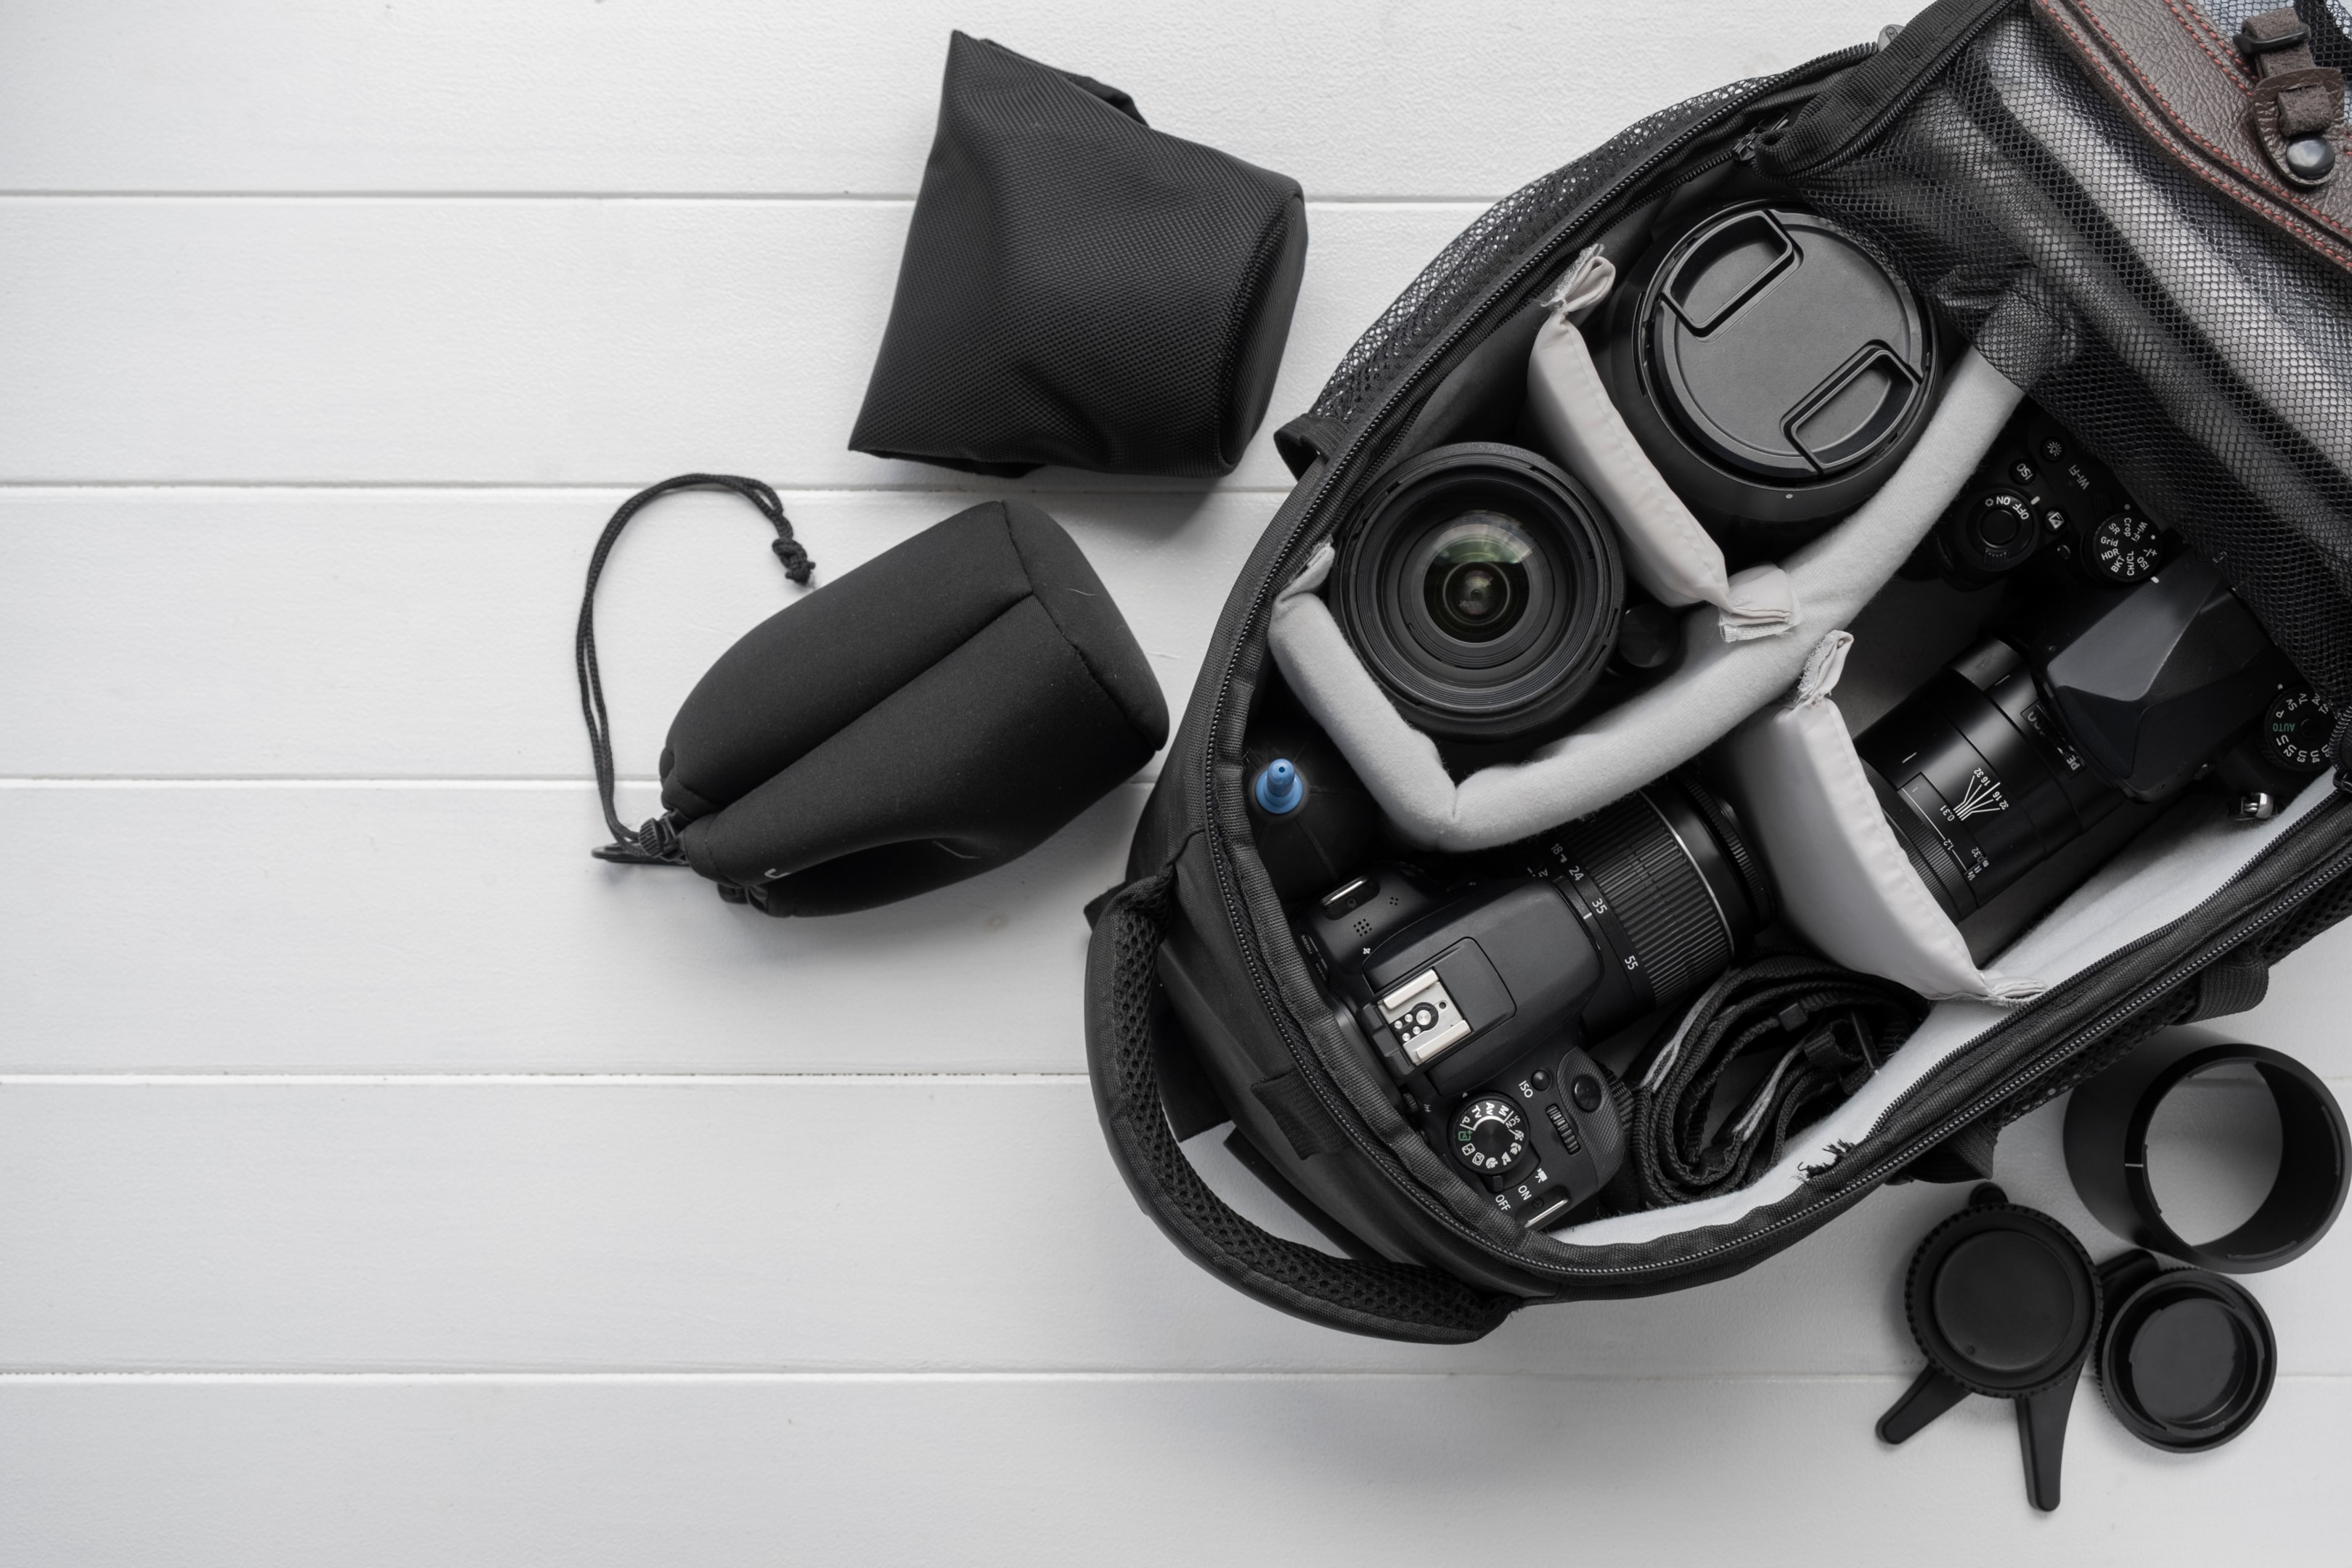
Start with the camera
Watch Primal Video's guide to top available cameras for recording Youtube videos
The camera is the core of your video setup. Depending on your goals and budget, there are a few excellent options:
Entry-level / beginner content creators
Smartphones – Modern smartphones like the iPhone or Google Pixel can shoot in 4K and have solid autofocus and colour accuracy. With good lighting, you can achieve surprisingly professional results.
Best use – Talking head videos, performance clips, behind-the-scenes content.
Mid-range hybrid users (music + video)
Canon EOS M50 Mark II – A mirrorless camera with flip-out screen, clean HDMI output, and excellent autofocus. Ideal for solo creators recording both video and stills.
Sony ZV-E10 – Tailored for video creators with high-quality 4K video, a directional mic, and real-time tracking autofocus.
Professional-grade home studios
Sony A7 IV or Panasonic Lumix GH6 – Full-frame or micro four-thirds cameras that deliver exceptional detail, low-light performance, and internal stabilisation. Best suited for polished, high-production content.
When choosing a camera, make sure it supports clean HDMI output if you plan to livestream or use it with a capture card. Also, check for manual exposure control, autofocus performance, and audio input options.
Lenses – Just as important as the camera
Your choice of lens has a major impact on the look and feel of your video. Most creators working in small rooms or home studios benefit from a wide-angle or standard prime lens.
Sigma 16mm f/1.4 – Excellent for APSC cameras (like the Canon M50 or Sony ZV-E10). Great for talking head shots with a beautiful background blur.
Sony 35mm f/1.8 – Compact and versatile, with a shallow depth of field ideal for creative studio shots.
Kit lenses (e.g. 15–45mm or 18–55mm) are fine to start, but upgrading will give you sharper visuals and better low-light performance.
Choose a focal length that works well for your space. If you're in a small room, avoid long telephoto lenses that force you far from the camera. Wider lenses (16–35mm range) let you frame shots effectively in tight spaces.
Audio for video
Even great video falls flat with poor audio. If you're not recording directly into your DAW, use an external microphone that connects to your camera or a separate recorder.
Options:
Rode VideoMic NTG – A premium on-camera shotgun mic that offers clarity, directionality, and USB-C versatility.
Deity V-Mic D4 Duo – Dual-capsule mic that captures front and rear audio – perfect for vlog-style content.
Wireless lavalier systems like the Rode Wireless GO II or DJI Mic – Ideal for mobile creators or tutorial-style videos.
For best results, record audio in your DAW using a proper mic (e.g. condenser microphone) and line input, then sync it to your video in post-production. This gives you full control over levels, EQ, and clarity.
Capture cards and live streaming
If you're streaming or using a DSLR/mirrorless camera as a webcam, you'll need a capture card to convert HDMI output into a USB signal.
Elgato Cam Link 4K – A compact, plug-and-play capture card widely used by streamers and content creators.
Blackmagic Design ATEM Mini – Ideal for multi-camera setups with real-time switching and audio mixing capabilities.
Capture cards allow you to integrate professional camera footage into livestreams, Zoom calls, or screen recording software with minimal delay and high resolution.
Tripods, mounts, and camera accessories
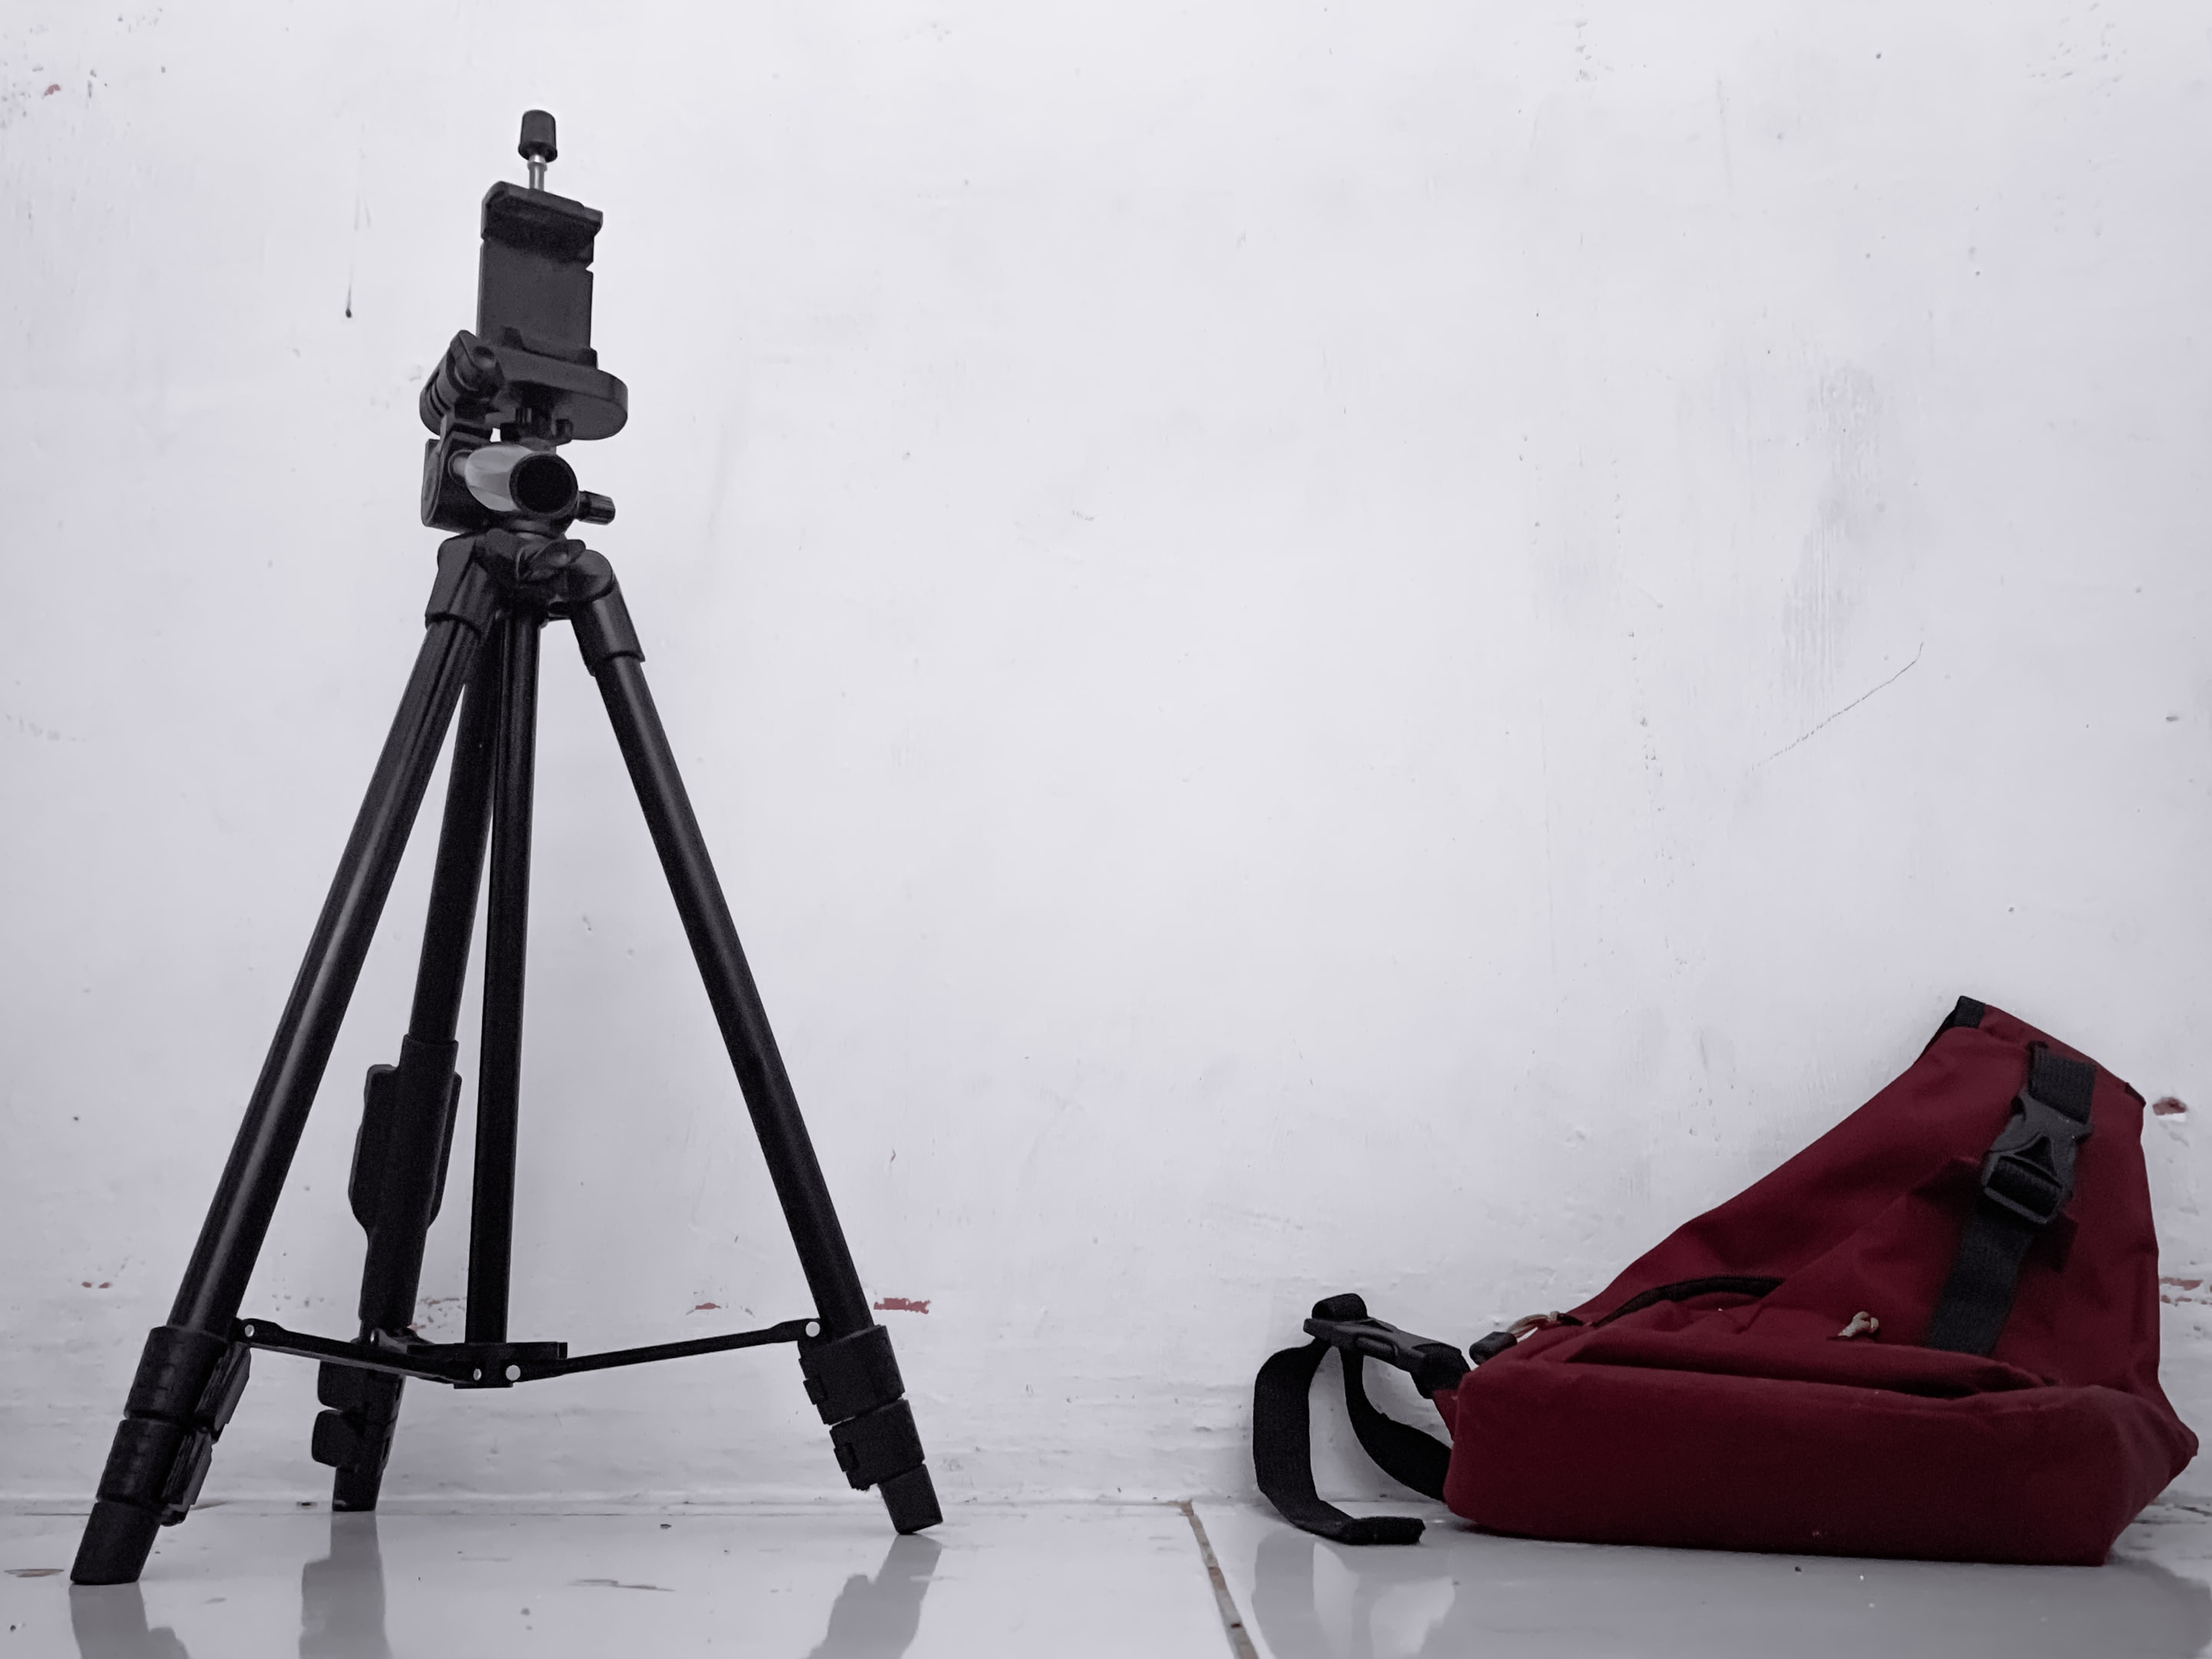
A solid support system is vital for a stable, professional-looking video:
Tripod with fluid head – For steady pan and tilt shots. Choose one with adjustable height and quick release.
Tabletop tripods or boom arms – Perfect for small studios or tight spaces.
Ball head mounts and quick plates – Allow for flexible camera positioning.
ND filters – If you're shooting with fast lenses in bright conditions, ND filters help control exposure without affecting image quality.
Extra batteries and SD cards – Video eats up storage and power quickly. Keep spares on hand for uninterrupted sessions.
How to refine framing and camera angles
Create depth and visual interest by using foreground and background layers in your shot. Place objects like microphone stands, monitors, plants, or lighting elements in frame to add context and brand personality.
If you’re recording tutorials, make sure your workspace is visible and well-lit. For performance videos, try multiple angles – static wide shots combined with handheld close-ups can make even small room setups feel dynamic.
Get a great lighting setup
Good lighting is one of the most effective ways to instantly elevate the quality of your video content – even more so than upgrading your camera.In a home studio, thoughtful lighting not only makes your content look professional, but also enhances your set design, supports your brand, and keeps your videos consistent across sessions.Whether you're recording music videos, tutorials, livestreams, or talking-head content, understanding how to control and shape your lighting environment is essential.
Why lighting matters
Camera sensors – especially in smartphones or entry-level DSLRs – don’t perform well in low light. Poor lighting often leads to grainy footage, colour distortion, and a lack of visual depth. Consistent, well-balanced lighting ensures your footage looks clean, polished, and engaging – even in a small room.
In a studio setting, you want to create a flattering and well-lit subject (typically yourself), while also considering your background and the overall mood of the video.
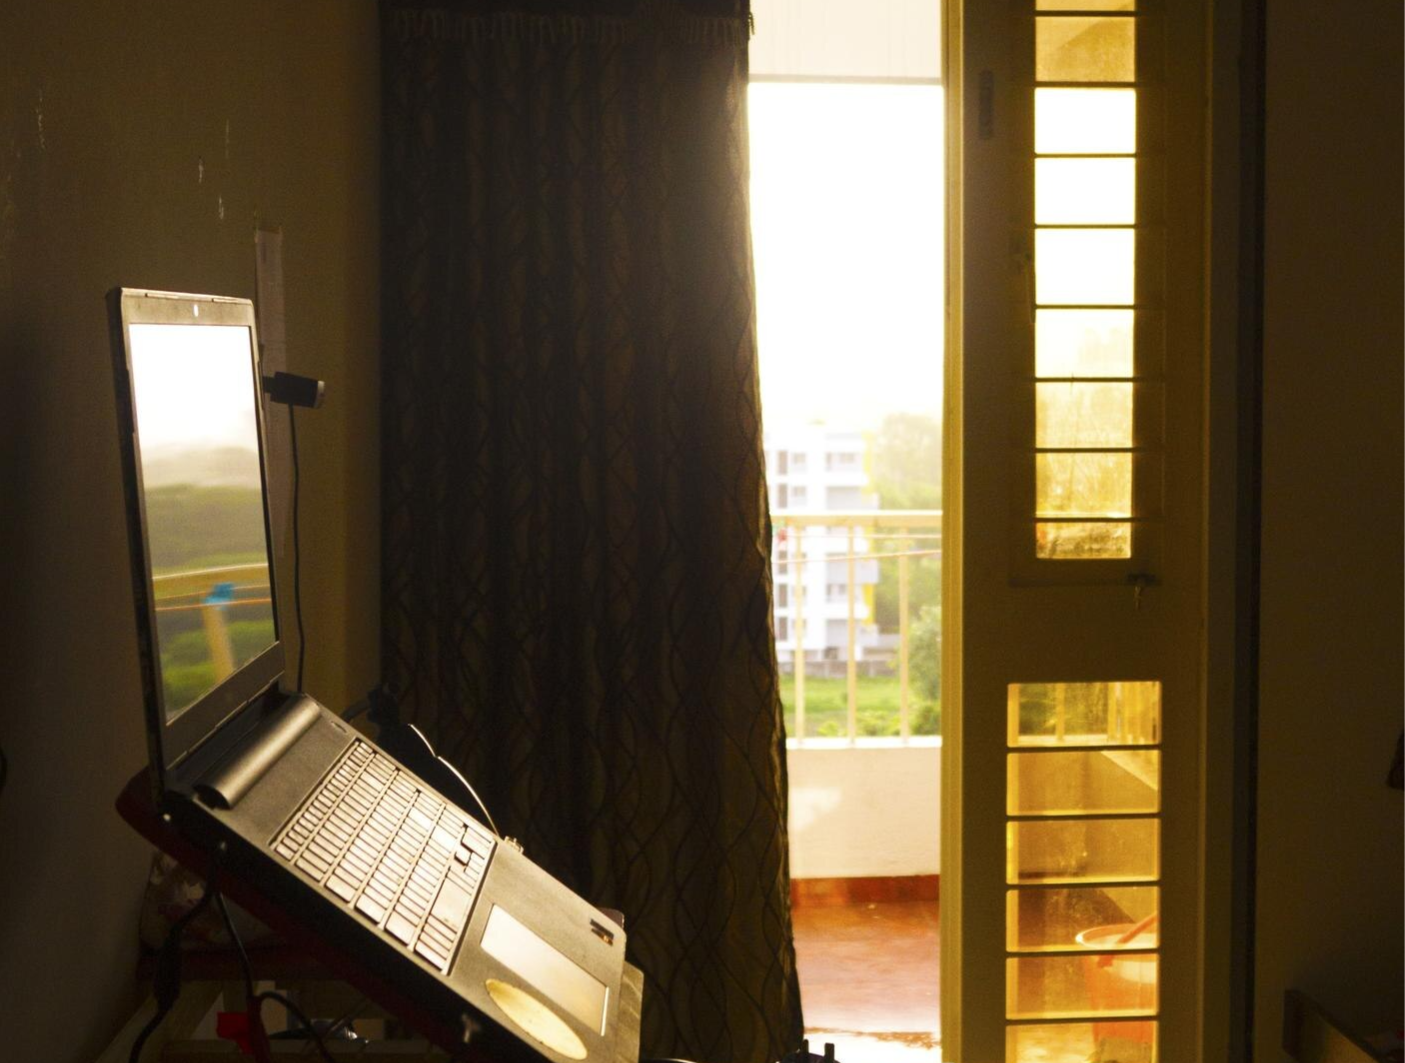
Natural light: Pros and cons
Natural light can look beautiful – soft, diffused, and free – but it’s unpredictable. If your home studio has windows, they can be an asset, but only with the right control.
Tips for using natural light:
Face toward the window – This gives even lighting on your face and reduces harsh shadows.
Avoid backlighting unless intentional – Light from behind causes silhouetting and exposure problems.
Use blackout curtains or blinds – These help you maintain consistent lighting when filming at different times of day.
Add artificial fill light to balance shadows, especially on cloudy days or during golden hour.
Artificial lighting – The real studio essential
If you want full control and reliable consistency, artificial lighting is the way to go. It allows you to match your visual style across videos, no matter the time of day or room.
There are three main types of artificial lighting setups commonly used in home studios:
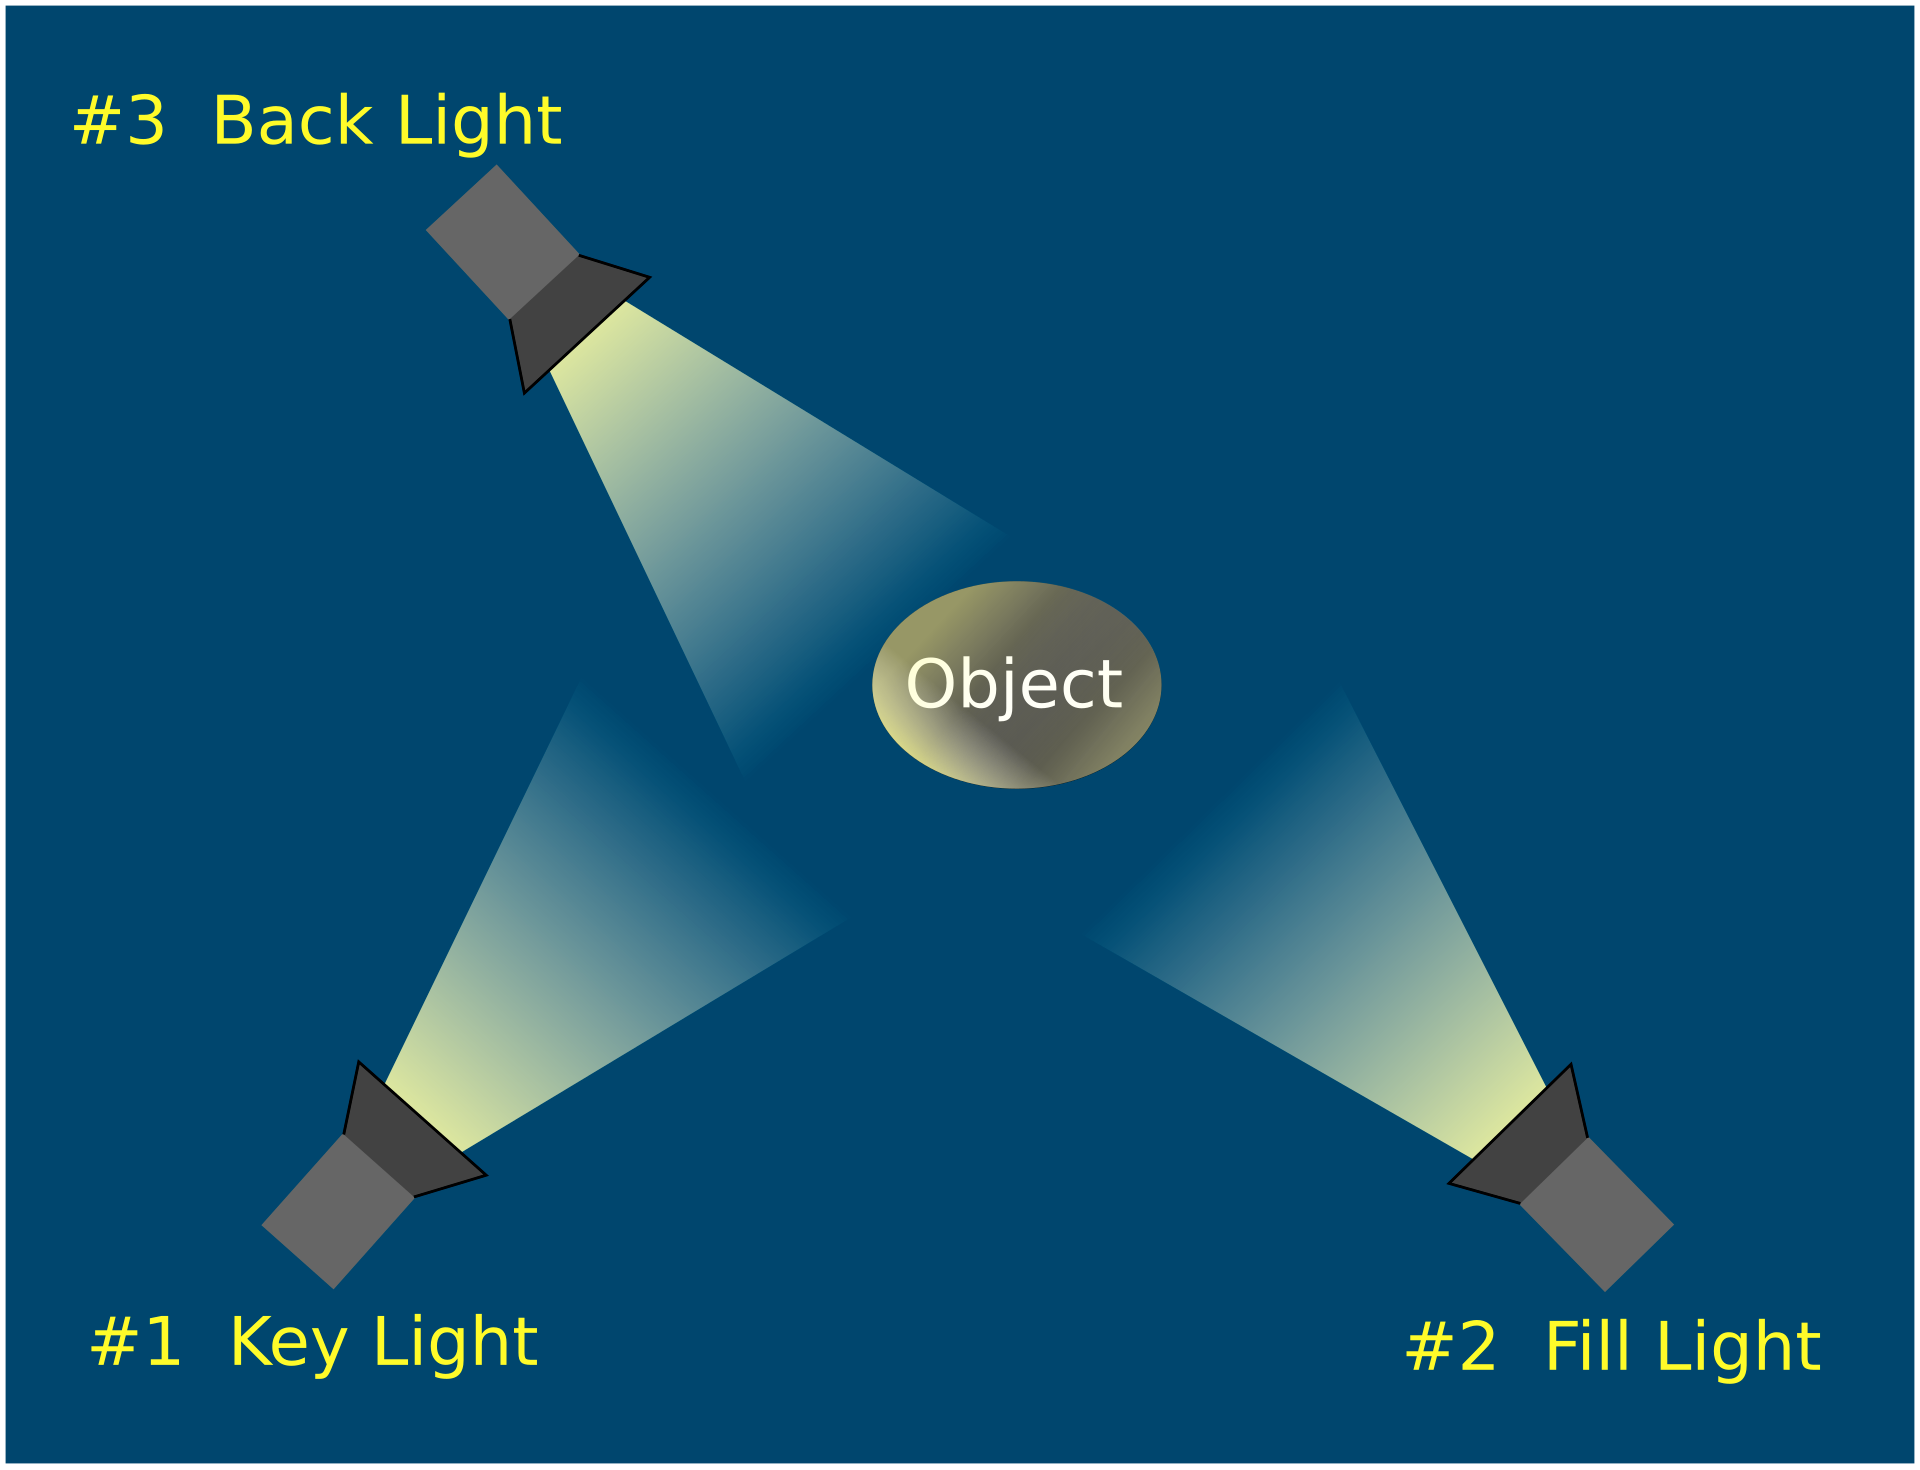
Key light
The most important light in your setup, the key light illuminates your face and should be the brightest source.
Best budget option – Neewer 660 LED Panel – Affordable, adjustable brightness and colour temperature. Great for beginners.
Mid-range option – Elgato Key Light – Optimised for desktop use, fully adjustable via app, ideal for livestreamers and creators.
Professional option – Aputure Amaran 100d/200d – Powerful, high-CRI LEDs with softboxes for beautiful, directional lighting.
Position the key light at a 45-degree angle to your face for a natural look. Use a softbox or diffuser to reduce harsh shadows.
Fill light
Used to soften shadows created by the key light. A fill light should be dimmer and positioned on the opposite side of the key.
- Can be another LED panel at lower intensity.
- A white reflector or foam board can work as a budget fill option.
- Even a desk lamp bounced off a wall can function as a makeshift fill.
Back light / hair light
This light is placed behind you and slightly above to separate you from the background, adding dimension and depth.
- Use small LED spotlights or even clamp lights with coloured gels.
- RGB lights (e.g. Govee or Nanlite PavoTube) can be used creatively for brand-themed background lighting.
Practical lights and ambience
Practical lights are visible in the scene – like a lamp, fairy lights, or a neon sign. These not only add depth and warmth but help build your set design and reinforce your brand or vibe.
- A desk lamp in the background can act as both a light source and decorative element.
- RGB bulbs let you change colour schemes for different moods or content types.
- LED strips can accent furniture, sound panels, or shelves.
Managing small spaces and mixed lighting
In small rooms, space is tight and lighting spill is common. To manage this:
- Use smaller lights with soft modifiers (e.g. umbrellas or softboxes).
- Angle your lights carefully to avoid glare on screens or walls.
- Stick to one colour temperature (either daylight ~5600K or tungsten ~3200K) across your setup to avoid weird skin tones or unnatural hues.
If you’re dealing with lighting from other rooms, block it out with curtains or blackout blinds, or adjust your artificial lights to overpower ambient spill.
Lighting for different content types
Recording vocals or music performances – Use warm, directional lighting for a moody, intimate vibe. Backlighting helps highlight your silhouette and add visual interest.
Talking-head videos – Aim for soft, even lighting that flatters skin tone. Use key, fill, and back lighting for a three-point setup.
Livestreaming or tutorials – Go for bright, clean lighting that mimics daylight. Consistency and visibility are more important than atmosphere here.
Check out Think Media's guide to three-point lighting
Lighting accessories worth having
Light stands – Ensure safe, adjustable placement of your lights.
Diffusers and softboxes – Soften harsh light and eliminate shadows.
Coloured gels or RGB LEDs – Create stylised looks or brand-themed colour accents.
Remote/app control – Many lights now support wireless control via mobile or desktop apps for easy brightness and colour adjustments.
Lighting doesn’t have to be expensive or complex to be effective. Even a few carefully chosen lights, placed and diffused well, can completely transform the look of your video content. As your setup grows, your lighting strategy should evolve with it – allowing you to take full control of your visual output and create consistent, high-quality results from your own home studio.
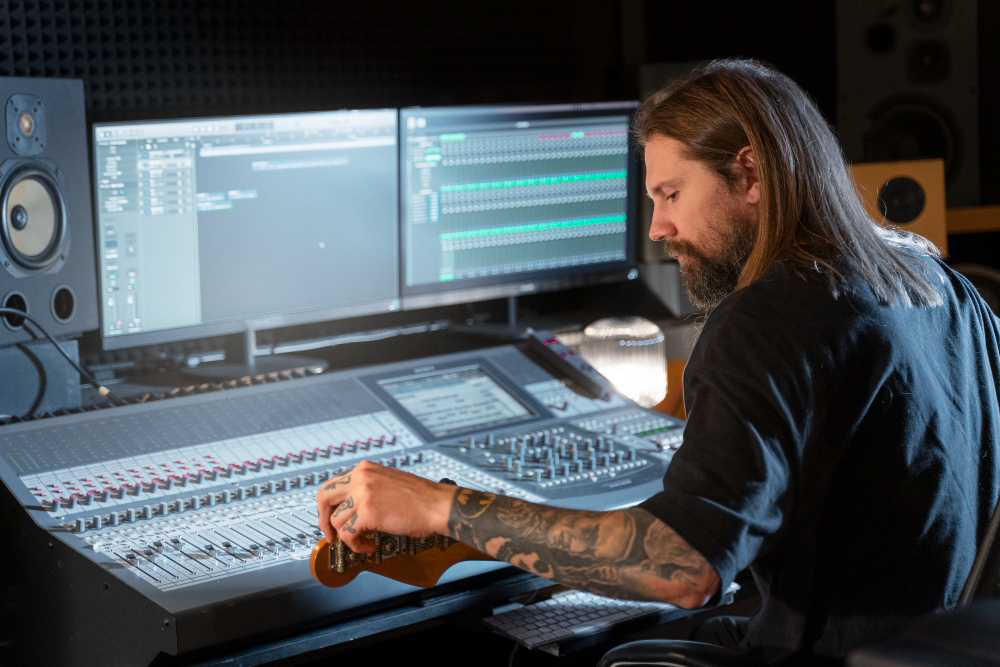
Last but not least, organise your workspace
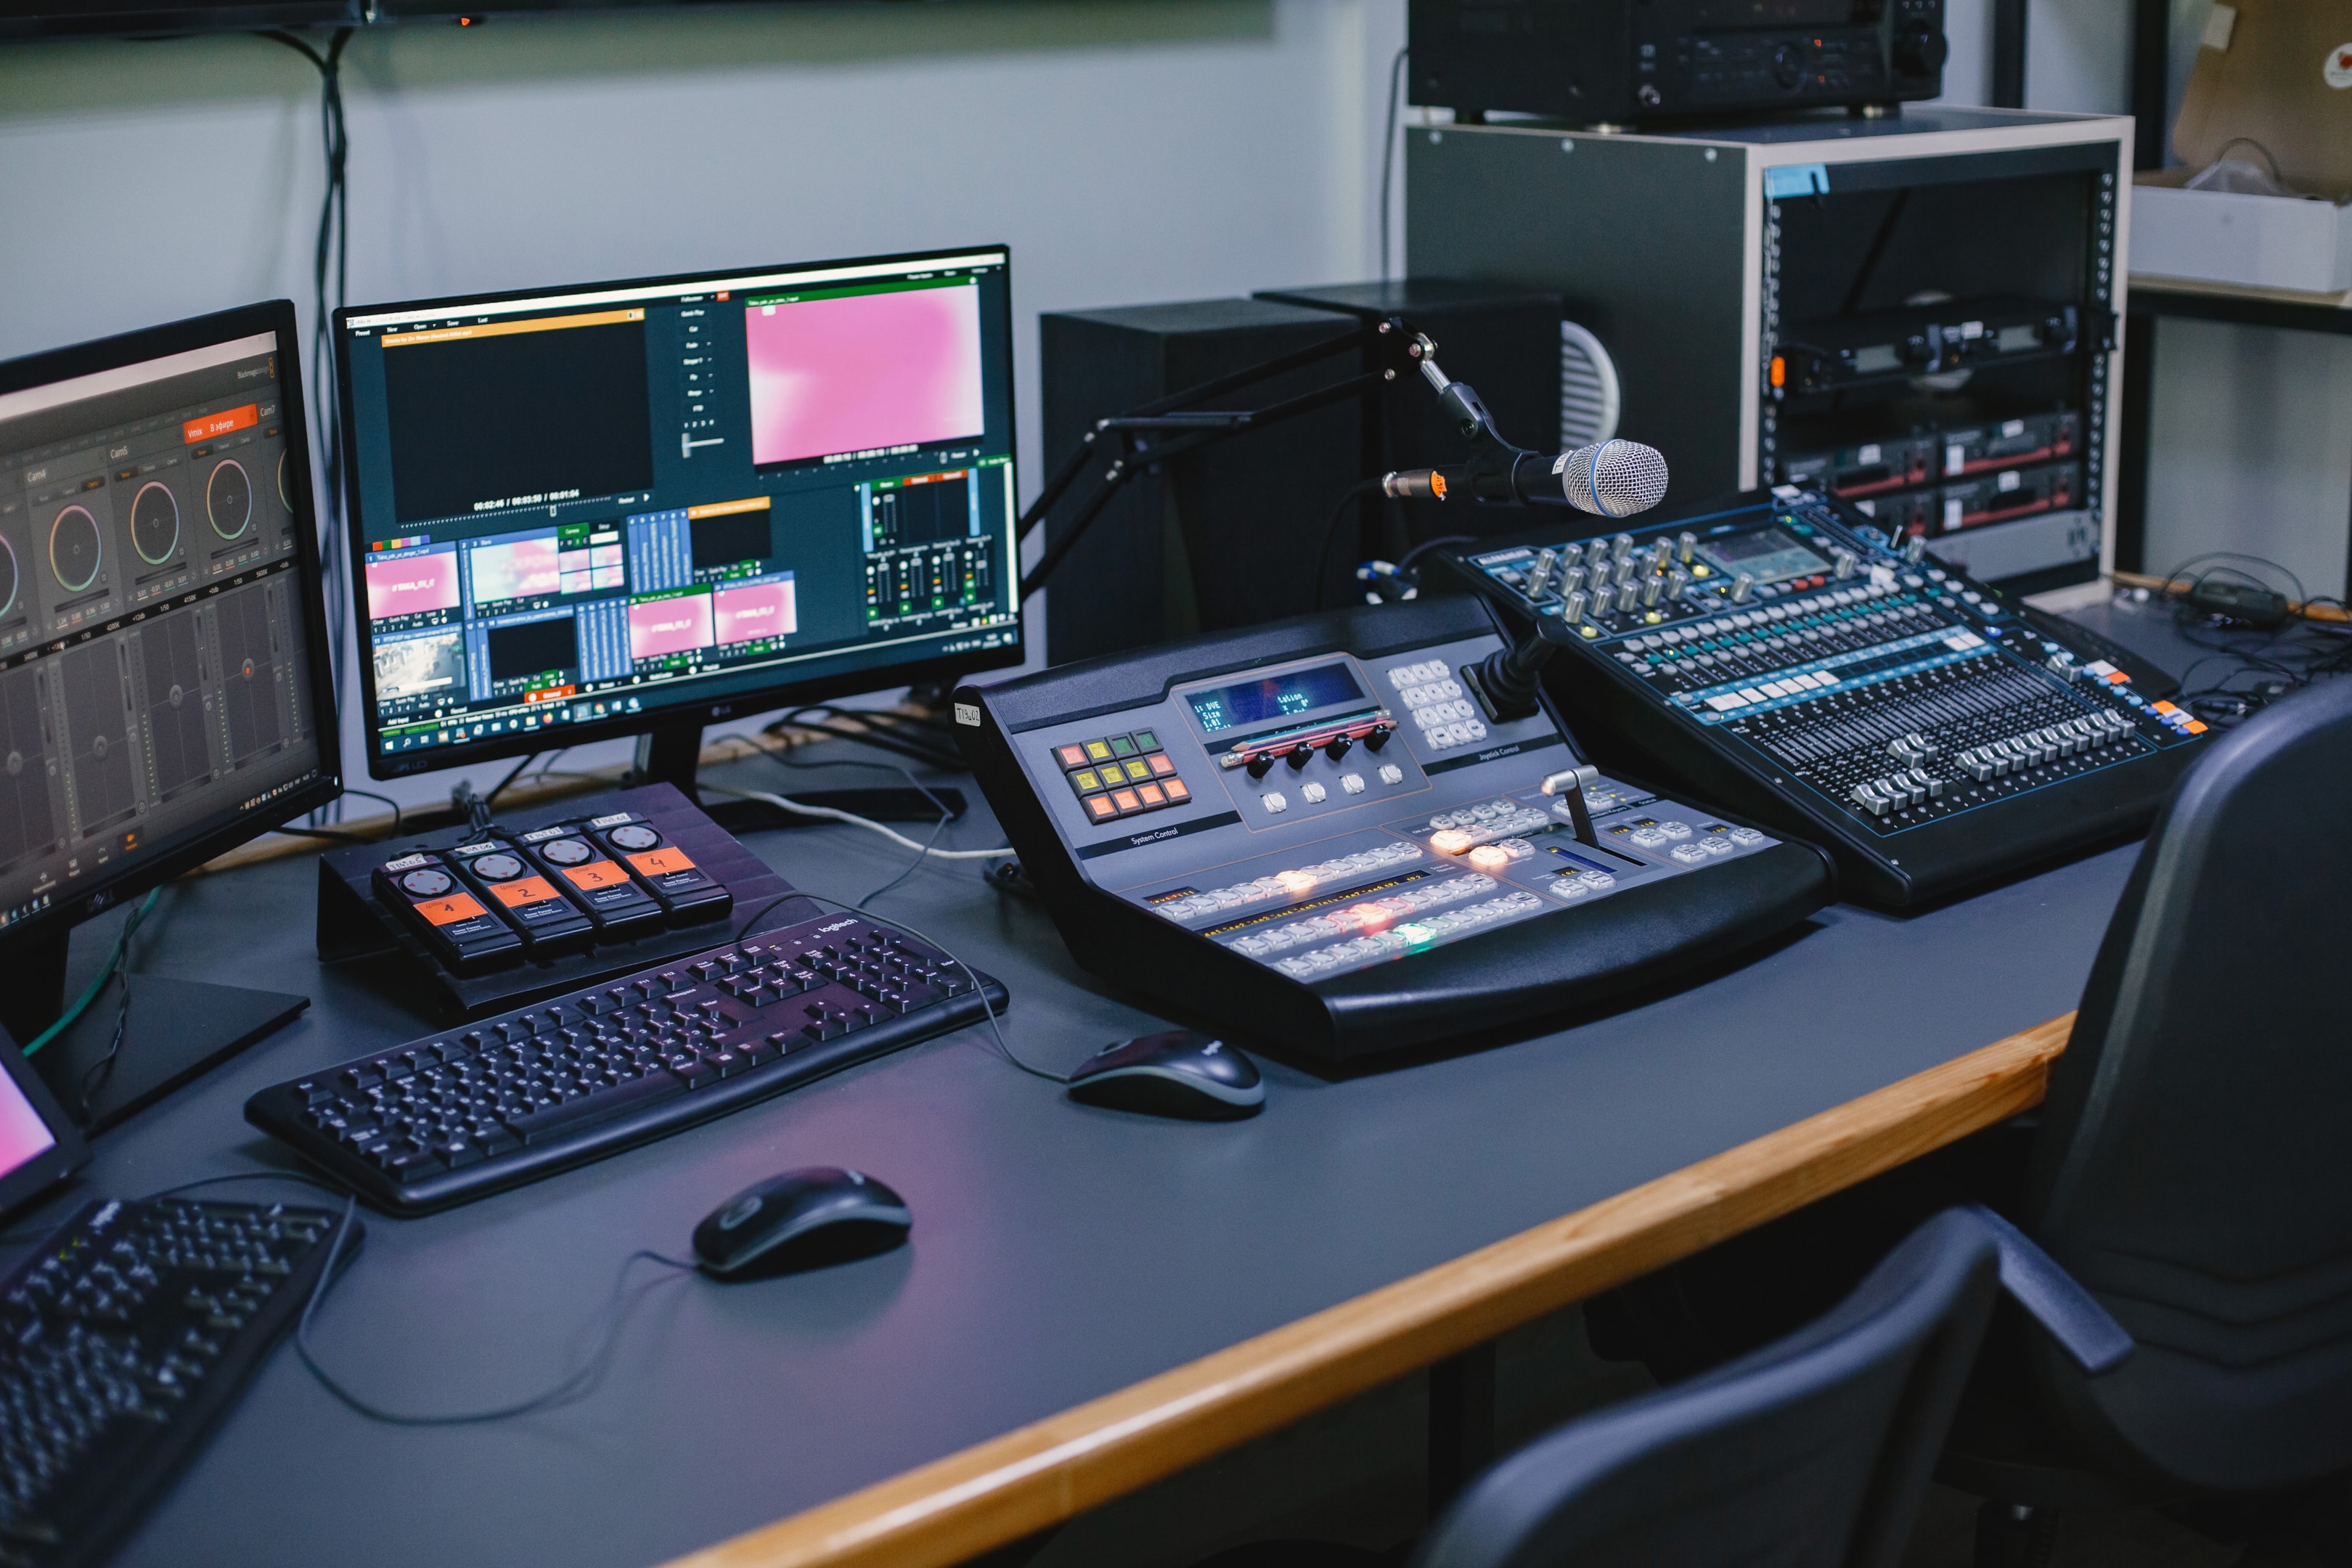
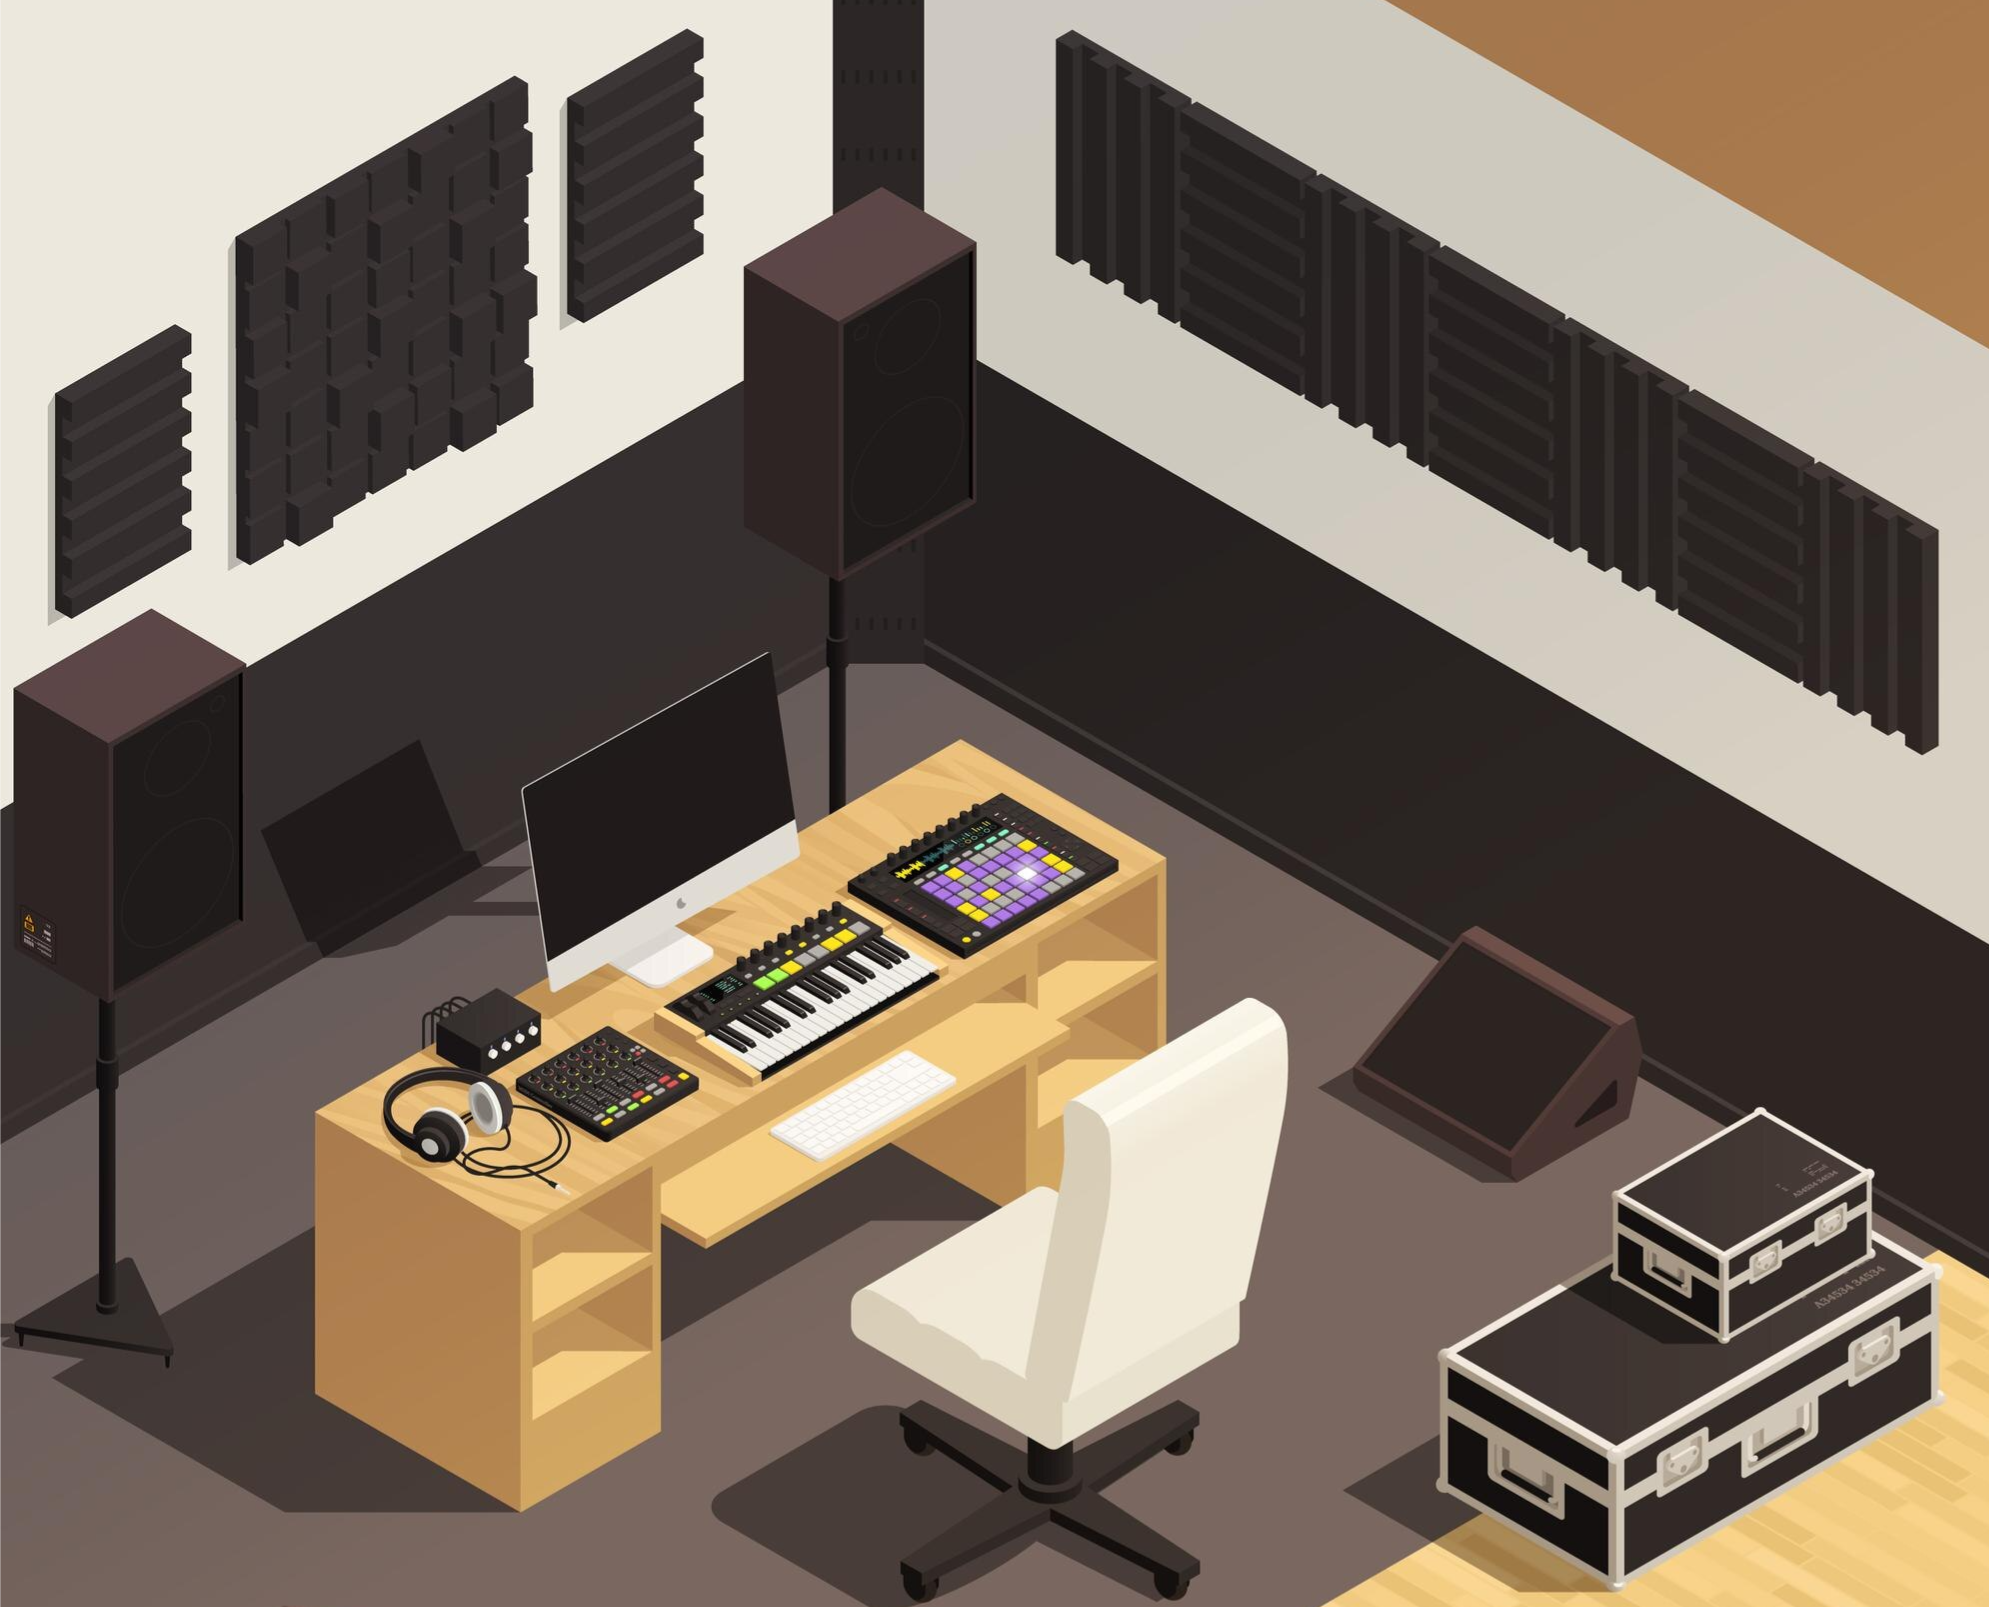
Workspace and desk setup
Your workspace and desk setup is the physical core of your home studio – the place where creativity meets function. A well-planned layout not only improves your workflow but also enhances comfort, efficiency, and even sound quality.Whether you're working with a few hundred dollars or investing in a long-term build, taking the time to design a bright, ergonomic studio space will pay off every time you sit down to create.
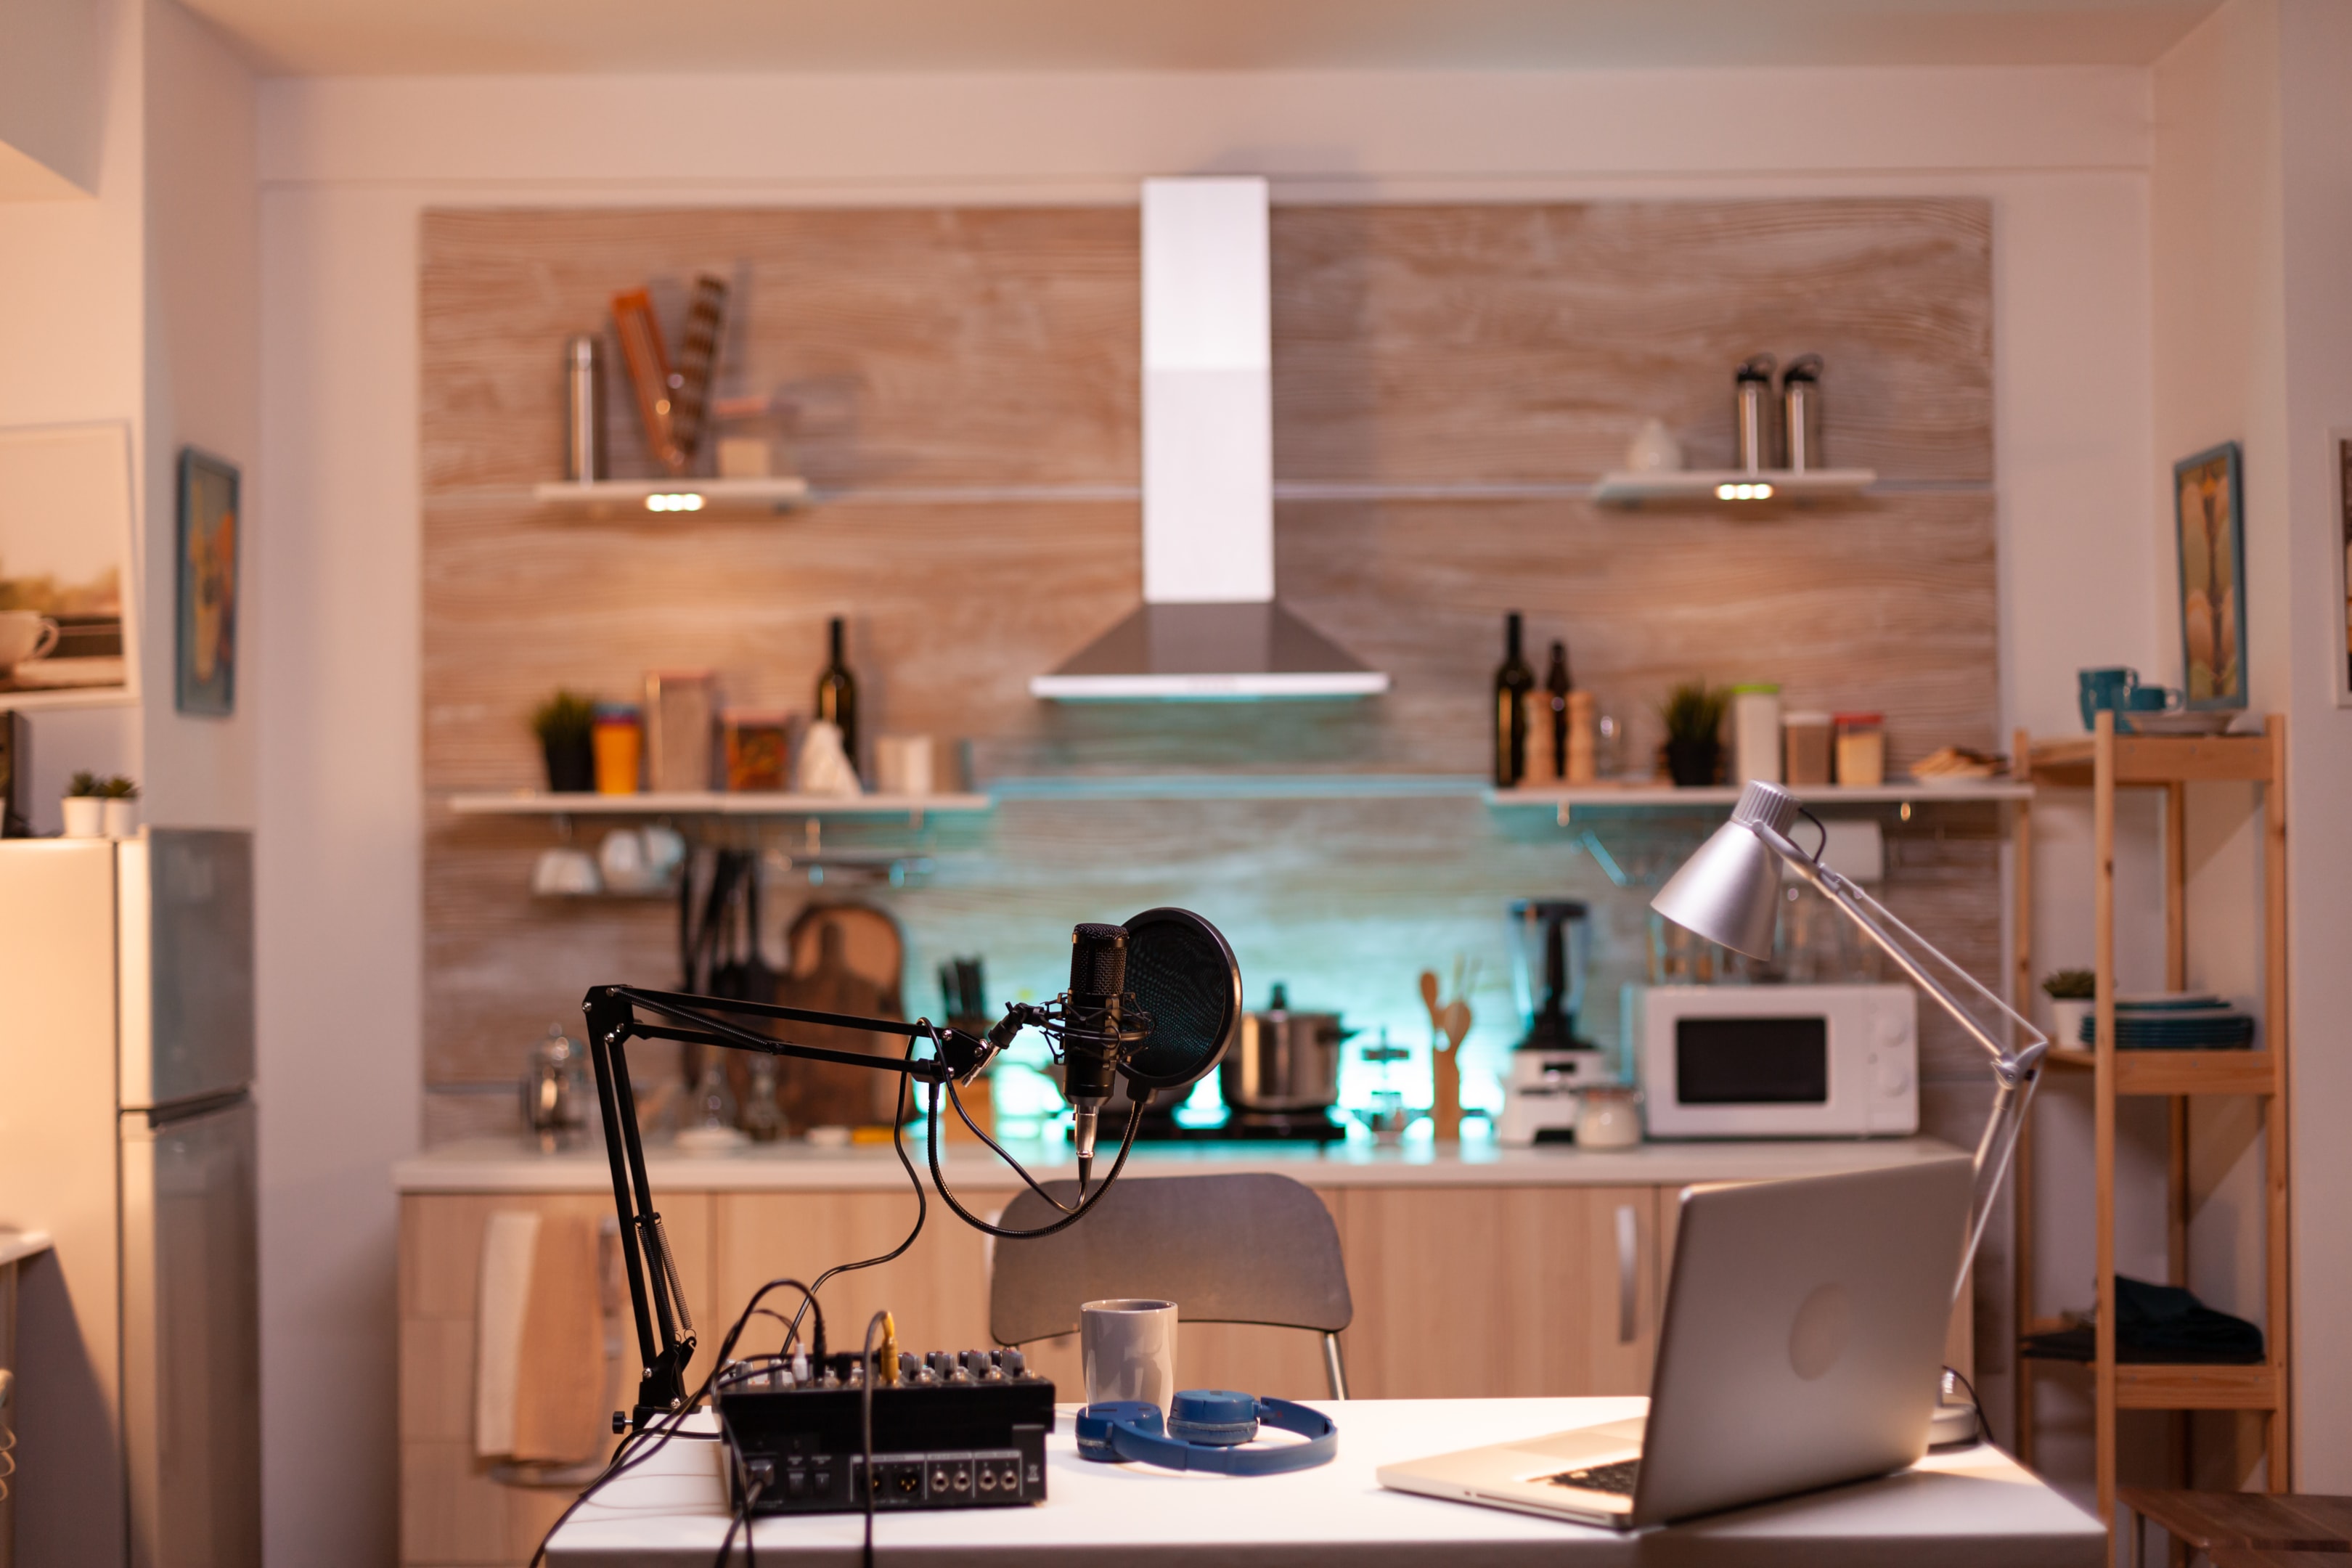
Designate your workspace
Begin by clearly defining a dedicated area in your home studio for your main workstation. This is where your audio interface, studio monitors, computer, digital audio workstation (DAW) controller, and other daily-use gear will live.
Even in a small room, efficient layout and minimal clutter can help create a professional atmosphere that keeps you focused.
If you're building a multi-use space, such as a bedroom-studio hybrid or shared living area, consider using dividers, furniture placement, or rugs to separate your creative zone from the rest of the room.
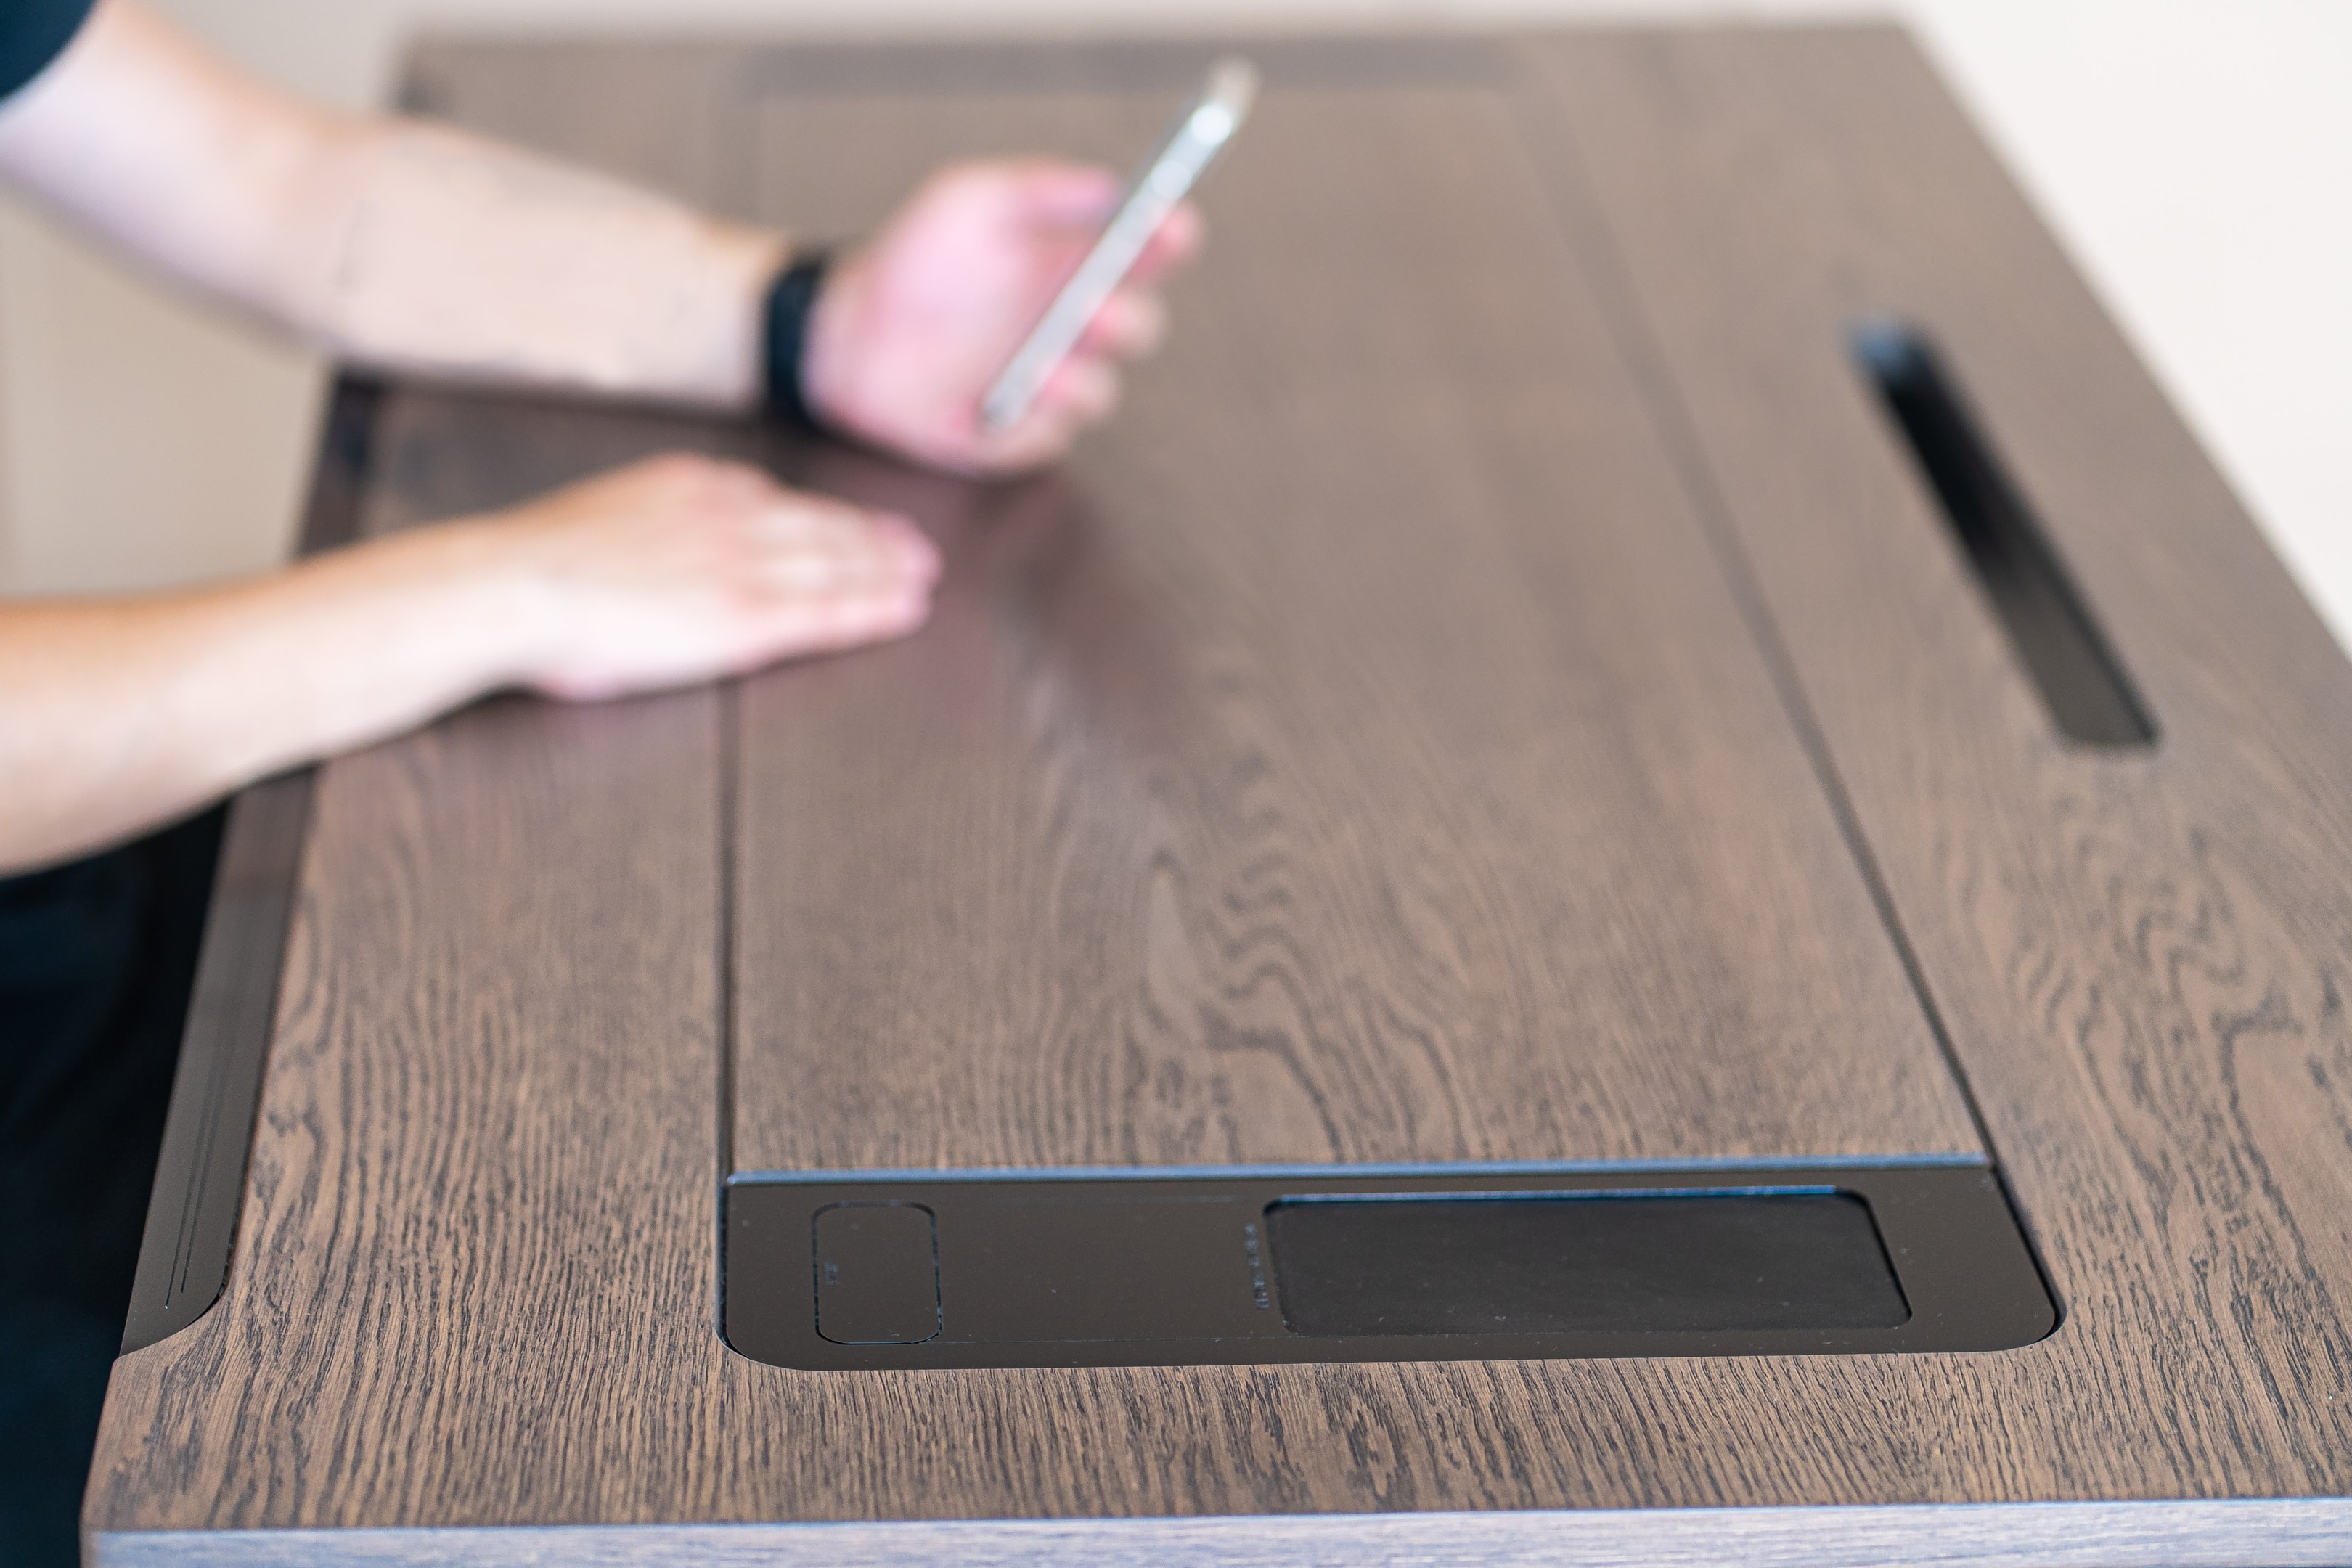
Keep your cables tidy and out of the way with clips, trunking, or under-desk mounts – not just for aesthetics but to avoid distractions and accidents.
How to pick a good desk
A proper studio desk isn’t just a surface to hold gear – it’s a foundation for your setup. There are a few routes you can take:
Studio-specific desks – Purpose-built options like the Output Platform, Zaor Miza series, or Glorious Workbench offer rack space, monitor shelves, and cable management solutions. They’re ideal for those wanting an all-in-one unit with room to expand.
Adapted office desks – A wide, sturdy office desk can work just as well with the right accessories (monitor stands, keyboard trays, etc.). Choose one that’s deep enough to fit your equipment without cramping your studio monitors or typing area.
DIY and custom builds – A local carpenter can help you design a desk tailored to your gear and space. This is a cost-effective option for oddly shaped rooms or unique setups.
Your desk should be stable, with enough space for your gear, and leave room for mixing and mastering comfortably without constantly shifting things around.
Set and studio design
Studio monitors – Position your monitors so the tweeters are at ear height, forming an equilateral triangle with your listening position. Use isolation pads or stands to decouple them from the desk and reduce unwanted resonance.
Computer monitor(s) – Place your screen directly in front of you to avoid neck strain. If you use two monitors, keep them aligned to reduce visual distraction and eye fatigue.
Keyboard and mouse – Maintain proper posture. Your elbows should be at a 90-degree angle, and your wrists should remain neutral. Consider a sliding tray if space is tight.
If you’re using a MIDI controller, DAW control surface, or mixing console, position them within easy reach. This setup enables a fluid workflow where you can create music, adjust parameters, and record vocals without constantly shifting position.
Ergonomics and comfort
Studio work often means long sessions. An ergonomic chair is as important as any piece of recording equipment. Choose a chair with lumbar support, adjustable height, and a stable base. If you stand while performing or producing, consider an adjustable desk or a high stool for seated breaks.
Lighting is another key factor. Use soft, diffused lighting to avoid glare on your screen. Add a practical light (such as a small desk lamp or LED strip) to create a pleasant and inspiring environment – especially if your studio doubles as a video or content creation space.
Personalisation and workflow
Your workspace should reflect your working style and creativity. Add small touches like:
A second monitor – For plugin management or video editing.
Dedicated space for your headphones – Use hooks or stands to protect your gear and reduce clutter.
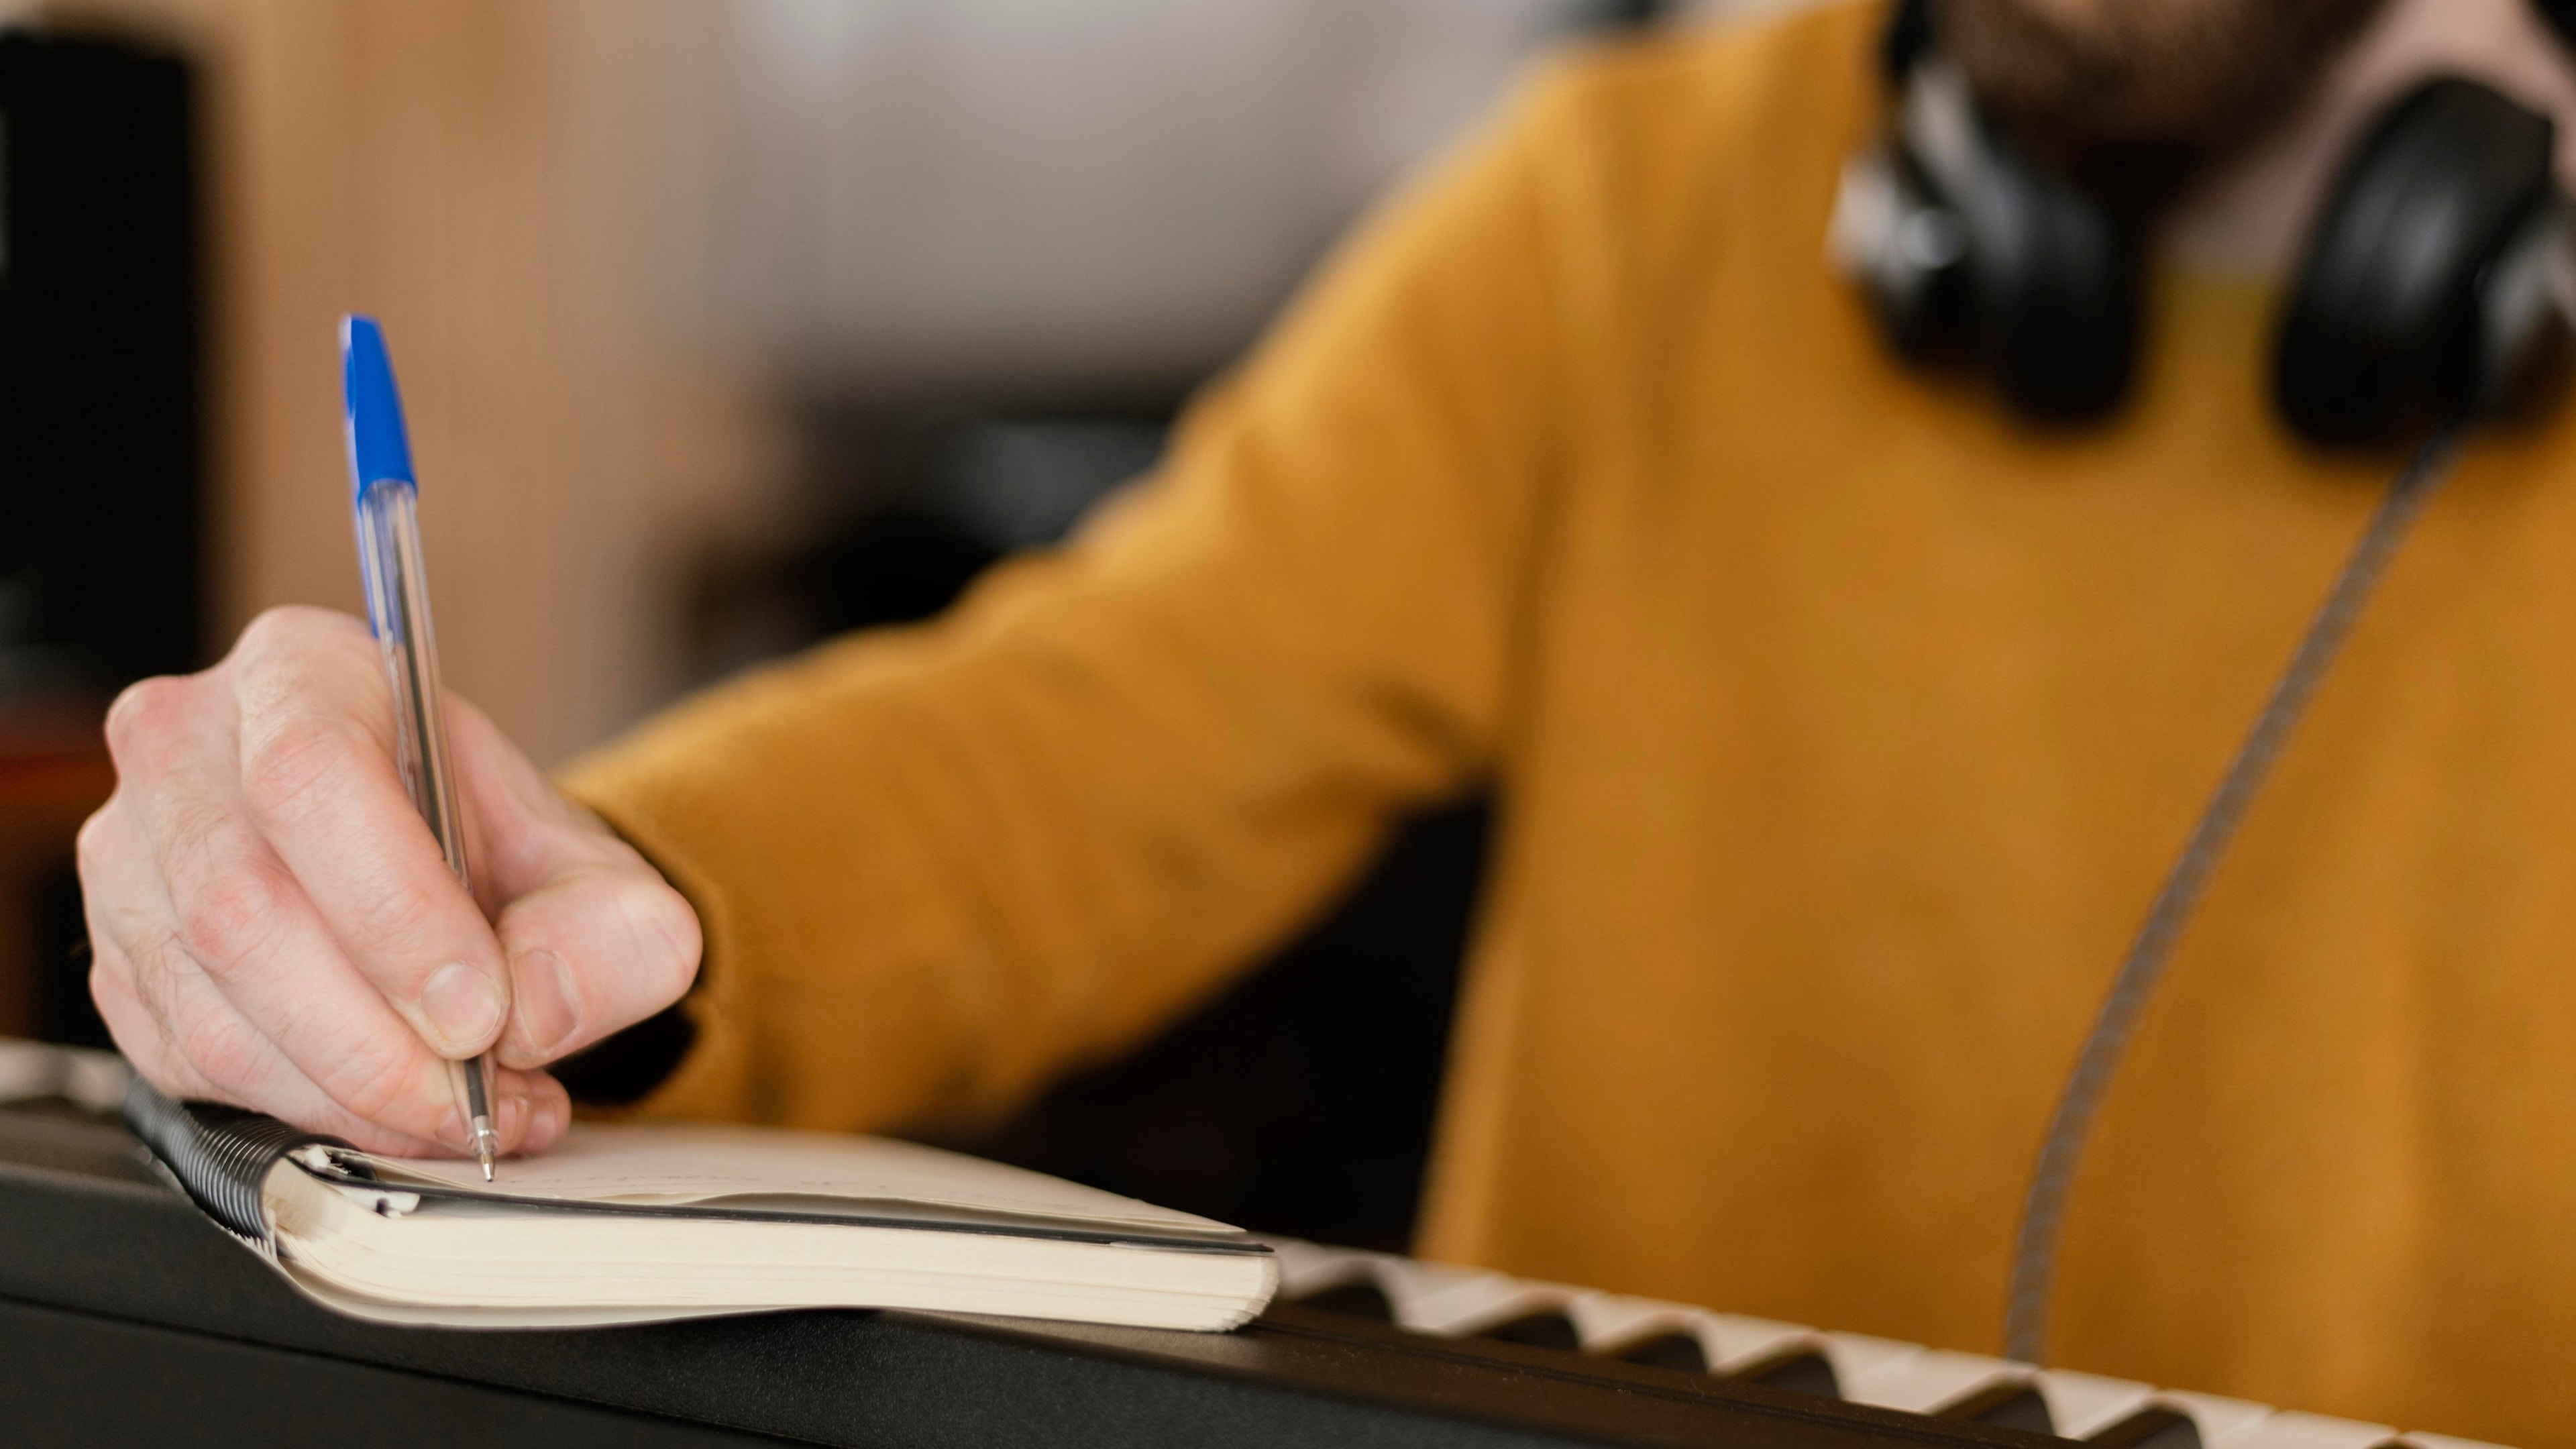
Reference materials – Keep lyric notebooks, MIDI charts, or mixing templates nearby.
Inspiration triggers – Art, lighting, or a plant can add comfort and spark creativity.
Keep your most-used tools within arm’s reach. You shouldn’t have to move around the room to change your line input, adjust your audio interface, or reach your microphone stands. The more streamlined your space is, the more productive your sessions will be.
Modular and expandable setups
As your home studio evolves, your workspace should adapt. Look for desks with rack space if you plan to add outboard gear. Consider movable carts for electric guitar amps, mic lockers, or vocal booth accessories that can be tucked away when not in use.
For those working in other rooms, using portable and modular gear (e.g. a laptop setup with a small controller and headphones) allows for flexible creativity without compromising your main workspace.
Your workspace and desk setup isn’t just about convenience – it’s about creating an environment that encourages deep focus, creative flow, and professional results. With good planning, even a small corner of your own home can become a powerhouse of audio production and music industry potential.
7 Bonus tips for improving room acoustics
Improving room acoustics is about shaping how sound behaves, not just adding absorption. A well-tuned room strikes a balance between absorption, diffusion, and symmetry.
1. Positioning matters
Your listening position should be:
- Around 38% into the room from the front wall (not halfway).
- Centred between side walls, facing the short wall of a rectangular room.
- Away from corners and parallel walls when possible.
Position studio monitors at ear height, forming an equilateral triangle with your head. Avoid placing them directly against walls, and decouple them with monitor isolation pads.
2. Symmetry and balance
Keep your setup symmetrical left to right. Uneven wall distances can skew stereo imaging and make mixes sound lopsided. The same goes for placement of acoustic panels – symmetry helps ensure a consistent and reliable listening field.
3. Control early reflections
Treat the first reflection points – the spots where sound from your monitors first hits the walls, ceiling, and desk before reaching your ears. Use acoustic panels, foam tiles, or dense absorbers to catch these and clean up your monitoring environment.
4. Tame the low end
Bass frequencies are the hardest to control, especially in a small room. Use bass traps in all vertical corners and, if possible, horizontal ceiling-wall corners. Focus on trapping bass frequencies rather than absorbing mid or high frequencies alone.
DIY bass traps using rockwool or mineral wool (wrapped in breathable fabric) are highly effective and much more cost-efficient than relying on foam panels, which typically don’t absorb much below 500Hz.
5. Diffusion for natural ambience
To avoid over-deadening your room, add diffusers – these scatter sound energy to maintain a sense of air and space. Place diffusers on the back wall, ceiling, or high points on side walls.
Bookshelves with irregular spacing and varying book depths can act as budget-friendly diffusers, especially for home studios in small rooms.
6. How do I record in acoustically challenging rooms?
If you’re recording in other rooms – such as a living room or bedroom – you can still get professional results with portable treatment:
- Use foldable gobos, thick blankets, or portable acoustic panels around your vocal area.
- Record away from reflective surfaces (e.g. windows, tiled floors, or bare walls).
- Use a reflection filter behind the mic and thick material behind the vocalist.
- Create a DIY vocal booth using mattress toppers, pillows, or duvets to block unwanted room sound.
Air conditioners, fans, and computers can also contribute to unwanted ambient noise. Switch them off during takes, or use noise reduction techniques in post.
7. Measure and adjust your room acoustics
To optimise your room:
- Use room analysis software like Room EQ Wizard (REW) with a calibrated mic (e.g. UMIK-1) to test your frequency response.
- Identify problem frequencies and place acoustic treatment accordingly.
- Use EQ correction software like Sonarworks SoundID Reference to flatten monitor response based on your room profile (note: this complements treatment – it doesn’t replace it).
Understanding and adjusting your room acoustics is critical for creating an accurate, balanced listening and recording environment. With the right combination of speaker placement, symmetry, acoustic treatment, and listening awareness, even a modest home studio can deliver professional recording results.
Good acoustics ensure that what you hear is what you’ve actually recorded – and that your mixes will sound good everywhere: in the car, on headphones, on streaming platforms, or in a professional studio.
Phew...that's a wrap!
Creating the perfect home studio is about making smart choices. You don’t need expensive gear to get started – just the right equipment and thoughtful planning.
From picking the best DAW to managing room acoustics, each step plays a role in helping you produce professional recording results from your own home. With attention to detail and a focus on your creative goals, your home recording studio can rival a professional studio – for a fraction of the cost.
Experience world-class recording studios at TYX
TYX is an end-to-end studio complex. Our London recoring studios offer industry-grade production spaces, professional guidance, mastering services, and career support. Moreover, as part of the Tileyard Group, we can easily connect you with artists and industry professionals.
Get in touch now and let TYX Studios elevate your music to professional, release-ready tracks.
Frequently Asked Questions
TYX Studios provides world-class facilities and soundproof live rooms, ideal for tracking bands or using premium outboard gear. Their spaces are professionally tuned for perfect frequency response.
A basic home studio in the UK can cost as little as £300 to £700, covering essentials like an audio interface, microphone, headphones, and DAW software. A more advanced setup with monitors, acoustic treatment, and upgraded gear typically ranges from £1,000 to £3,000. For professional-grade studios with purpose-built rooms and high-end equipment (like TYX recording studios) costs can easily exceed £100,000. Some builds can be up to £500,000 or more depending on scale and design.
Start by choosing the quietest room possible and treating it for sound with panels, rugs, or DIY solutions. Add essential gear like an audio interface, microphone, and studio monitors. Set up a computer with your DAW software, arrange your desk ergonomically, and consider lighting if you're creating video content. With a clear plan, you can build a capable studio in nearly any room.
Yes, but it depends on your setup and how you use it. Some home studio owners earn income by recording clients, producing tracks, selling beats, or offering mixing and mastering services. Others monetise through content creation, YouTube, or teaching. Income varies widely and often comes down to skill, consistency, and good business sense.
TYX Studios is living proof that a well-run studio can thrive.
You need a computer with enough RAM (at least 8 GB) and fast storage (SSD), a digital audio workstation (DAW), an audio interface to connect your mic or instruments, a quality microphone (a large‑diaphragm condenser is ideal), studio headphones, XLR cables and a mic stand.
Studio monitors and acoustic treatment, even budget options or DIY panels, make a big difference once you begin mixing. Even big UK institutions recommend beginning with these basics and building up as you go
A room size of around 3m x 4m (roughly 10ft x 13ft) is a good minimum for most home studios. Rectangular rooms are preferable to square ones, as they reduce acoustic issues like standing waves. That said, smaller or larger rooms can work well with proper treatment and layout planning.
Look for a quiet, isolated rectangular space (preferably not square) away from street noise or household traffic. Avoid rooms with large windows, reflective surfaces or noisy AC units. Carpet, rugs or curtains help tame early reflections, while bass traps in corners are especially helpful in small rooms. Planning spatial layout before buying gear prevents wasted time and money later